Want to build a website like Udemy?
Then, you’re in the right place.
Massive Online Course marketplaces like Coursera, Udemy, Futurelearn, etc. help millions of people worldwide to learn new skills and achieve their personal and professional goals.
Udemy is one of the most popular eLearning platforms of its kind. With over 57 Million, 213000 courses, and 74,000+ instructors, the startup that was founded in 2010 has seen exceptional growth. (www.prosperityforamerica.org)
Clearly, it’s one of the most successful e-Learning websites ever created.

However, as someone has said, imitation is the sincerest form of flattery.
If you want to build a successful education website like Udemy, you can take a few leaves out of their book. Starting by adopting principles and implementing the features incorporated by their site.
That’s why in this step-by-step guide, we’re going to explore the process of creating a Udemy-like online education site from scratch.
We’ll look at why one should choose them as an example while creating their own e-Learning site, the site development process, and the cost involved in it.
There’s a lot to cover, so let’s dive straight into the details.
Why Udemy is the best Model for Your e-Learning Platform?
Even though, this eLearning giant might seem like it has a complex structure, the way Udemy works is pretty simple:
- SMEs, teachers, or trainers can easily register themselves as an instructor to create an online course.
- Instructors have access to all tools and resources to launch their online courses. which are then listed on the website. These courses can be free, paid, or subscription-based.
- When a learner buys a course, the revenue is shared between the website admin and the instructor.
- Instructors can manage the course material and communicate with students to resolve their doubts.
That’s the workflow of Udemy in a nutshell.
Apart from this, there are many features of Udemy that make it arguably the best e-Learning platform today. From an intuitive UI for students to instructor-friendly features, Udemy includes everything that its diverse users need.
Some of these features include:
- Uses modern e-learning principles
- Courses are accessible on all devices (i.e. website, mobile apps)
- Offers a smooth learning experience for students
- Toolkit to create multimedia-rich free and premium course content
- Instructor-friendly course management features like a comprehensive dashboard and a standard lecture uploader
- Multiple course payment options for ease
- Admin Panel and student profiles
- Courses available in different languages
- Reporting features, course completion certificates, rewards, and other gamification features to encourage the learners
- Course reviews and rating system to boost credibility and more…
With that premise, let’s now take a look at how you can set up your own Udemy-like education website, a.k.a an online course marketplace.
How to Set Up a website like Udemy?
We’ve divided the whole process of creating your site into 6 separate parts for ease of understanding.
Setting up a course marketplace is a huge endeavor. You have to invest a significant amount of time, effort, and money in order to establish, promote, and make your site successful.
Hence, having a step-by-step process, and a checklist of sorts can help you follow each part of the process for smooth and error-free development.
In a hurry? Grab the hot-to-trot 20-point checklist that outlines the steps and go through it whenever you get time.
Here’s how you can go about it:
#1. Pick a niche to build a basic website framework

If you aim to build a full-fledged online course marketplace from day #1, you’ll be overwhelmed and none of your plans will materialize.
Your first step should be to create the framework for your primary site. A version of your site with must-have features. For that, you must figure out a niche.
Once you know that, you can think more clearly about other design and development-related aspects of your site.
For example, decide whether you want to focus on one particular subject, say, music, and dive deep into it, or you want to launch industry-focused courses.
While choosing your niche, ask yourself questions like –
- Whom do I want to teach? What is my target audience?
- How many subject matter experts, or instructors, do I have, who can assist me in teaching?
- What are my deployment timelines? By when do I want to make this website up and running?
- How many courses do I have ready and how many do I have to build from scratch?
- What are my student enrollment targets?
- What should be my monetization strategy? (More on this in the next step)
- What is my budget?
…and so on, until you have a clear picture of what your course marketplace website should look like.
Further, to build a primary framework, you need to decide your tech stack, i.e. your software requirements.
There are three aspects of a website – backend, frontend, and database and server infrastructure.
The backend is the server component, from where you control how the platform works. This includes creating and managing courses, handling payments, instructors, emails, and all the other tools you have on your platform. Some of the common languages used for backend development are Ruby on Rails, PHP, Python, Java, and .Net.
The frontend is the face of your website, which is visible to your users, in this case – students, and is developed using coding languages such as Javascript, Angular JS, CSS3, Bootstrap, and HTML5.
Your database is where your website data is stored in the cloud and delivered to your users. This will depend on the platform you choose to build your website. If you opt for a cloud-based platform, they have their own databases and storage services. If you choose an open-source platform, you can choose open-source database management systems like MySQL.
(Pro Tip): You need not know/learn these languages yourself, you can discuss them with your website developer to know which one will fit your platform requirements. Choose a tech stack that will enable you to handle your platform on your own, once the basic framework is set up and ready.)
Now that you have your initial framework, let’s talk money.
#2. Decide your monetization plan
Monetization refers to how you plan to make money from your e-Learning site. There are several options to explore.

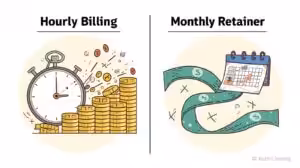
- Pay-Per-Course
The Pay-Per-Course model is pretty straightforward.
You can sell each course at a fixed price. Students have to pay a one-time upfront fee. Some websites also tweak this strategy a bit – they group similar courses together and sell them as a package.
Either way, this strategy works best when you’re selling various courses of different subjects. No surprise that this is the model adopted by Udemy.
- Monthly subscription
Instead of charging a one-time fee for each course, you can provide access to all of your courses in exchange for a monthly subscription fee.
As long as one maintains their membership on your site by paying the fee, they can access all course content present in the membership.
This strategy makes sense in the scenario when you’ve developed multiple courses belonging to the same subject that can turn someone from novice to expert.
In such a situation you can create various tiers of membership with different prices and courses depending on the level of knowledge one can gain from them.
- Advertising
Some eLearning sites also choose to charge no fee at all and offer their content for free. However, they monetize their content with ads.
The ads are included in all web pages and learning material, much like they’re included in videos and blogs.
You can mix-match this strategy with one of the above but be cautious – your ads should not spoil the learner experience. You can also use it if you want to offer your course content for free but want to recover the cost of running the site.
- Donations/External Investment Support
Did you know that the total funding raised by Udemy to May 2021 was $296.5m (Crunchbase)
You can also choose the option of donations or investments. Wikipedia is a good example of an informative site that is running on donations.
So it’s definitely possible for you to sustain your eLearning business using this model.
In fact, sometimes this model works better than monetizing your site with ads.
However, this method does make you dependent on your donors.
#4. Get a domain name and hosting
Once you have zeroed in on your niche, decided on your features, and monetization strategy, the next step is to get a domain name and a hosting solution for your site.

Keep the following things in mind while choosing them:
- Domain name
Choose a name that is memorable and brandable. It’s good practice if it aligns with the purpose/niche of your site.
it should be short (generally shorter than 9 characters), easy to remember, and type. And, stick to .com domains only.
The domains of other TLDs (i.e. .org, .net, .info, etc.) are available, but people generally fire them.COMs first in the browser URL after hearing about a brand.
It also helps your word-of-mouth marketing.
- Hosting
For hosting, keep in mind that e-Learning sites are different from other websites in terms of resource consumption.
The sessions of these sites last much longer than normal sessions. And depending on the size of your market you may have hundreds or even thousands of active sessions at any point in time.
Moreover, if your courses are going to include video content then each of the sessions will also be consuming a lot of bandwidth.
So you should get a dedicated hosting server for your e-Learning site instead of a shared hosting plan.
Look for a hosting provider that’s reliable, has an uptime close to 100% and offers spot-on customer service. Siteground, Hostinger, and Bluehost are among the popular ones.
Once you’ve chosen your domain name and hosting, it’s time to start building your Udemy-like elearning website. To do so, you must choose a Learning Management System (LMS) first.
#5. Choose a platform for setting up your website
An LMS is a software that is used to create & upload your course content, enroll students, add instructors, and let them interact with each other.
There are two types of LMS platforms – cloud-based and open-source.
Cloud-based LMS
Cloud-based platforms are those that give you a full-fledged course marketplace development solution with all the features you need inbuilt.
These are ‘hosted‘ platforms, meaning you don’t have to choose a hosting provider. They are useful if you want to set up your websites in a short time span where you don’t have to worry about hosting or marketing your courses.
However, in this scenario, you have to conform to the framework of the platform. You won’t have a lot of freedom to design your own website.
Also, cloud-based platforms usually cost a lot more than open-source website development. Some examples of cloud-based LMSs include Teachable, Thinkific, etc.
Open Source LMS platforms
Open-source LMSs empower you to build and customize your website from scratch without any constraints. You are free to develop and scale your platform as you choose.
These platforms are ‘self-hosted‘ and need much more involvement from your end when it comes to managing them. You are responsible for every single aspect of the site, from website hosting, and security to setting up payment gateways, to marketing your courses.
Recommended: To learn more about Open-source and Cloud-based LMSs, read this article.
Let’s take a look at some of the popular LMS options that are available today:
LearnDash

LearnDash is an open-source learning management system that is based on WordPress – a platform used by nearly 40% of websites in the world. Thanks to WordPress’s popularity, and user-friendliness, LearnDash makes a for wonderful LMS to build a website like Udemy.
The key benefit is that you can choose from the widest range of themes, plugins, drag-and-drop course builders, page builders, payment gateways, and other tools to build your e-Learning site.
You can also take advantage of its extensive documentation, robust support, and ease of use to build your site.
The best part? It’s open-source, so you can customize it to suit your needs as you grow.
LearnDash also has a vast community, tons of resources, and strong development teams, which can guide you through the development of your Udemy-like course marketplace.
Its pricing starts at $159 per year.
Note: With WordPress and LearnDash, creating a website like Udemy is incredibly easy. If you want to learn more to get things started, you can read this article or reach our team of Official LearnDash Partners for a free consultation.
Moodle
Another open-source option, but different from WordPress because it’s a proper LMS platform and not a CMS that can be turned into LMS with help of plugins.
As far as features are concerned, it gives you everything that you may need to set up your site – features to incorporate multimedia content in each lesson, user-friendly instructor tools, student progress tracking, robust security, and scalability.
Moodle is also free of cost. It’s used by some of the world’s most renowned universities, and that’s because it has proved its worth over the course of its existence.
But that doesn’t mean it’s free from shortcomings.
A key limitation of Moodle is that it’s not as easily customizable as WordPress. You need some coding knowledge if you want complete control over the customization of your Moodle site.
Plus, it’s also not as easily scalable as WordPress. You may have to customize it considerably as your business grows.
Finally, we’ve Teachable, a cloud-based LMS.

It comes with a drag-and-drop website builder, student progress and course management features, multimedia support, advanced pricing options, reporting & analytics, course content importer, sales page templates, multi-language support, and pretty much everything else that you may need to create a single or multi-instructor e-learning site.
Teachable is also different from other platforms on our list because it’s a hosted service, which means that its team takes care of everything for course creators.
The shortcomings of Teachable include the inability to upload large videos (you need to post a YouTube URL for that).
Additionally, you need some coding knowledge for customization. It offers less freedom in the choice of quizzes that you can create (only multiple-choice or true/false quizzes allowed) and the text editor that’s not too rich in formatting features.
Teachable pricing starts from $348 per year.
These are but a few examples of learning management platforms. For more options, you can take a look at this article – 6 Best LMS Platforms for Online Education Websites.
#6. Developing Your Udemy-like Website
When it comes to working on the actual website development, you can either hire a developer or build one yourself.
Since making a website like Udemy is a complex task, hiring a developer is your safest bet. You can chart out your requirements with the expert team and figure out a timeline for the entire project.
If you plan to build it yourself, you can use this guide to draft a plan and start your development accordingly.
Choosing your tech stack, consulting with your investors, and deciding on your platform can give you more clarity about this stage. You’ll be able to map the features and functionalities with practical considerations such as turnaround time and budget.
How Much Does it Cost to Build a Udemy-like Website?
If you don’t consider your budget in the beginning while developing your site, you’re bound to overspend and burn out your resources.
Considering that you plan to set up your site on your own, on an independent open-source platform like WordPress, these will be the tentative costs you will need to consider.
| Item | Cost |
| Domain name | $10 – $20 (annual) |
| Hosting plan | $80 – $400 (monthly) |
| LMS | $0 – $350(annual) |
| Development cost | Variable, depending on your features and requirements |
That’s a very basic break-up of the costs. Your expenses will vary depending on the registrar, plan, platform, the features you want to incorporate, any additional services you enlist, such as content delivery networks, and many other factors.
Wrapping Up,
Phew, that was a long one.
But it’s worth the read. After all, your website is like your home. So it’s a one-time investment. Therefore it’s critical to do your research properly and bring in a team of experts to help bring your vision to life.
Udemy is unarguably one of the most successful e-learning platforms in the world, so modeling your online course marketplace based on it is the best bet. But education platforms are sprouting left, right, and center these days, so picking a unique niche is important to stand out.
Once you figure that out, the rest will follow.
I hope we have answered most of your initial questions about setting up your own Udemy-like website.
If you still need some help in getting started, you can reach out to our team anytime with all your queries.
Feel free to share any more doubts in the comments section below!