Every good Learning Management System provides an option to add a timer to a quiz/test. And LearnDash is no different.
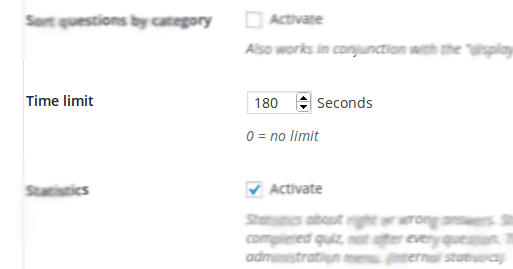
If you tread to LearnDash Quiz settings in your admin panel, you should notice an option to add a ‘Time Limit’ at the quiz level.

Timers are a great way for the examiner/instructor/teacher to control the actual quiz.
- It challenges each student, by playing on their psyche,
- students just don’t have the time to cheat,
- and it adds a level of competition among them too
But a quiz timer works well when all the questions are weighted equally or are of the same type. Like a math quiz for example. But what if a few math questions are just a part of the quiz, and only those particular questions need to be timed.
Well, in this case, you’d need a per question timer, instead of quiz timer.
Now, LearnDash does not provide a per question timer.
You know that.
And that’s why you’re here right?! 😀
So, for those scenarios where you need to add timed questions, I’m going to explain to you how exactly you can add a time limit for each quiz question in LearnDash.
Here’s what we’ll try to achieve:
- We’ll add an optional field for each question, where you can specify a time limit for each quiz question.
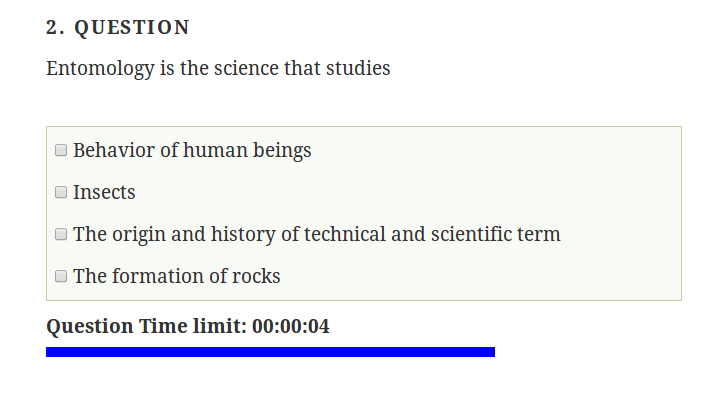
- The time limit will then be shown on the front-end for the quiz question, and the ‘Next’ question button will be hidden.
- If the student runs out of time, the next question will be automatically shown.
Now, I must warn you; you need a fair amount of PHP and JavaScript development knowledge to implement this solution. If not, you need to contact a LearnDash developer, who can help you out here.
[su_note note_color=”#EDEDED”]
| DIY Customization Hacks for your LearnDash Quizzes |
[/su_note]
Okay. Let’s get to work.
Step #1: Add a Question Time Limit Setting
You need to start by adding a simple setting, for every quiz. Of course, it’s not as simple as it seems.
If you’re a developer who’s worked on LearnDash quizzes before, you’ll know there aren’t any hooks you can work with. There isn’t a hook you can use to add a field to the quiz question settings.
But don’t worry. We won’t be customizing the core here. What we will be doing, is using some JavaScript magic.
Using JavaScript we’ll be placing a field above the ‘Save’ button on the question settings page. The reason for using the ‘Save’ button as a reference for the field, is because the ‘Save’ button is present on every quiz question settings page.
We’ll be using the ‘Save’ button’s id as a reference, to add the question timer field.

The below piece of the JavaScript code displays a ‘Question Time Limit’ field above the ‘Save’ button.
$save_button       = jQuery("#saveQuestion");
$save_button_div   = $save_button.closest("div");

$content = '<div class="postbox">
                      <h3 class="hndle">' + 'Question Time Limit (in seconds)' +'</h3>
                      <div class="inside">
                                 <input type="number" min="0" class="small-text" value="'+ input_content +'" name="qtn_time_limit">
                      </div>
                </div>';
$save_button_div.before($content);
Here, input_content is the value of the ‘Question Time Limit’ field. By default, the value has to be set to 0. Every time you (or a user) sets this value, it has to be updated and saved in the database (handled via PHP). And similarly, it has to be read from the database and displayed to the user when the user views this field.
This JavaScript code when enqueued will display the field as below:

Step #2: Add a Time Limit for the LearnDash Quiz Question
Once the field value has been saved for a question, the timer has to be displayed when the quiz question is attempted. This can be done using the below steps:
- Get the Timer Value
- Start the timer
- Periodically check if the time limit has been reached
- Trigger the next quiz question button
The code for the same is as below:
 jQuery('[name="startQuiz"],[name="next"]').click(function(){
   jQuery('.wpProQuiz_listItem').each(function(){
   if(jQuery(this).is(':visible')){
       $current_question_id = jQuery(this).find(".wpProQuiz_questionList");
       $current_question_id = $current_question_id.attr("data-question_id");
       if(wdmAjaxData.post_meta[$current_question_id] !== undefined){
           counter_value = wdmAjaxData.post_meta[$current_question_id];
       }
       else{
           counter_value = 0;
       }
       var wdm_globalElements = {
           next: jQuery(this).find("[name='next']"),
           wdm_timelimit: jQuery(this).find('.wpProQuiz_question_time_limit'),
           current_counter: counter_value
        };
           wdm_globalElements.next.hide();
           var wdm_timelimit = (function() {
           var _counter = wdm_globalElements.current_counter;
           var _intervalId = 0;
           var instance = {};
           instance.stop = function() {
           if(_counter) {
               window.clearInterval(_intervalId);
               wdm_globalElements.wdm_timelimit.css("display", "none");
           }
         };
         instance.start = function() {
         if(!_counter){
             wdm_globalElements.next.show();
             return;
         }
         var x = _counter * 1000;
         var $timeText = wdm_globalElements.wdm_timelimit.find('span').text(parseTime(_counter));
         var $timeDiv = wdm_globalElements.wdm_timelimit.find('.wpProQuiz_question_progress');
         wdm_globalElements.wdm_timelimit.css("display", "");
         var beforeTime = +new  Date();
         _intervalId = window.setInterval(function() {
                 var diff = (+new Date() - beforeTime);
                 var elapsedTime = x - diff;
                 if(diff >= 500) {
                    $timeText.text(parseTime(Math.ceil(elapsedTime / 1000)));
                 }
                 $timeDiv.css('width', (elapsedTime / x * 100) + '%');
                 if(elapsedTime <= 0) {
                    instance.stop();
                    wdm_globalElements.next.trigger("click");
                 }
          }, 16);
        };
        return instance;
        })();
         wdm_timelimit.start();
       }
       });
}
The above code hides the ‘Next’ question button while the timer is running, and then clicks it once the time limit is reached.
https://wisdmlabs.com/learndash-quiz-customization/?utm_source=blog&utm_medium=post&utm_campaign=quiz_cusomization_timer&utm_content=DropshippingAnd the result for the same should be as below:

A per quiz question timer works when you want to assign a weight to a particular question as compared to other questions in the quiz. This code can come in handy when you want to add such functionality to LearnDash.
If you’re trying this out, and you’ve got any questions for me, fire away!
[su_note note_color=”#EDEDED”]
| Further Reading on ‘LearnDash Quiz Customization’ |
[/su_note]
[space]
Need a Customized Quizzing Module for your LearnDash LMS??
[freepik]


5 Responses
Hi there,
Thanks for this awesome tutorial! I would love to give this a try, as I urgently need something like this.
Where do I place the codes above in LearnDash to make this work.
thanks
Hi Rakie,
You have to add the JavaScript in your own .JS file and then enqueue the file, to ensure that the JS is loaded. You can add the code to enqueue the file in functions.php of your theme, by following this tutorial.
I see that you’ve mailed us as well. We’ll be sure to follow up via email.
Hi Namrata.
Sorry it has has taken me so long to get back to you. You were very helpfu and thank you for the info.
I really want to implement this on my my site but I am struggling with the first step. I know how to add the second part of the tutorial to my themes custom functions.php.
Please can you assist me with the first part. You can email me too.
Thanks for you great code. btw, can you please explain, “wdmAjaxData is not defined” when i click start quiz button.
Thanks for this, but it doesn’t seem to work. I have added both sets of JS using a Custom JS plugin but nothing shows – running a LearnDash version < 3.0. Any help would be much appreciated.