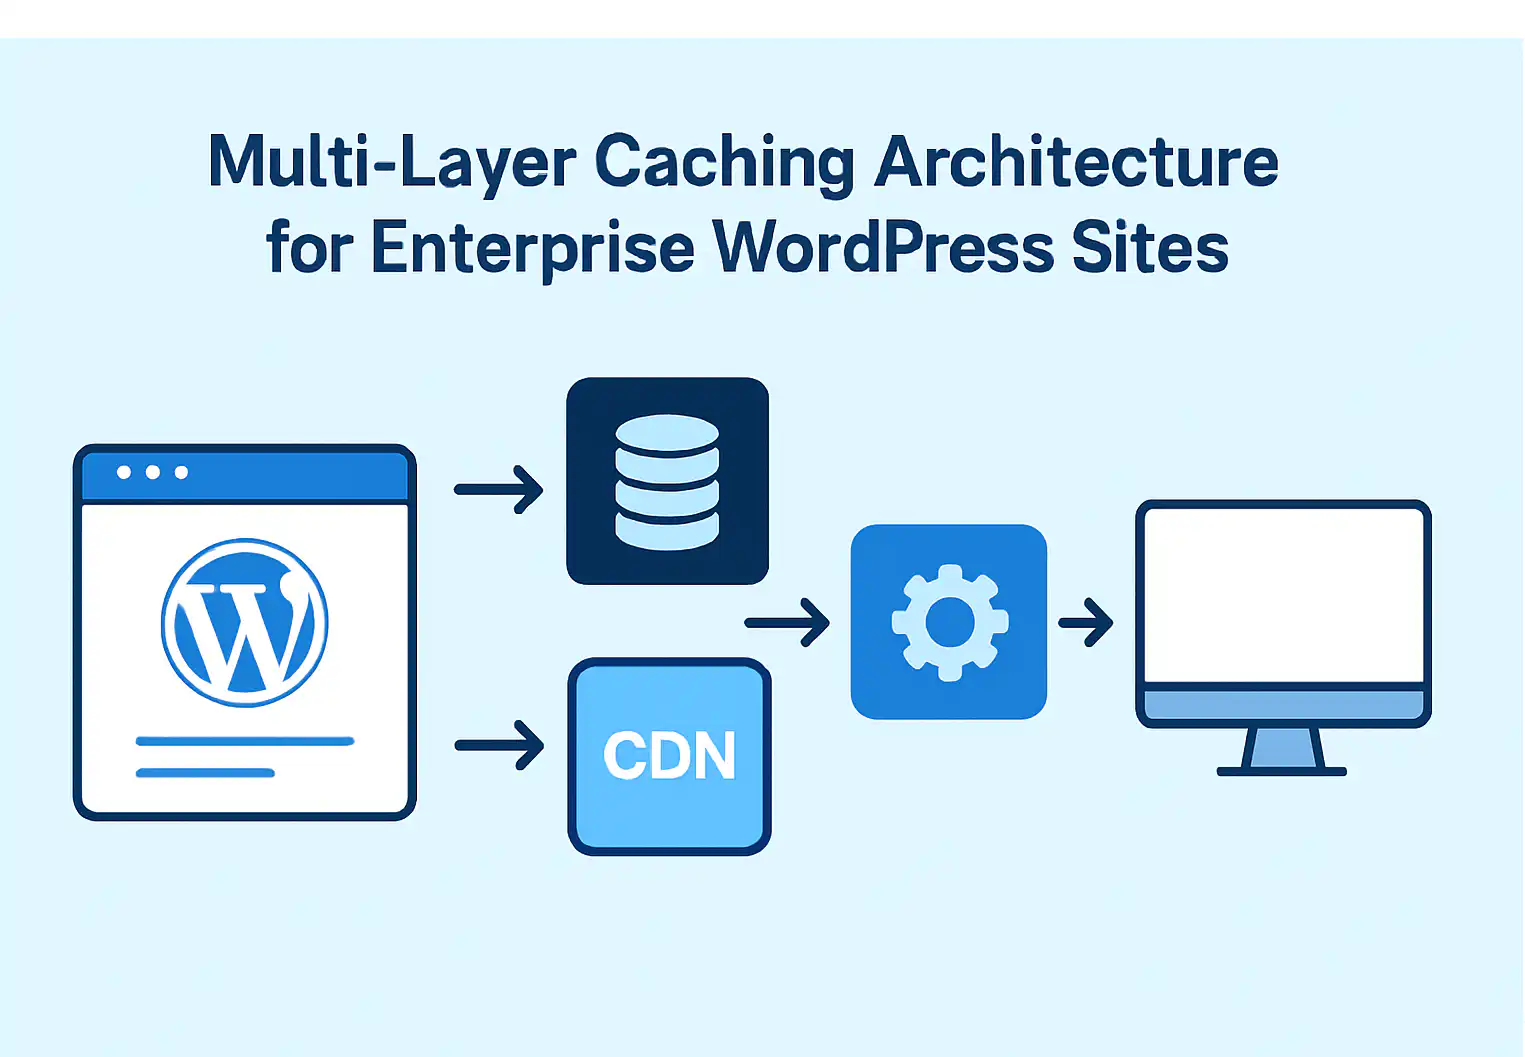
| Multi-layer caching helps enterprise WordPress sites handle high traffic, reduce server load, and improve page speed by combining multiple caching layers such as browser caching, page caching, object caching, server-side caching, PHP opcode caching, and CDNs.
This guide explains how each layer works, when to use tools like Redis, Varnish, Cloudflare, or WP Rocket, and how businesses can gradually build a scalable caching architecture that improves Core Web Vitals, SEO performance, and user experience |
If you manage a busy WordPress website, you’ve probably felt that frustration when your pages slow down — especially right when lots of people come knocking. It’s like, “Why now?” But honestly, there’s a smart trick called multi-layer caching that can save your site from crawling and keep it humming through those traffic surges. Let me walk you through what it really means, why it’s worth your attention, and how you can tackle it step-by-step — no tech overwhelm, I promise.
Why Does WordPress Slow Down?

WordPress is dynamic — meaning it builds pages fresh each time someone visits. For every page view, the server chats with the database and runs a bunch of PHP code.
Imagine this: one page load might involve 20 to 40 database calls and load several PHP scripts. Now multiply that by thousands, maybe hundreds of thousands of visitors, especially during busy times. Your poor server is doing backflips!
Here’s the kicker: even a tiny delay — like just 0.1 seconds — can make 1-2% of your visitors bail. If you’re making a million bucks a month, that’s up to $20K lost just because things took a little longer to load. Harsh, right?
The Shortcut Trick — What’s Multi-Layer Caching?
Think of caching as saving shortcuts for your website. Instead of rebuilding every page from scratch on every visit, caching remembers parts — sometimes even the whole page — and serves that up faster.
Multi-layer caching stacks these shortcuts at various levels, working together to shave precious milliseconds off load times and lighten the load on your server. Let’s break down the key layers — no jargon, just the basics.
First, Browser Caching.
This one lives right in your visitor’s browser. When they come to your site, their browser saves stuff like images, CSS, and scripts locally. That way, when they visit again, it doesn’t have to go back and grab those files from your server all over again.
You just tell browsers how long to hold onto these files — maybe logos can chill for a year, but CSS files refresh every week. This simple move cuts down those repeat requests by almost two-thirds, making return visits feel snappier.
Next up, Page Caching.
Here your server keeps fully built HTML copies of pages ready to go. Rather than rebuilding the page with all the database queries and PHP every single time, it just sends out this saved snapshot.
WP Rocket or W3 Total Cache are your best buddies here. Visitors might see load times drop from nearly a second to less than a tenth of that. The tradeoff: when you update content, you have to clear the cache, or people get served old info. Nothing a quick refresh can’t fix.
Then there’s Object Caching.
Ever notice your site asks for the same info repeatedly, like product details or user preferences? Object caching grabs those results and stores them in super-speedy memory storage — tools like Redis or Memcached do this well.
Redis especially shines when handling WordPress’s trickier data. This step cuts your database calls by up to 80% and makes dynamic parts of your site two or three times faster.
Don’t forget PHP Opcode Caching.
PHP code has to be compiled each time it runs. Opcode caching speeds things up by storing the compiled PHP scripts so your server can reuse them instead of rebuilding from scratch.
Most hosts have OPcache built in already, which often doubles or triples PHP speed and trims page loading by roughly a third.
Now the bigger guns: Server-Side Caching.
This is where tools like Varnish or Nginx step in, acting as gatekeepers. They handle most visitors’ requests by serving cached pages directly — meaning WordPress doesn’t have to jump in unless it’s a special case.
This way, your server might only have to handle 5 to 10% of the traffic, freeing it to breathe and scale better during busy spells.
Finally, the Content Delivery Network (CDN).

Imagine servers sprinkled all over the world, each holding copies of your site. That’s what a CDN does. Visitors load files from the closest server possible, knocking down load times by hundreds of milliseconds — especially for international visitors.
Cloudflare and AWS CloudFront are popular choices. It helps your site feel quick no matter where people access it from.
How To Start Without Getting Overwhelmed
You don’t have to flip all these switches at once. Here’s a gentle pace that’s helped many sites:
- Weeks 1-2: Check that PHP OPcache is on (usually it is). Pick a page caching plugin — WP Rocket if you want simple and fast, or W3 Total Cache if you want more options. Set browser caching rules on your server.
- Weeks 3-4: Add object caching with Redis or Memcached. Make sure caches clear automatically when you update content. Bonus tip: preload popular pages so visitors get instant access.
- Weeks 5-8: Roll out server-side caching with Varnish or Nginx. Hook up a CDN to speed things further globally. Get some rules in place to clear caches automatically so your site stays fresh.
Real Talk: Adobe’s Results
Adobe moved their corporate blog to multi-layer caching and dropped page loads from a slow 4.2 seconds to a slick 0.8. Plus, they handled four times the normal traffic during huge spikes, no sweat. That’s the power of caching done right.
Keep An Eye Out — What Should You Watch?
To know if caching is working, keep these in mind:
- Page cache hit rate: aim for 80-90%
- Object cache hit rate: shoot for 70-85%
- Time To First Byte (TTFB): under 200 ms
- Cached page load times: under 1 second
Use tools like New Relic, Datadog, GTmetrix, or WebPageTest to check these.
Wrapping Up
With these caching layers in place, your WordPress site should stop feeling like a traffic jam and start feeling like a smooth highway. Visitors get faster loads, stick around longer, and hopefully buy more. Meanwhile, your servers work smarter, not harder.
If it feels like too much, there’s no shame in calling in an expert to tailor-fit your setup. Faster site, happier visitors, better business — sounds like a win to me.
Ready to get started? Click here for a free consultation. Let me know if you want me to help with any step!
Further Reading:
What a Professional WooCommerce Migration Company Actually Delivers
9 Essential Tips to Give Your WordPress Website that Extra Edge
Is your eCommerce website as fast as it can be?
A Strategic Way to Build a WordPress Website for Growth
FAQs
What is multi-layer caching in WordPress?
Multi-layer caching combines different caching methods like browser, page, object, and CDN caching to improve WordPress website speed and scalability.
Why is caching important for enterprise WordPress websites?
Caching helps enterprise WordPress sites handle high traffic, reduce server load, improve Core Web Vitals, and deliver faster user experiences.
What is the difference between page caching and object caching?
Page caching stores full web pages for faster delivery, while object caching stores database query results to improve dynamic website performance.
Which caching tools are best for enterprise WordPress performance?
Popular enterprise WordPress caching tools include Redis, Varnish, Cloudflare, WP Rocket, and NGINX FastCGI Cache.
Can multi-layer caching improve WordPress SEO performance?
Yes, faster loading times and better site performance can improve Core Web Vitals, reduce bounce rates, and support stronger SEO rankings.