 Until now I have written about eCommerce websites and LMS websites and event management websites and………….! Today however I am going to write about a yet untouched, nonetheless promising territory – the online medical world. This post is primarily going to circle around the health checker solution for your pharmaceutical product website on WordPress and here’s a gist of what you should expect, straight from the developer of the health checker solution.
[vc_row][vc_column width=”1/1″][box_content direction=”bottom-top” shadow=”off”][vc_column_text]
“The health checker solution allows users to evaluate their health condition based on the symptoms that they experiencing and find an appropriate medication for the health condition. What’s more, this happens interactively! Users can interact with the system iteratively by providing the system with some information. The health checker will now process the information that has been provided by the user and based on user’s input ask for some more details. This process continues every step of the way until the user is provided a health condition based on the symptoms that have been provided. The user can then select the health condition to search for suitable medication”
Aparna Gawade, Senior Developer
WisdmLabs
[/vc_column_text][/box_content][/vc_column][/vc_row]
End User’s Interaction with Health Checker
If that right there was an overload of technology for you then let me break it down for you with an example.
Suppose a user experiencing knee pain comes to your website looking for an appropriate medication. The user will go through the following processes before he reaches the medicinal product which will be suitable to treat the knee pain.
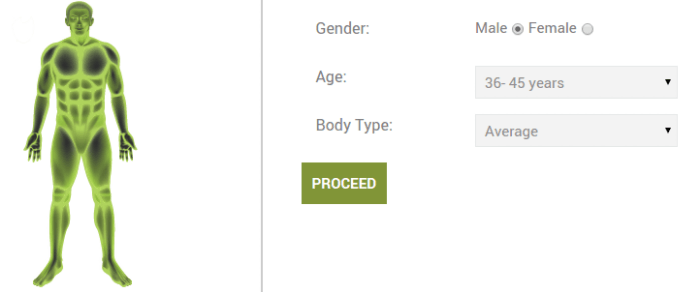
Step 1: Initially user will first have to provide the health checker with details such as gender, age and body type. Once the user has input all these details he can then submit these details to the system by clicking on the Proceed button.
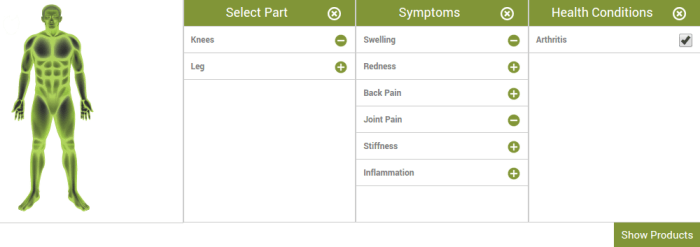
Step 2: User is now provided an interactive image of the human body. Depending on the health condition being experienced by the user the appropriate body part is selected in the image. In our example the user is experiencing knee pain. So user will select the leg portion in human body image.
Step 3: The user will now have to select the part of the leg that is causing trouble. For our user it is the knee.
Step 4: Once the user has selected ‘knee’ a list of symptoms related to the knee will be displayed to the user. The user can select the symptoms which are being faced by him. Based on the symptoms selected by the user, health condition will be displayed to the user.
Step 5: The user can now select a health condition and click on the ‘Show Products’ button provided by the health checker system to retrieve a list of products that would best suit to improve the health condition.
Step 6: The user can now proceed to buying the products which would be most suitable in treating the medical condition.
What you Need to do to Make the Health Checker Work
The health checker solution is a simple 6 step process for the end user. However, what about setting up this system? At this point you might be concerned as a website owner about configuring such a system. If you’re are stressing over complexity issues then you should stop right there! I say this because we believe in SIMPLE and we abide by it every step of the way. So setting up the health checker solution for you will be as simple as the end user searching for a product on your website. If you have your doubts then lets take a look at the set up process.
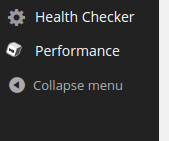
Step 1: Admin will be provided with a menu option in the left corner of the dashboard which will read ‘Health Checker’. On clicking this menu option the user will be provided with the setting panel on the right hand side of the dashboard.
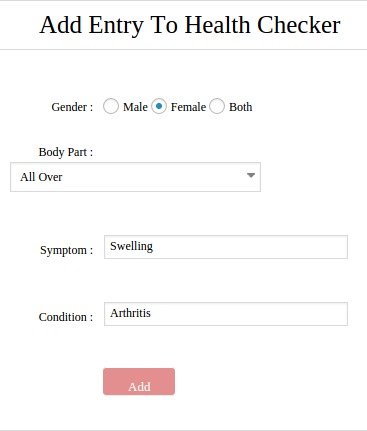
Step 2: Here the admin will have to make a health checker entry which would have details like gender, body part, symptom and health condition.
Step 3: Once these details are added an entry will be made in the symptom-health conditions table. At the same time the symptom will be added to a separate symptom table and the health condition will be added to a health conditions table.
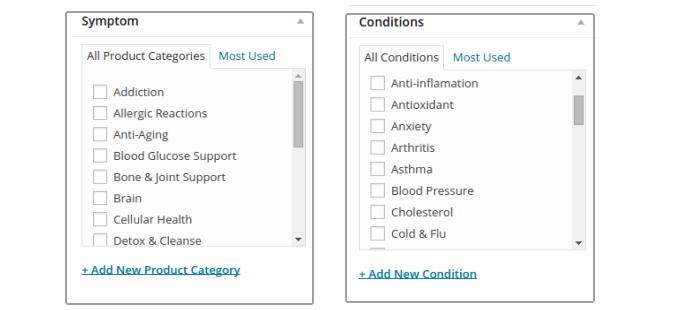
Step 4: Now the admin will be provided two widgets on the product page. One widget will display the various symptoms from the symptom table and the second widget will display the health conditions from the health condition table. The admin can select the symptoms and health conditions for each product and voila! health checker has been set up for use.
Users can thus search for medicinal products specific to their health conditions based on their symptoms using the interactive product search. Similarly, the interactive product search functionality can be used to filter any other elements on the website. That’s all from my end folks! Adios!
[space]

