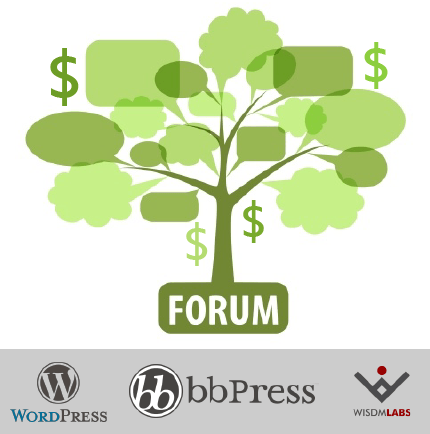
There are many forums on the Internet, dedicated to each of your favourite topics.
The following tutorial will provide you with detailed instructions to create your own paid membership forum using WordPress, bbPress and WooCommerce. In the end, you can start your own online forum and even charge members for the subscription.
Specifically, the customized forum will:
- Allow you to create a monthly membership product with automatic billing system.
- Require customers to pay for a monthly subscription to gain access to the forum pages.
- Provide the ability to limit content (forum pages) to subscribed members only.
- Allow members to manage(cancel) their membership subscription from inside their bbPress profile.
Please Note: This tutorial follows a very accurate setup for your forum. So while this setup may suit your business needs, you may want to modify many other things as per your requirements.
So we recommend that you start with a fresh install of WordPress and follow this tutorial to get up and running before customizing the components for your own business.
[space]
——————————————————————————————————————————————————————
——————————————————————————————————————————————————————
[space]
Contents
- Components
- Establish WordPress
- Update WordPress Settings
- Install bbPress Theme & Child Theme
- Setup & Activate the Child Theme
- Install and Activate the bbPress Plugin
- Install and Activate WooCommerce
- General Settings
- Create Premium Content
- Groups 404 Redirect plugin
- The Crux
- Conclusion
——————————————————————————————————————————————————————
Components:
- WordPress (Version 3.8).
- WooCommerce (Version 2.0.20).
- bbPress (Version 2.5.3).
- WooCommerce Subscriptions (Version 1.3.1).
- Groups (Version 1.4.6).
- Groups Woocommerce (Version 1.4.1).
- Groups 404 Redirect (Version 1.1.3).
- Woocommerce Stripe (Version 0.25).
- bbPress Child Theme.
——————————————————————————————————————————————————————
Establish WordPress:
To set up a fresh WordPress website from scratch, download the WordPress Installation package from the official download page.
You may visit this for details of the setup. Name your new WordPress website whatever you’d like. For this article, we are creating a local site named MY SITE.
——————————————————————————————————————————————————————
Update WordPress Settings:
Go to WordPress > Settings > Permalinks. Change the settings to Post Name and save.

——————————————————————————————————————————————————————
Install bbPress Theme & Child Theme:
We’ve used the WP Knowledge Base in our tutorial. You will also need to download the bbpress-twenty-ten theme.
(or any other bbpress compatible theme) and place this theme in your WordPress themes directory. While you’re there, create another folder named “bbPress-child”, because we’ll require the child theme.
——————————————————————————————————————————————————————
Setup & Activate the Child Theme:
To create a child theme, we will first have to create a folder in the wp-content/themes folder for the child theme. Then we create a style.css file in our child theme folder as shown below.
[pre]/*
Theme Name: BBPress Child theme
Template: twentythirteen
Version: 1.0
Description: Child theme for twentythirteen
Author: WisdmLabs
*/
@import url("../twentythirteen/style.css");[/pre]
After saving the style.css file, go to WordPress -> Appearance -> Themes.
Activate The bbPress child theme.

——————————————————————————————————————————————————————
In this tutorial, we are creating Child theme of theme ‘Twenty Thirteen’.
The bbPress theme will create a new page named “Homepage” and update your WordPress settings accordingly. Let’s make sure that it’s true:
If you freshly installed WordPress and are following this tutorial, you should have a new page named “Homepage” in WordPress -> Pages -> All Pages.
If not, you can create the page.
Go to WordPress -> Settings -> Reading. Make sure that “A static page” is selected and “Front page” is set to Homepage.
Create a file named ‘page.php’ in the directory ‘bbpress-child’. Add a following content in that file
[pre]<?php
/**
 * The template for displaying all pages
 *
 * This is the template that displays all pages by default.
 * Please note that this is the WordPress construct of pages and that other
 * 'pages' on your WordPress site will use a different template.
 *
 * @package WordPress
 * @subpackage Twenty_Thirteen
 * @since Twenty Thirteen 1.0
 */

get_header(); ?>

    <div id="primary" class="content-area">
        <div id="content" class="site-content" role="main">

            <?php /* The loop */ ?>
            <?php while ( have_posts() ) : the_post(); ?>

                <article id="post-<?php the_ID(); ?>" <?php post_class(); ?>>
                    <header class="entry-header">
                        <?php if ( has_post_thumbnail() && ! post_password_required() ) : ?>
                        <div class="entry-thumbnail">
                            <?php the_post_thumbnail(); ?>
                        </div>
                        <?php endif; ?>

                        <h1 class="entry-title"><?php the_title(); ?></h1>
                    </header><!-- .entry-header -->

                    <div class="entry-content">
                        <?php the_content(); ?>
                        <?php wp_link_pages( array( 'before' => '<div class="page-links"><span class="page-links-title">' . __( 'Pages:', 'twentythirteen' ) . '</span>', 'after' => '</div>', 'link_before' => '<span>', 'link_after' => '</span>' ) ); ?>
                    </div><!-- .entry-content -->

                    <footer class="entry-meta">
                        <?php edit_post_link( __( 'Edit', 'twentythirteen' ), '<span class="edit-link">', '</span>' ); ?>
                    </footer><!-- .entry-meta -->
                </article><!-- #post -->

            <?php endwhile; ?>

        </div><!-- #content -->
    </div><!-- #primary -->

<?php get_sidebar(); ?>
<?php get_footer(); ?>[/pre]
Basically, this is nothing but the replica of page.php of the Parent Twenty-Thirteen theme. In order to disable comments on the Pages we have removed comments section from this file.
——————————————————————————————————————————————————————
Install and Activate the bbPress Plugin:
Download the bbPress plugin and activate it. After doing so, go directly to the bbPress settings:
WordPress -> Settings -> Forums.
Upon activation, bbPress will make additions to three areas of the WordPress Administration Screens:
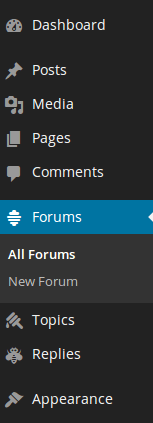
bbPress creates three custom post types and adds them to the navigation menu: Forums, Topics, and Replies. Use these menu items to create and manage your forums.
A sub-menu found at Settings -> Forum.
Customize these settings for greater control over bbPress.
Go to Dashboard->Appearance->Widgets.
If you are unable to see this widget, visit your WordPress Dashboard, click on the Screen Options tab at the top right of the Dashboard and make sure that “Right Now in Forums” is checked.
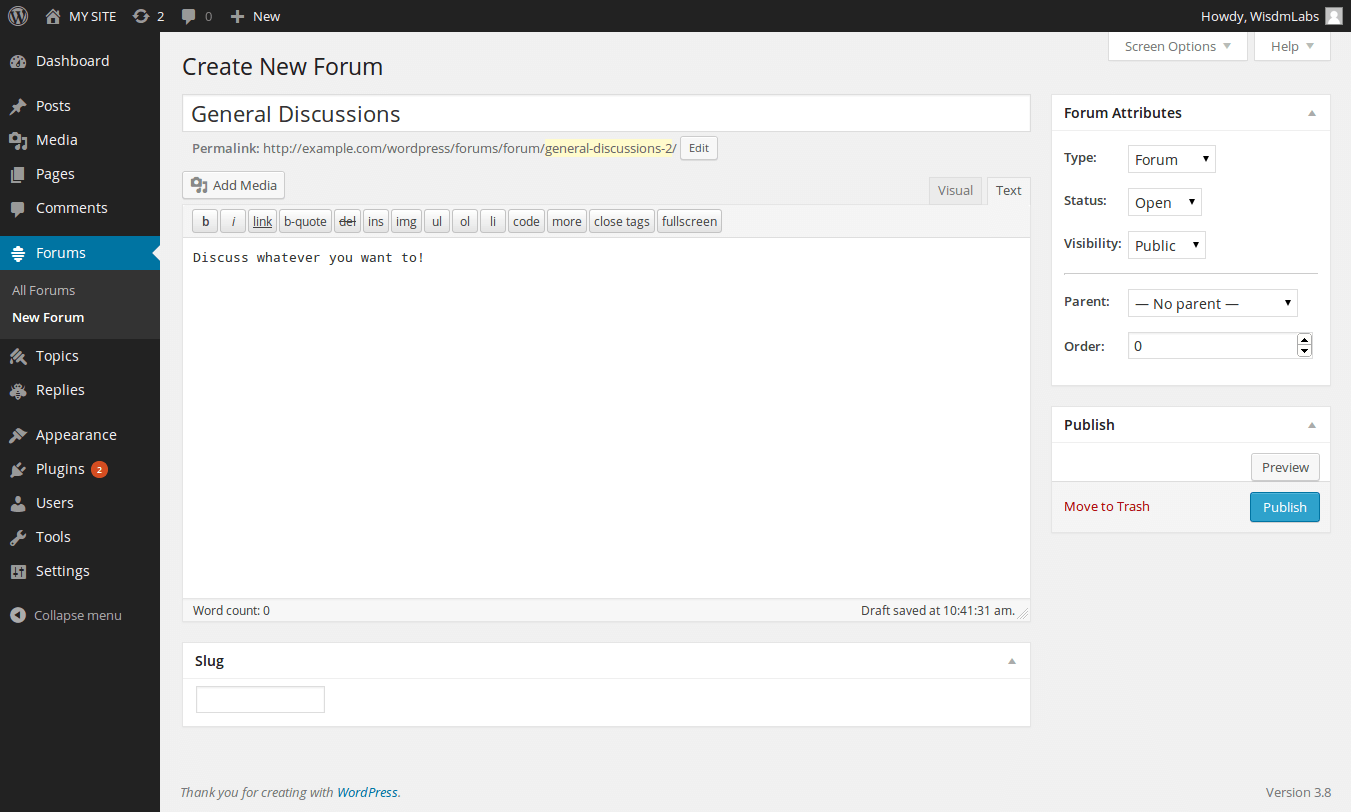
1. Go to Forums >New Forum
2. Give your Forum a name
3. Add text to the text editor to give your forum a description on the back end.
4. Adjust your Forum attributes. These are:
Types: choose whether you are creating a Forum or category.
Forum: can contain topics and be the parent of other forums.
Category: can only contain forums (no topics). Use for organizing your forums.
You may, for example, have a Category “Open Source Software” with the Forums “bbPress” and “WordPress”.
Status: choose whether the forum is open or closed.
Visibility: decide whether your forum is public, private or hidden.
Parent: Forums can have a hierarchical structure. If your forum is a sub-forum of another Forum or is the child of a category, add the Parent here.
Order: this determines the order in which the forums appear.
Make changes according to your requirements and Click Save Changes.
——————————————————————————————————————————————————————
Install and Activate WooCommerce:
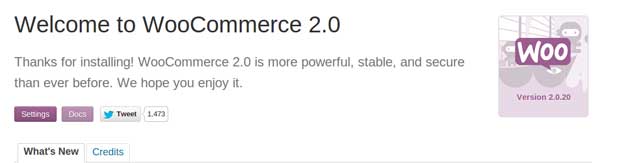
Download the WooCommerce plugin and activate it.
Install the WooCommerce page as shown by the huge purple banner.

Go back to WordPress -> Settings -> Permalinks.
Here you’ll find some additional settings after the WooCommerce installation. We are going to change one setting: we are setting Product permalink base to Shop base. Save.
——————————————————————————————————————————————————————
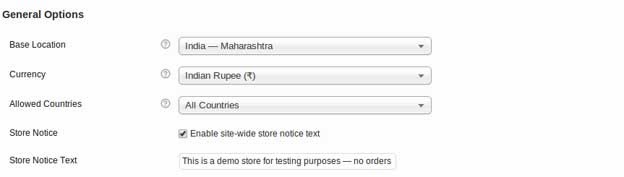
General Settings:
Configuring the Settings:
Currency: Choose the currency of the store.
Allowed Countries: Here you can select if you want to sell/ship to other countries or select a few- useful if only trading within your own country for instance. Customers outside your countries will not be able to checkout. For the specific countries option, define the countries you wish to sell/ship to. You must set the Allowed Countries option to Specific Countries option.
Store Notice: Check the “Enable site-wide store notice text” and then edit your message below.
This message will appear at the top of your site.
WooCommerce Cart, Checkout and Accounts:
1. Enable a coupon field or a comments field at the checkout and enable guest checkout (no account/registration required) or force secure checkout. If you select the option to force SSL/HTTPS and SSL Certificate is required which is used to provide communication security over the Internet. Shopping carts use this protocol to protect sensitive data typically gathered during the checkout process.
2. In case you are using a direct payment gateway (such as PayPal Pro, which transfers credit card details) you must be using SSL and should be looking at PCI compliance.
Registration:
Here you can allow registration on the checkout page or My Account page and enable the option to register using E-mail address as the user.
Customer Accounts:
Choose whether to:
- Prevent customers from accessing WordPress admin.
- Clear cart when logging out.
- Allow customers to repurchase orders from their Account Page
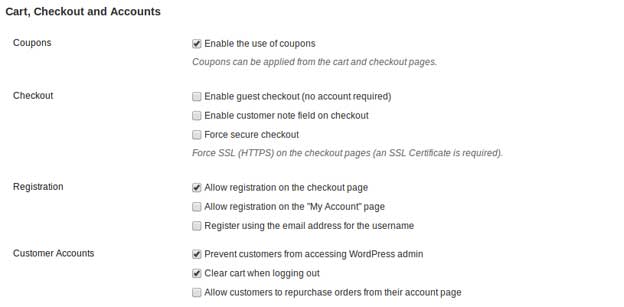
Save your settings.
——————————————————————————————————————————————————————
Catalog Settings:
1. The Catalog options allow you to adjust many settings for your shop pages. You can determine the ‘Default Product Sorting’ for your products by: custom ordering + name, popularity, average rating, or ascending/descending price.
2. Define ‘Shop Page Display’ to show products, sub categories or both as well as the ‘Default Category Display’.
3. Add to cart options include the ability to enable a redirect to the cart page after a product is added or whether or not you want to display the ‘Add to Cart’ buttons on the archive product pages.
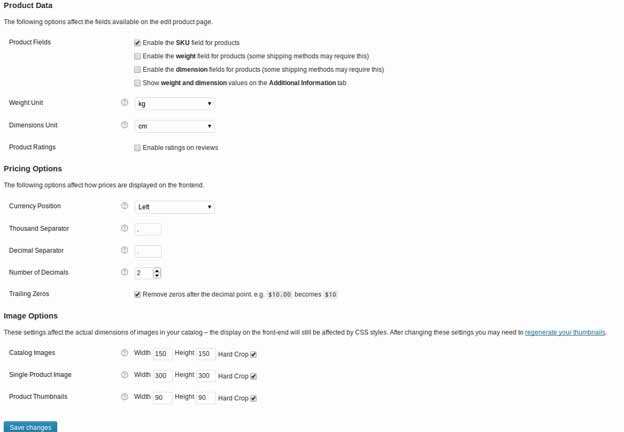
Product Data:
Here you can choose to enable product SKU / weight / dimension fields on the backend and whether to display that meta information on the frontend in the ‘Additional Information’ tab. You can also set the weight and dimension units of measure.
Pricing Options & Images:
Leave these settings at their default values.
——————————————————————————————————————————————————————
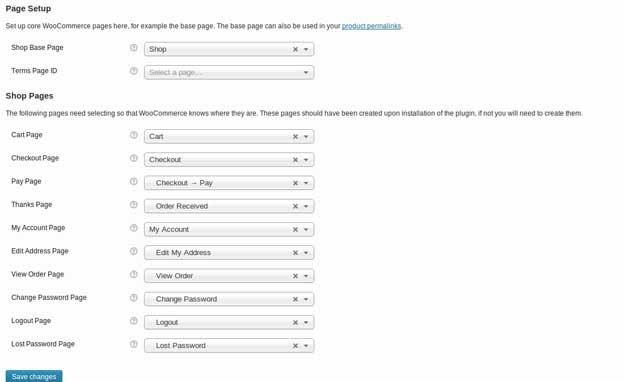
Page Settings
You can take a look at the Page settings, but we’re going to leave all the defaults in place.
——————————————————————————————————————————————————————
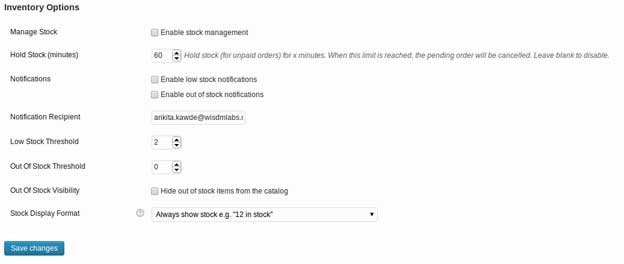
Inventory Settings
Go to the Inventory tab and do the following:
1. Disable Stock Management because we’re not managing it.
2. Disable the Stock Notification Settings.
Save Changes.
——————————————————————————————————————————————————————
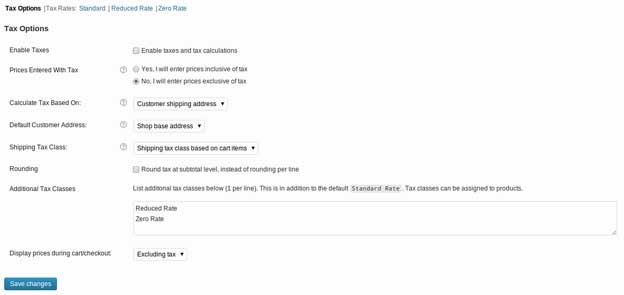
Tax Options
The tax tab lets you define the tax rates for your store and set up how tax should work. Tax rates are applied based on the customer’s shipping address.
——————————————————————————————————————————————————————
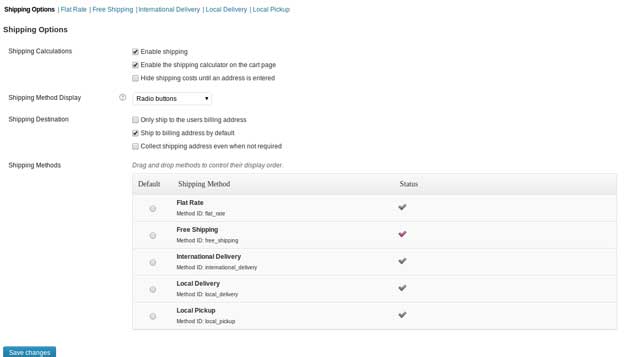
Shipping Options
Navigate to the Shipping tab.
1. Uncheck “Enable Shipping” because we’re not shipping anything.
2. Uncheck “Enable the shipping calculator on the cart page” for good measure.
Save changes.
In the remaining shipping sub-tabs, all should be disabled except free shipping.
——————————————————————————————————————————————————————
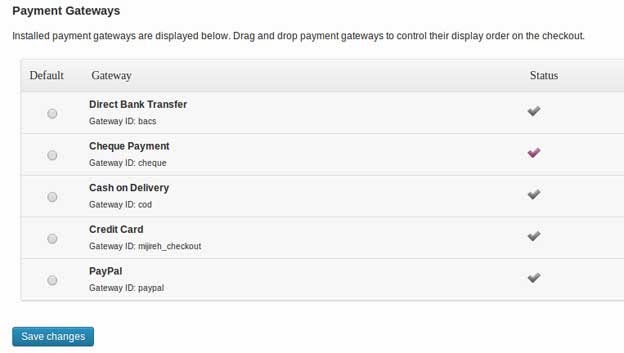
Payment Options
Go to the Payment Gateways tab.
At first, a few payment gateways will be enabled. We’re going to disable all of them. So for each gateway, click it, uncheck its corresponding ‘enable’ box, save the settings, move to the next. See screenshot for example.
Note: Save the settings after changing each payment gateway.
Go back to the main Payment Gateways tab. It should look like the screenshot.

——————————————————————————————————————————————————————
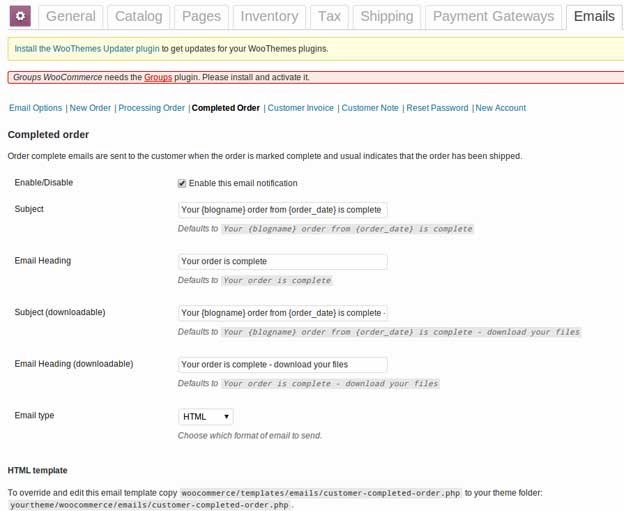
Email Settings
Now you will find options to customize your shop emails. Including sender ‘from’ name and email address, email template customizations and responsive customization.
For our purposes, we’re going to leave all of the email options at their default (enabled), except one.
——————————————————————————————————————————————————————
Integration Settings
The integration tab is where you configure integrations with third party services (not including payment gateways / shipping methods) such as ShareThis, Google Analytics and ShareYourCart.
——————————————————————————————————————————————————————
Woocommerce Subscription
WooCommerce Subscriptions is an awesome plugin that allows you to sell products and services that require recurring payments.
Just go to purchase the WooCommerce Subscriptions plugin from WooThemes.com and download, install and activate it.
——————————————————————————————————————————————————————
Install & Activate Groups
Groups gives us the ability to create a group and assign permissions (capabilities) to that group. In the WordPress admin, download, install and activate the Groups plugin by itthinx.
——————————————————————————————————————————————————————
Install & Activate Groups Woocommerce
Groups Woocommerce are a free plugin which grants membership based on product. It automatically assigns a customer to one or more groups based on the products ordered.
You’ll have to purchase the Groups WooCommerce plugin from WooThemes.com. Download, install and activate the plugin.
Settings:
Go to Woocommerce–> Groups.
All settings should be left at their default.
- The Order Status drop-down indicates that we want to assign users to the appropriate group as soon as their purchase is complete. In WooCommerce, completed purchases for subscriptions can be marked as either Processing or Complete. Both of these states indicate a completed purchase. But under certain conditions, a shop owner might want to leave the status as Processing. For our purposes, we want to use Complete instead of Processing. Thus, we want this drop-down box set to Complete.
- The Subscription Status box indicates that we want to move users in and out of their appropriate groups depending on their subscription status. Check this box.
- The Durations checkbox should also be checked.
Make sure that “Force registration on checkout” is checked. This forces the user to register during checkout for any product that that assigns Groups.
Save the settings.
——————————————————————————————————————————————————————
Groups Capability Settings
The first step in setting up Groups is to set up the capabilities. For this tutorial, each capability will be assigned to one Group.
Navigate to Groups -> Capabilities.
Click New Capability.
- Enter “registered” (see screenshot) in the capability field and click on add. This capability indicates that a user has registered and resides in our WordPress users database. It does not indicate that the user is a paying subscriber.
- Follow the same process to create a capability named “members” and “monthly”
——————————————————————————————————————————————————————
Groups Settings
Go to Groups > Groups and add click New Group.
Enter Registered in the Name field and click Add.
You should have one Group listed by default: “Registered”.
Check the box for the Registered Group; in the drop-down box labeled “Apply capability to selected groups”, select “registered”; click the Add button. (Second Screenshot)


Now create a new Group by clicking the New Group button at the top of the page. Write “Members” in the name field and set the parent to “Registered” (see screenshot). Save.
Repeat the process for adding the “members” capability to the “Members” group (check the box, select the drop-down, click add).
Now create a new Group named “Monthly” and set the parent to “Members”. Save.
Repeat the process for adding the “monthly” capability to the “Monthly” group (check the box, select the drop-down, click add).
——————————————————————————————————————————————————————
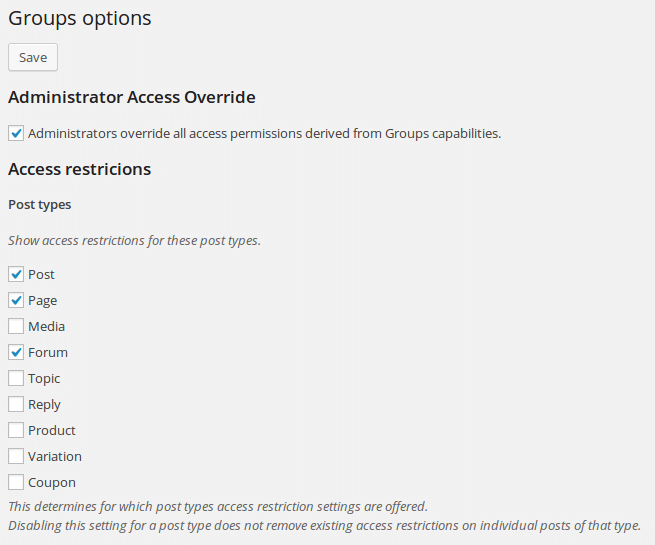
Groups Options
Now, Go to Groups–> Options and remove all check boxes except Post, Page and Forum.
This indicates that when editing a post/page or creating a forum, we’ll have the option to restrict the post/page/forum to certain capabilities. You can leave the other boxes checked.
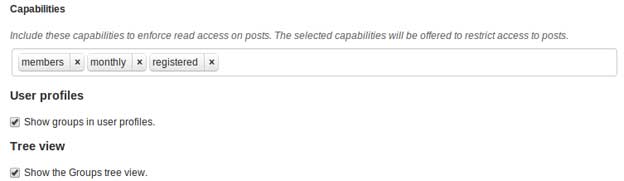
- Under the Capabilities section, scroll through the list and select- members, monthly, and registered. These three capabilities will show as options when editing a post , page or forum allowing us to restrict access to those posts/pages/forums.
- Under the User Profiles section, make sure that “Show groups in user profiles” is checked. This can be helpful information when viewing the WordPress user admin page (WordPress -> Users).
- Under Tree View check the “Show the Groups tree view” . This will enable us to organize our Groups into parent-child relationships.
Save the options.
——————————————————————————————————————————————————————
Install & Activate Stripe Plugin
WP Stripe plugin provides a payment form and recent donor widget by utilizing Stripe.com, the awesome alternative to PayPal. Although the fees are a bit high, users find it worth the price! You’ll have to purchase the WooCommerce Stripe plugin from WooThemes.com. Download, install and activate the plugin.
Go to Stripe to setup a free account.
Note: If you run multiple businesses through Stripe, you’ll need to setup multiple Stripe accounts. This is Stripe’s recommended approach as they don’t offer a multi-account view at this time.
After you’ve setup your Stripe account, confirm that you’re dealing with Stripe’s test data by looking at the little toggle switch (see screenshot).
While still on the Stripe website, Go to Your Account -> Account Settings -> API Keys.
There you’ll find four API keys, which you’ll need for your WooCommerce settings.
If Stripe asks for additional information to obtain the keys, just follow the directions:
In a new browser tab, jump back over to WooCommerce -> Settings -> Payment Gateways -> Stripe and enter the four corresponding API keys into the appropriate fields.
Alternatively, you can just enter the test API keys for now.

Change the remaining WooCommerce Stripe settings according to the following (see screenshot):
- Check Enable Stripe.
- Check Enable Test Mode.
- Check Capture charge immediately.
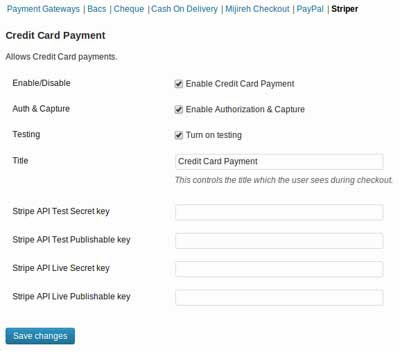
Save the settings.
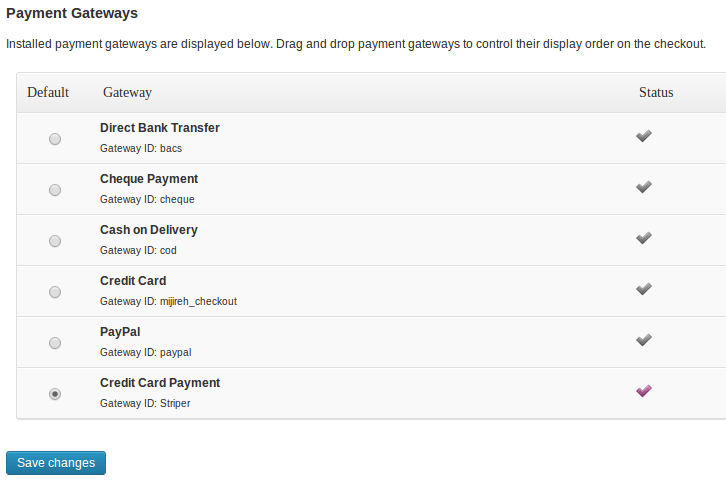
Go back to WooCommerce -> Settings -> Payment Gateways, Stripe should be active gateway, indicated by the purple checkmark (screenshot).
For good measure, navigate to WordPress -> Settings -> Permalinks and click Save Changes.
——————————————————————————————————————————————————————
WooCommerce New Product Setup
Adding a product is a simple process and almost similar to a normal WordPress post.
In the Products menu click Add Product; You should immediately see where to type the product title and full description.
In the Product Name field, type “Monthly Subscription”, as we’re setting up each subscription period to be a separate product.
Scroll down to the Product Data setup box and change the General Options as follows(screenshot):
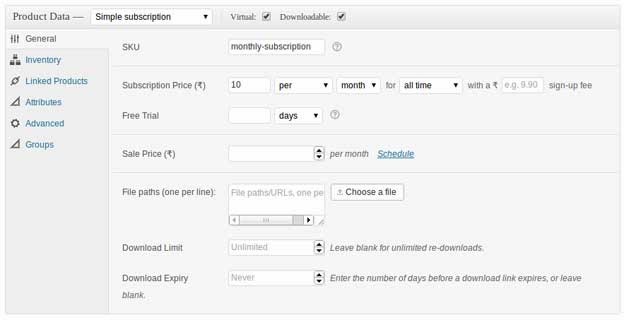
1. First, select Simple Subscription from the drop-down menu.
then, Check the Virtual and Downloadable boxes. Why?
Virtual because we’re not selling physical products.
Downloadable because the way you force the order to say “Complete” is by selecting the Downloadable field.
2. The SKU(stock keep unit) is used to track products. In the SKU field, enter “monthly-subscription”. It’s not needed now but will be useful when/if you set up coupons and start looking at Google Analytics eCommerce transactions.
3. Fill out the Subscription Price fields according to the screenshot. We’re setting up a monthly subscription for $10 per month that will continue to renew until cancelled.
4. Leave the Sign-Up Fee empty for now.
5. We have kept the free trial empty because things start getting a bit complicated with a free trial.
6. Leave Sales Price empty because we’re not discounting this subscription at this time.
The rest of the fields on this screen are for actual downloadable products. Leave them blank.
Scroll up and click on the Save Draft button.
Scroll down and click the Inventory sub-tab. Leave the setting at In Stock.
Click the Advanced sub-tab (leave the others as they are: Linked Products, Attributes). here, we’ve unchecked “Enable reviews”.
Click on the Groups sub tab.
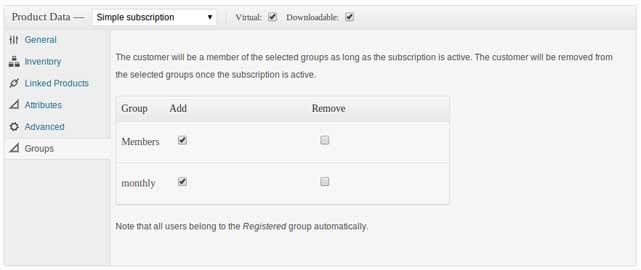
Under the Add column, check the Members and Monthly boxes (We established these Groups in an earlier step of this tutorial).
So When a new customer signs up and pays for a membership, they’ll be added to the Registered, Members, and Monthly Groups.
If the customer cancels his/her subscription, the system removes them from these Groups.
Remember:
We created these Groups and we assigned each Group a capability. When we actually create a new premium post (or any premium content), we can control access to that post by way of the capabilities.
Click Save Draft.
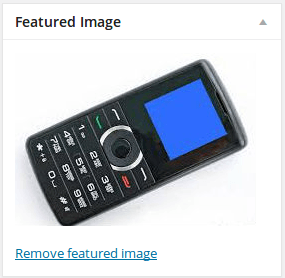
Scroll down and add a featured image to represent your product. We have added an example image!
The Product Short Description box, will be the main description for your product and will appear next to your product’s image when a user is looking at a single product page.
So include the most relevant info in this box.
Click Publish.
So you have a monthly subscription product ready for purchase finally! For easy access, let’s make the product available on the home page.
Go to WordPress -> Pages -> All Pages -> Homepage.
In the main content area, you’ll see several shortcodes that were added by the bbPress theme. We will add following shortcode to display the product we just created:
[recent_products per_page=”1″ columns=”1″ orderby=”date” order=”desc”]
Save the page. You can change the above short code as per your requirements.
——————————————————————————————————————————————————————
Create Premium Content
We have to create content which is accessible only to the paying subscribers.
For this, go to Posts-> New Post->Add New.
In the Post Title, enter “Premium Content”. Enter anything you wish in the post content field.
In the box labeled Access Restrictions, check “members” (see screenshot).
Note: The Access Restrictions box is displayed on our Edit Post screen because we asked Groups to show it on posts and pages.
The items inside the Access Restrictions box are the capabilities we created and asked Groups to include.
We are not checking the “monthly”, “registered”, or “groups_read_post” boxes because we’re not using those capabilities to restrict content for now. We’re restricting content only to “members”.
Publish the post.
You now have one premium post that is available only to your paying members.
Note: You can test this by visiting your site’s home page with a browser that IS NOT logged in & a browser that is logged in as your admin. You’ll see different content in the Latest Posts box.
——————————————————————————————————————————————————————
Groups 404 Redirect plugin:
Install the Groups 404 Redirect
Once the install is done, Go to Dashboard>Settings>Groups 404.
Select ‘Redirect to a page or post’ and change the ‘Redirect Status Code’ to ‘Moved Permanently (301)’. Save this.
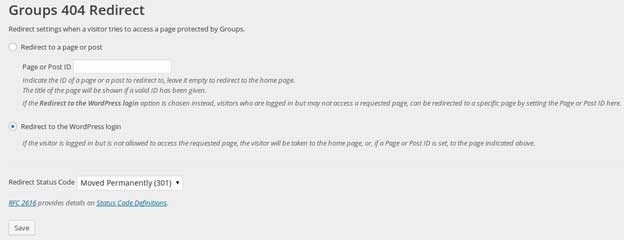
Note: Sometimes default permalink settings may create problem for forums. So be sure that Permalink is set to ‘Post name’.
For this, go to Settings -> Permalinks.
——————————————————————————————————————————————————————
The Crux
At this point, we already have:
1. A forum setup
2. Subscription Product ready for purchase.
3. Some content only visible to paid subscribers.
The crux lies here-
Do you want to charge for access to your forums or do you want to charge only for certain premium posts and pages? If you wish to charge only for certain premium posts/pages, you’ve effectively done with this tutorial.
You should consider establishing Register and Activate pages for bbPress so that your users can sign-up for forums without paying (see the Install and Activate the bbPress Plugin section that we covered earlier).
If you want to charge access to your forum, continue with the tutorial.
The forum will necessarily need to have the following six main steps:
1. Creating a page for listing Forum.
2. Creating a Premium Forum.
3. Login Redirect
4. Logout Redirect.
5. My profile, Login and Logout menu in Navigation Link.
6. Add WooCommerce “My Account” to bbPress Profile.
To achieve the above behavior in WordPress, we’ll need to use a file named functions.php that will add features and functionality to your forum according to your needs. So we’ll have to create a functions.php file for the bbPress child theme.
——————————————————————————————————————————————————————
1. Creating a listing page for Forums:
Create a page called ‘Forums’ and set the permalink of that page as ‘forums-page’.
Note: Make sure that permalink you set for this page is different than the value set for ‘Forum Root’ parameter in Settings -> Forums.
Add the following short code in the description box of this page:
[bbp-forum-index]
The above short code displays a list of all the forums. Set Enforce read access to ‘custom field’.

Add the link of this newly created page in the Menu. To do this,
Go to Appearance -> Menus.
To make the forums page available in your menu bar, click on Pages and tick ‘Forums’. If the user is not registered(or who are not part of Members Group), the forums option will not appear in the pages section.

This page will be available only to paying members. Hence if a visitor visits this page, then we ask him to login. In case a registered member visits this page, we ask him to subscribe for one of the available plan so that he can see content of this page.
bbPress shows listing of forums on this link:
yourwebsite.com/forums
but since its an archive page(not a normal page) it is difficult to change the content of this page.
Therefore, we can redirect users visiting ‘/forums’ to our ‘/forums-page’ page.
To do the above things, open the functions.php and add the following code there:
[pre]//Redirect /forums to /forums-page and if visitors comes to '/forums-page', then ask them to login.
add_action( 'bbp_template_redirect', 'wdm_forums_page_template_redirect' );
function wdm_forums_page_template_redirect()
{
    if(is_post_type_archive(bbp_get_forum_post_type())) //If current link is an archive link of forums, then we redirect users to forums-page
    {
        wp_redirect( home_url('/forums-page/' ) , '301' );
        exit();
    }

    if(is_page ('forums-page') && !is_user_logged_in())
    {
		wp_redirect( wp_login_url( home_url('/forums-page/' ) ) ); //Redirect to Forums Page after successful login
		exit();
    }
}

//If User who is logged in but does not have access to Forums page comes to forum, then show products for which he can sign up and view the page

add_filter('the_content', 'wdm_change_content_for_forums_page', 0);

function wdm_change_content_for_forums_page($content)
{
	if(is_page('forums-page') && is_user_logged_in() && !current_user_can('members'))
	{
		return 'Hi, it seems that you do not have access to Forums Section. Please purchase one of the following products to access Forums. <br />'.do_shortcode('[recent_products per_page="1" columns="1" orderby="date" order="desc"]'); //You can change this shortcode as per number of products you have. Show Products he can subscribe for to get access of that page.

	}
	return $content;
}[/pre]
——————————————————————————————————————————————————————
2. Creating Premium Forum:
Go to Forums -> New Forum. Add the Name of the Forum, it’s Description and other such details. Set value of the meta box ‘Enforce read access’ to Members. After entering all the details, click on ‘Publish’.
——————————————————————————————————————————————————————
3. Redirecting user to appropriate page after Login:
If a paying member logs in, he’ll be redirected to the page he was trying to access. So if a person who was once a paying member and cancelled later on tries to log in, we want to always redirect him to WooCommerce My Account page, allowing him to resubscribe.
How to do this:
Open functions.php and add the following code so that we can redirect user to appropriate page after login.
[pre]// Redirect user to the appropriate page on login
add_filter( 'login_redirect', 'wdm_login_redirect', 10, 3 );
function wdm_login_redirect( $redirect_to, $request, $user ) {

	// If trying to log into the WordPress admin, get out of the way
	if( ( false !== strpos($redirect_to, 'wp-admin') ) && ( false !== strpos($request, 'wp-admin') ) ) {
		return $redirect_to;
	}

	// If the user failed to authenticate, get out of the way
	if( is_wp_error( $user ) ) {
		return $redirect_to;
	}

	// If the user is an active member, get out of the way
	if( user_can( $user, 'members' ) ) {

		return $redirect_to;
	}

	// If the user is registered, but not a paying subscriber, send them to the WooCommerce My Account page
	if( user_can( $user, 'registered' ) ) {
		home_url('/my-account/');
	}

	// If none of the above, get out of the way
	return $redirect_to;
}[/pre]
——————————————————————————————————————————————————————
4. Redirecting users to Home Page after Logging Out:
When a member logs out of your forum, you probably want to redirect them to the homepage. This is because by default, the member will be redirected back to the page they were originally looking at, which will produce a 404 error. So we want to send them to the homepage instead.
Create a file named ‘functions.php’ in your theme directory and add the following code:
[pre]// Always redirect user to home page on logout
add_filter('logout_url', 'wdm_logout_url', 10, 2);
function wdm_logout_url( $logout_url, $redirect ) {

	$args = array( 'action' => 'logout' );
	$args['redirect_to'] = urlencode( get_home_url() );

	$logout_url = add_query_arg( $args, site_url( 'wp-login.php', 'login' ) );
	$logout_url = wp_nonce_url( $logout_url, 'log-out' );

	return $logout_url;
}[/pre]
After adding this code, save the file.
——————————————————————————————————————————————————————
5. My profile, Login and Logout menu in Navigation Link.
We can add a ‘My Profile’,’Login’ and ‘Logout’ link to the main navigation when the user is logged in to the forum.
If the user is logged in, ‘My Profile’ and ‘Logout’ menu will appear.
If the user is a paying member, we can direct them to their bbPress profile.
If the user is registered but not a paying member, can direct them to the WooCommerce “My Account” page instead.
To do this also, we need to open our functions.php file and add the below code in it:
[pre]// Add "My Profile" link to main navigation for logged in members
add_filter( 'wp_nav_menu_items', 'wdm_wp_nav_menu_items', 10, 2 );
function wdm_wp_nav_menu_items( $items, $args ){

	// If the user is a paying member
	if( current_user_can( 'members' ) ) {
		if( function_exists('bbp_get_user_profile_url') ){
			$profile_link = sprintf( '<li><a href="%1$s" title="%2$s">%2$s</a></li>', bbp_get_user_profile_url( ( wp_get_current_user()->ID ) ), __('My Profile') );
		   	$items = $items .  $profile_link;
		}

	// If the user is registered, but not a paying member
	} elseif( current_user_can( 'registered' ) ) {
		$profile_link = sprintf( '<li><a href="%1$s" title="%2$s">%2$s</a></li>', home_url('/my-account/'), __('My Profile') );
		$items = $items . $profile_link;
	}
        //If User is not logged in, then show page of login page with 'My Profile'
        elseif(!is_user_logged_in()) {
                $profile_link = sprintf( '<li><a href="%1$s" title="%2$s">%2$s</a></li>', wp_login_url()  , __('Login') );
		$items = $items . $profile_link;
        }

        //If user is logged in, then show 'Logout' menu
        if(is_user_logged_in())
        {
            $profile_link = sprintf( '<li><a href="%1$s" title="%2$s">%2$s</a></li>', wp_logout_url()  , __('Logout') );
	    $items = $items . $profile_link;
        }

	return $items;
}[/pre]
——————————————————————————————————————————————————————
6. To show WooCommerce Account information in bbPress profile:
bbPress creates a profile page for every user. Wouldn’t it be better to show entire information of the user in one place? Makes viewing user information easy. For this we try to show WooCommerce information of the users in their respective bbPress profiles.
To do this, create a folder named ‘bbPress’ in your theme directory. Now create a file ‘user-profile.php’ in that folder.
Basically we’re customizing the bbPress default template as per our requirement. bbPress plugin too has it’s own ‘user-profile.php’ file. However we are creating the ‘user-profile.php’ file using the theme.
Add following content in that file:
[pre]<?php

/**
 * User Profile
 *
 * @package bbPress
 * @subpackage Theme
 */

?>

	<?php do_action( 'bbp_template_before_user_profile' ); ?>

	<div id="bbp-user-profile" class="bbp-user-profile">
		<h2 class="entry-title"><?php _e( 'Profile', 'bbpress' ); ?></h2>
		<div class="bbp-user-section">

			<?php if ( bbp_get_displayed_user_field( 'description' ) ) : ?>

				<p class="bbp-user-description"><?php bbp_displayed_user_field( 'description' ); ?></p>

			<?php endif; ?>

			<p class="bbp-user-forum-role"><?php  printf( __( 'Forum Role: %s',      'bbpress' ), bbp_get_user_display_role()    ); ?></p>
			<p class="bbp-user-topic-count"><?php printf( __( 'Topics Started: %s',  'bbpress' ), bbp_get_user_topic_count_raw() ); ?></p>
			<p class="bbp-user-reply-count"><?php printf( __( 'Replies Created: %s', 'bbpress' ), bbp_get_user_reply_count_raw() ); ?></p>
			<p><?php echo do_shortcode('[woocommerce_my_account]'); ?></p>
		</div>
	</div><!-- #bbp-author-topics-started -->

	<?php do_action( 'bbp_template_after_user_profile' ); ?>[/pre]
After adding the above content, save the file and go to your bbPress profile. You will find information about WooCommerce orders and subscriptions in the ‘Profile’ tab.
To make any styling changes, open ‘style.css’ of your theme and make changes to it as per your requirements.
To know more about customizing the bbPress theme, visit the following links:
http://codex.bbpress.org/step-by-step-guide-to-creating-a-custom-bbpress-theme/
&
http://codex.bbpress.org/theme-compatibility/
——————————————————————————————————————————————————————
Conclusion:
There are endless customization options that you can make from here. bbPress comes with five widgets available to add to any of your WordPress themes sidebars.
You can activate them in the following way:
In the dashboard go to ‘Appearance’ -> ‘Widgets’
Some areas from your own consideration are:
*(bbPress) Recent Replies – A list of the most recent replies.
Options:
Title: Here you can set the title of the widget as it will be displayed in the sidebar.
Maximum replies to show:
Show post date:
*(bbPress) Recent Topics – A list of recent topics, sorted by popularity or freshness.
Options:
Title: Here you can set the title of the widget as it will be displayed in the sidebar.
Maximum topics to show:
Show post date:
Popularity check: Number of topics back to check reply count to determine popularity. A number less than the maximum number of topics to show disables the check.
*(bbPress) Topic Views List – A list of registered optional topic views.
Options:
Title: Here you can set the title of the widget as it will be displayed in the sidebar.
*(bbPress) Search – A simple search form for your forums.
Options:
Title: Here you can set the title of the widget as it will be displayed in the sidebar.
*(bbPress) Login Widget – A simple login form with optional links to sign-up and lost password pages.
Options:
Title: Here you can set the title of the widget as it will be displayed in the sidebar.
Register URI: Link to your custom signup page eg. A WordPress page using the [bbp-register] shortcode.
Lost Password URI: Link to your lost-password page eg. A WordPress page using the [bbp-lost-pass] shortcode.
*(bbPress) Statistics – A list of your forum statistics.
Options:
Title: Here you can set the title of the widget as it will be displayed in the sidebar.
If you have found this tutorial useful, please help us spread a word about it – simply click on the “share” button below for a variety of options. Also, if you have additional inputs please feel free to drop us a line! We will be happy to keep the tutorial updated.
Lastly, We thank xd3v.com for inspiring us to create such a tutorial.