The ability to sort users into Groups is undoubtedly one of the most useful features of LearnDash. It’s neatly done, complete with Group email notifications and special access to the reporting for the Group Leader.
A LearnDash Group essentially functions as a ‘class’, where an assigned ‘Group Leader’ can have a group of users learning one or more than one Courses. Of course you can combine this feature with a plugin that lets you bulk register users to groups, which is especially handy when you’re dealing with a scenarios involving a large number of users, say a corporate training website. Or if you like to manage things behind the scenes and let other Instructors do the teach, Front End Course Creator is just the right LearnDash extension to do the job.
Front End Course Creator assigns a user the role of a Course Author, with special privileges to set up entire courses without ever having to touch backend! Perfect for when you don’t want others to be meddling with your site’s back end. But that’s never enough.
In this DIY guide, we cover the steps to yet another LearnDash hack, creating and managing LearnDash Groups right from the front end. More power to Course Authors!
Step 1. To Create/Edit Group
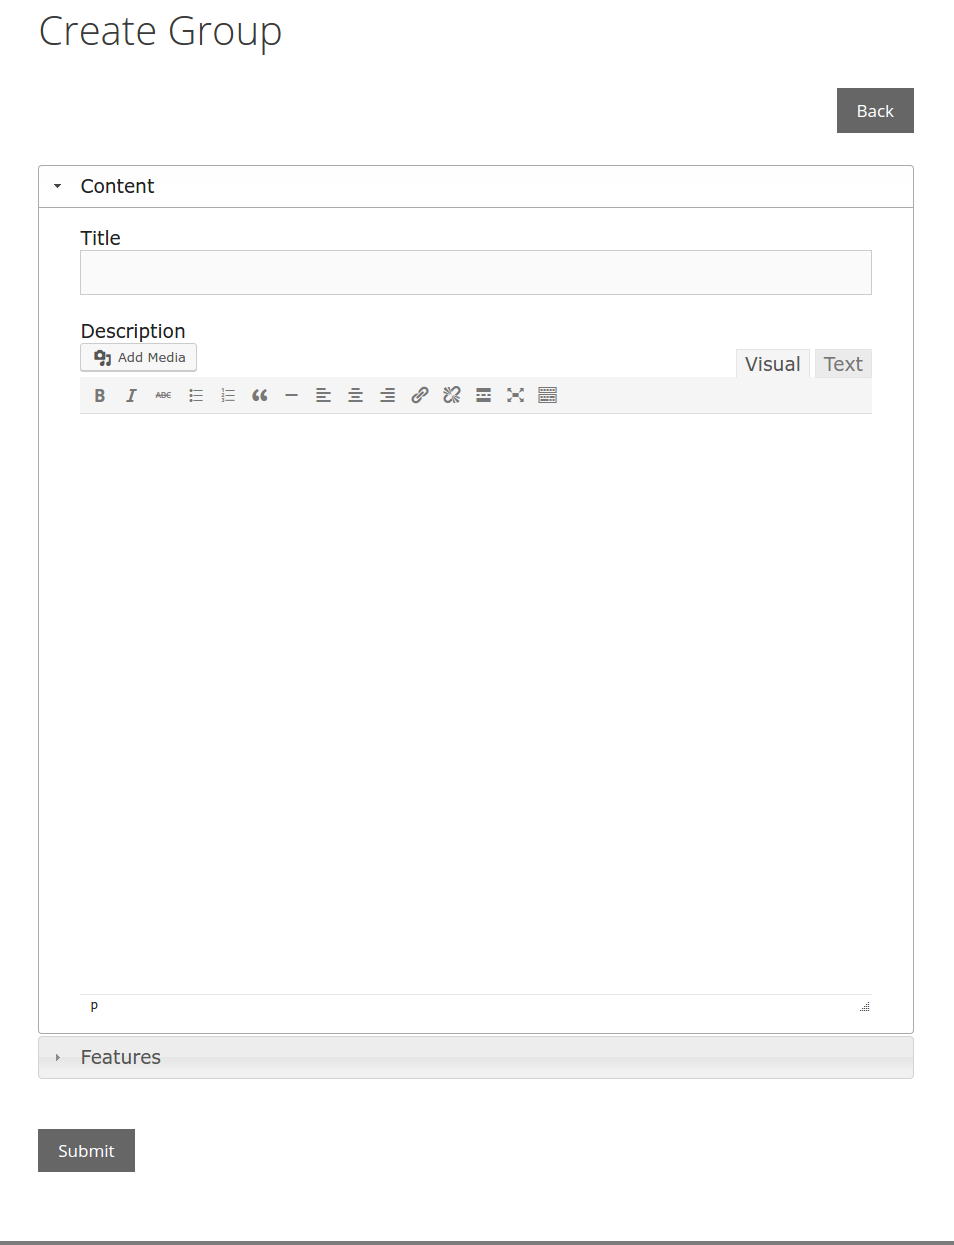
Allowing Course Authors to create Groups on front end involves displaying a form on the page that can take in relevant inputs for the following fields:
- Title – Title of the Group.
- Description – Description of the Group.
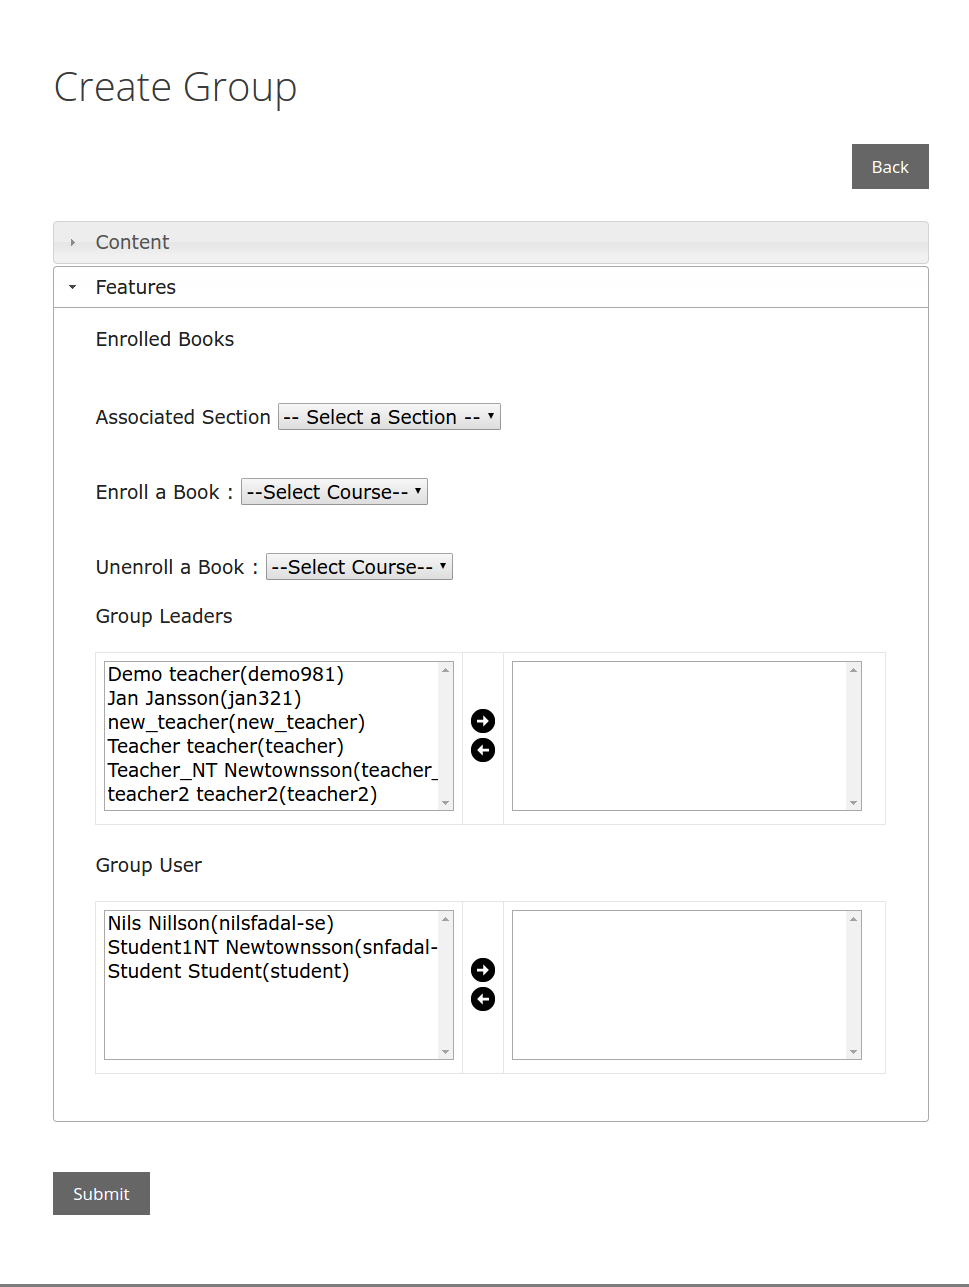
- Enrolled Courses – Courses associated with the Group.
- Enroll Course – A drop-down of all available Courses to associate with the Group.
- Unenroll Course – A drop-down of all associated Courses to disassociate with the Group.
- Group Leader – A drop-down of all users to assign a Group Leader of the Group.
- Group Users – To enroll members into the Group.
- Submit – Button to submit the entered data.
Here is one such sample form:
Once the data has been entered, we need to specify to the system how to process the data and thereby effectively create/edit Groups. Use the following code:
[space]
A] To Create a Group
$wdm_post_name=sanitize_title($wdm_group_title);
$group = array(
‘post_title’ => $wdm_group_title,
‘post_status’ => ‘publish’,
‘post_type’ => ‘groups’,
‘post_content’ => $wdm_group_content,
‘post_author’ => get_current_user_id(),
‘post_name’ => $wdm_post_name
);
$group_id = wp_insert_post($group);
[space]
B] To Update a Group
$group_post = array(
‘ID’ => $wdm_group_id,
‘post_title’ => $wdm_group_title,
‘post_content’ => $wdm_group_content,
‘post_status’ => ‘publish’,
‘post_author’ => get_current_user_id(),
);
wp_update_post( $group_post );
[space]
C] To Associate Courses With Group
$wdm_course_id=$_POST[‘learndash_group_enroll_course’];
update_post_meta( $wdm_course_id, ‘learndash_group_enrolled_’ . $group_id, time() );
[space]
D] To Assign a Group Leader
$wdm_assign_group_leader=$_POST[‘wdm_group_leaders’];
learndash_set_groups_administrators($group_id, $wdm_assign_group_leader);
[space]
E] To Add Members to Group
$wdm_assign_group_user=$_POST[‘wdm_group_user’];
learndash_set_groups_users($group_id, $wdm_assign_group_user);
[space]
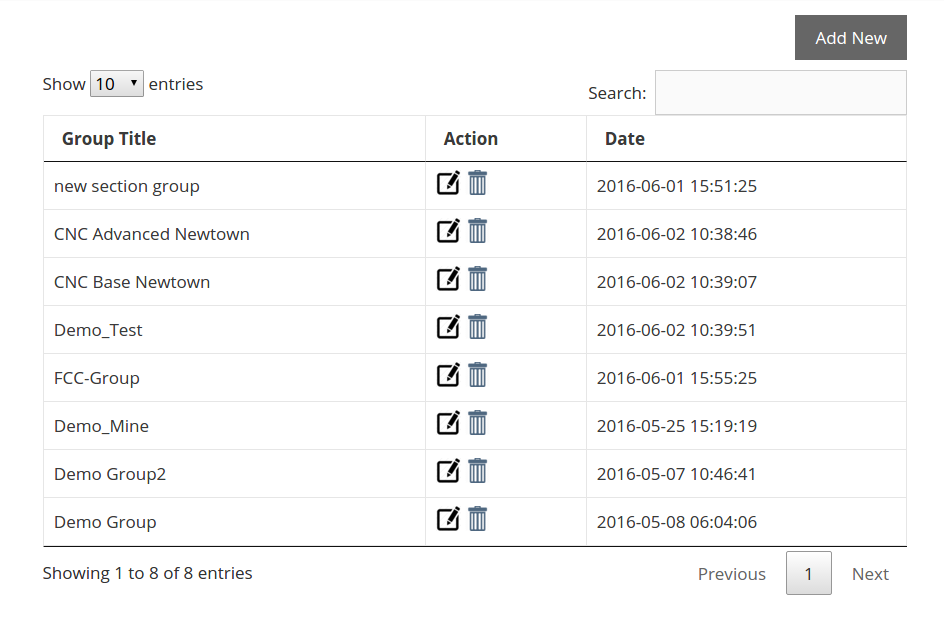
Step 2: Display List Of Groups
Once you’ve created Groups, you would also need to display an exhaustive list on the front end.
To achieve this, we use the database library to retrieve the list of Groups created by the Course Author on the front-end. Use the following database query.
$sql = “SELECT ID,post_modified FROM $wpdb->prefix.‘post’ WHERE post_author = “.get_current_user_id().” AND post_type like ‘groups’ AND post_status IN (‘draft’,’publish’)”;
Make sure you check the following condition before running the query:
get_current_user_id() must be ‘course_author’
Once you’re done, you should be able to easily display the list on any desired page with the help of shortcodes.
Need assistance with LearnDash? Contact us now or take a look at our LearnDash Services. Happy to help!
| Further Reading on ‘Implementing a Payments Module on Your LearnDash LMS’ |