Overview
The WISDM Product Enquiry Pro plugin comes with a powerful built-in Custom Form Builder that allows you to create highly customizable enquiry forms tailored to your specific needs.
This feature enables you to add custom fields, adjust form layouts, and gather detailed information from your customers.
In this guide, we’ll walk you through the process of creating a custom enquiry form, adding and configuring fields, and previewing how your form will look on the frontend.
1. Getting Started
To begin creating a custom enquiry form, ensure you have the WISDM Product Enquiry Pro plugin installed and activated on your website. Once activated, follow these steps to access the form builder.
Step 1: Access the Forms Menu
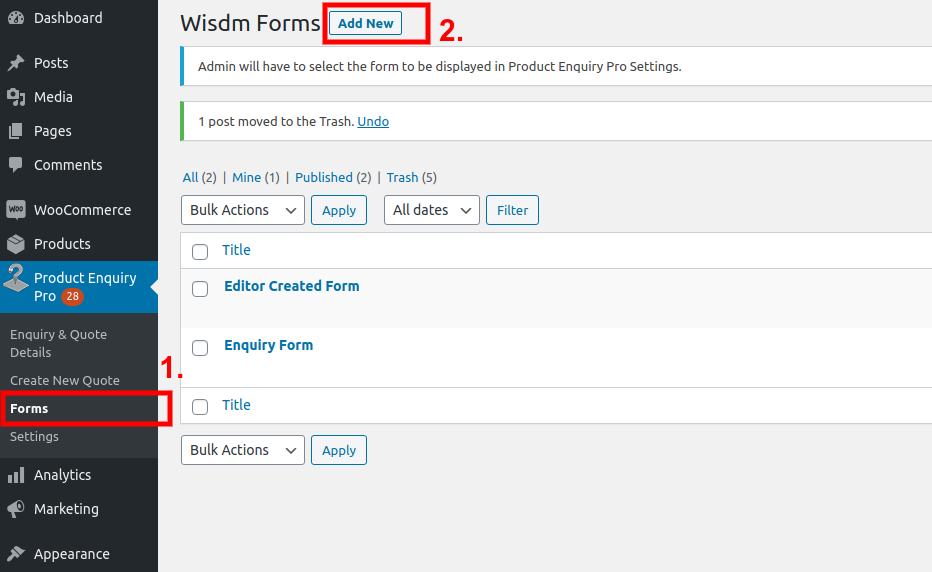
- From your WordPress Dashboard, navigate to WISDM Enquiry Pro → Forms. This will redirect you to a page listing all previously created enquiry forms.
Step 2: Create a New Form
- Click the Add New button located at the top of the page. This will open the form creation interface where you can build your custom form.
2. Creating a New Form
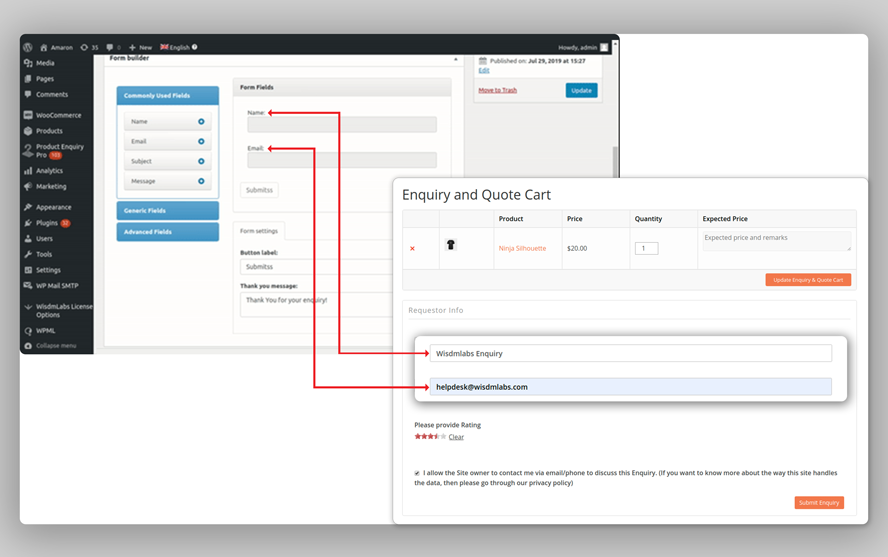
After clicking the Add New button, you’ll be presented with a new form builder interface. Here’s how you can start building your custom form:
- Form Title: Provide a name for your form (e.g., “Product Inquiry Form”).
- Form Fields: You will see a list of available fields that you can add to your form, such as text inputs, dropdowns, checkboxes, etc.
3. Adding Custom Fields
Step 1: Add Fields to Your Form
You can easily add custom fields to your enquiry form in two ways:
- Click the Plug (+) Icon: Each available field has a “+” icon on its right-hand side. Simply click on this icon to add the field to your form.
- Drag and Drop: Alternatively, you can drag the desired field and drop it into the form builder.
Step 2: Remove Fields
If you need to remove any field after adding it, click on the cross (x) icon next to the field.
Important: The Name and Email fields are mandatory and cannot be removed from the form.
4. Configuring the Rating Field
One of the most unique features of the WISDM Product Enquiry Pro form builder is the Rating Field. This field lets you collect feedback in the form of star ratings.
How to Configure the Rating Field:
- Add the Rating Field: Follow the steps above to add the Rating field to your form.
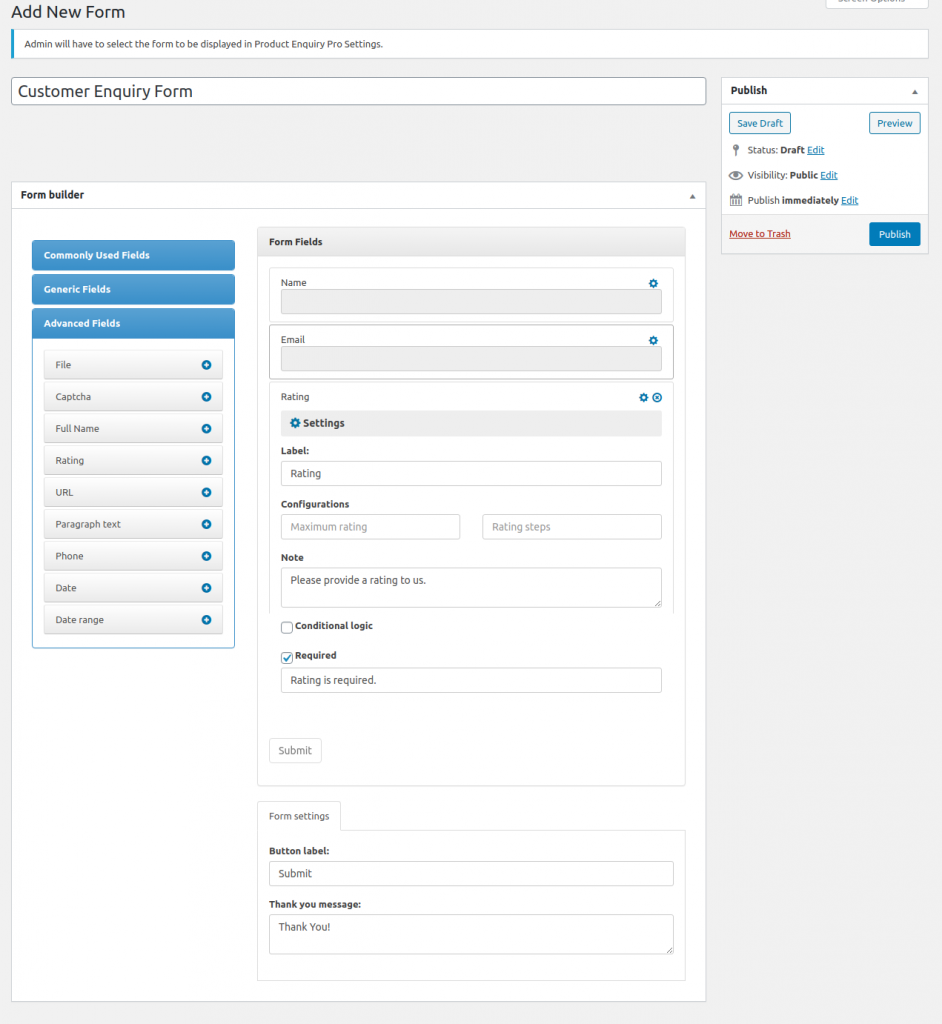
- Configure the Field: After adding the rating field, you’ll see several configuration options:
- Maximum Rating: Defines the total number of stars that will appear in the rating system. For example, setting the maximum rating to 5 will display 5 stars.
- Rating Steps: Determines the increments in which users can provide their rating. For instance, setting the rating steps to 0.5 allows users to rate in increments of 0.5 (e.g., 4, 4.5, 5).
- Maximum Rating: Defines the total number of stars that will appear in the rating system. For example, setting the maximum rating to 5 will display 5 stars.
Example Configuration:
- Maximum Rating: 5
- Rating Steps: 0.5
These settings will result in a 5-star rating system with increments of 0.5 stars.
5. Frontend Preview
Once you’ve added and configured your fields, including the Rating field, it’s time to see how your form will look on the frontend.
How to Preview the Form:
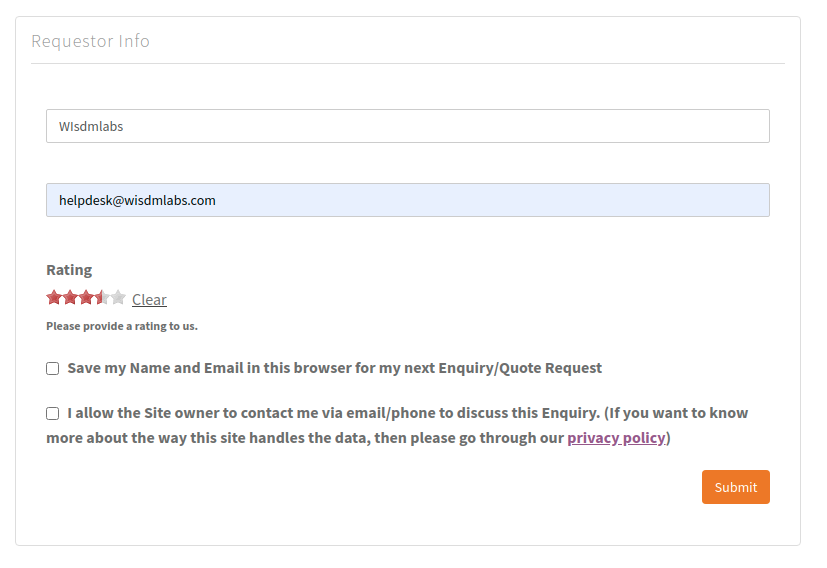
After saving your custom form, you can preview it by visiting the page on your website where the form is embedded. Here’s an example of what the form might look like with the rating field:
- Star Rating Field: On the frontend, the rating field will appear as a set of clickable stars, where users can select a rating from 0.5 to 5 stars.
6. Conclusion
Creating custom enquiry forms with the WISDM Product Enquiry Pro plugin is straightforward and highly customizable.
Whether you’re collecting basic information or gathering detailed feedback with advanced fields like the rating system, this tool provides the flexibility to meet your specific needs.
With this guide, you should be able to:
- Create custom enquiry forms
- Add and configure fields (including the Rating field)
- Preview the form on your website
If you have any further questions or need assistance, feel free to reach out to our support team. Happy form building!