There are a variety of page templates available with the eLumine theme. Some of them can be used to generate a regular page. Others are for more specific cases.
Login/Registration Page
There are two different pages available in eLumine that can be used:
- Default WordPress Login/Registration Page.
- eLumine’s Login/Registration Shortcode page.
Default WordPress Login/Registration Page
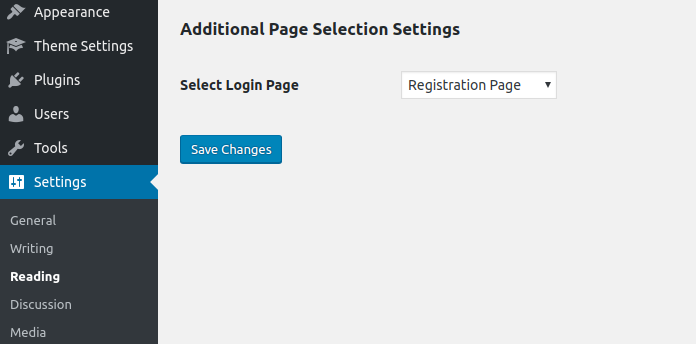
- Go to WordPress Dashboard > Settings > Reading Settings.
- Scroll down to the Select Login Page setting under Additional Page Selection Settings section.
- Choose Select a Page to remove a previously set login page.
- Click on Save Changes.
- Now the custom login page has been deselected so the default WordPress Login page will load on clicking the Login menu in the website header.
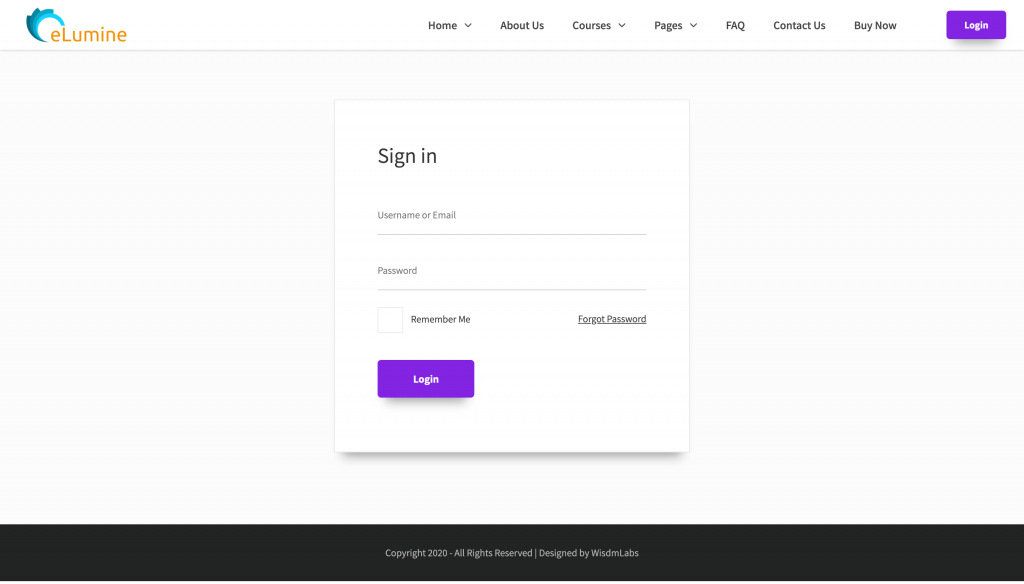
eLumine’s Login/Registration page
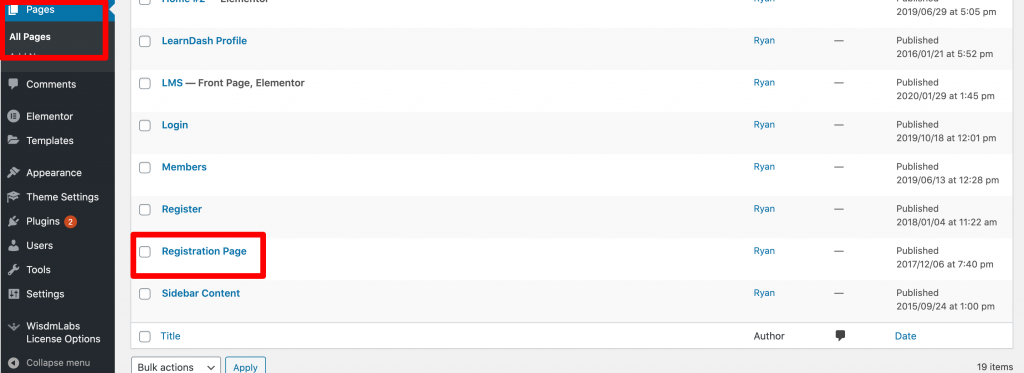
- If you have installed eLumine’s demo content then you should already have a page called “Registration Page” created on your website which contains eLumine’s Login/Registration shortcode.
- For those of you who haven’t installed the demo content the process of creating the page is mentioned below:
- Go the Pages menu in your WordPress Dashboard.
- Click on the Add New button.
- Set a page title of your choice.
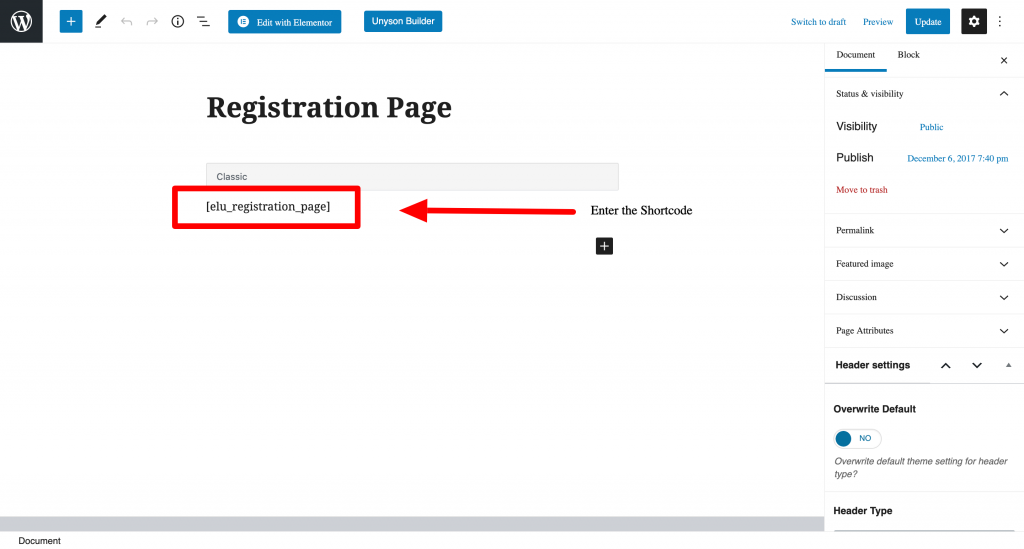
- In the page content add [elu_registration_page] shortcode. This will render the login form by default with the link to show the Registration page.
- If you wish to load the Registration page by default with the login link below it then add [elu_registration_page registration] shortcode.
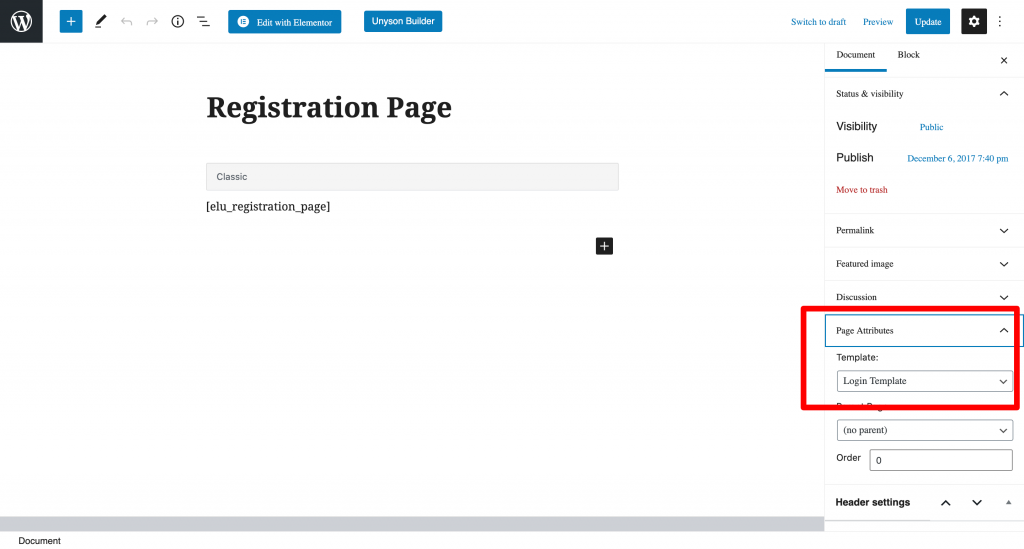
- After adding the content, set the page template to Login Template in the Page Attributes meta box. This will render proper styling for both the forms.
- Your Login/Registration page is ready for use.
- Now follow the below steps to set this as your default pages.
- Go to WordPress Dashboard > Settings > Reading Settings.
- Scroll down to the Select Login Page setting under Additional Page Selection Settings section.
- Choose the page you just created in this dropdown.
- Click on Save Changes.
- Now clicking the login link in the Header should load eLumine’s login/registration forms.
Please note that registration is disabled by default in WordPress. You will need to manually enable it. Go to General Settings > Membership and select Anyone can register.
Homepage Setup
If you have already installed demo content then your homepage is already setup. However, if you do not have a homepage setup then follow the steps below:
1. Create a new page, add a title, and publish it.
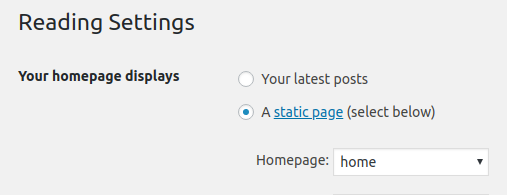
2. Now, navigate to Settings > Reading Settings. For “Your homepage displays” setting select “A static page” and choose the page you created in the “Homepage” dropdown.
3. Click on the Save Changes button.
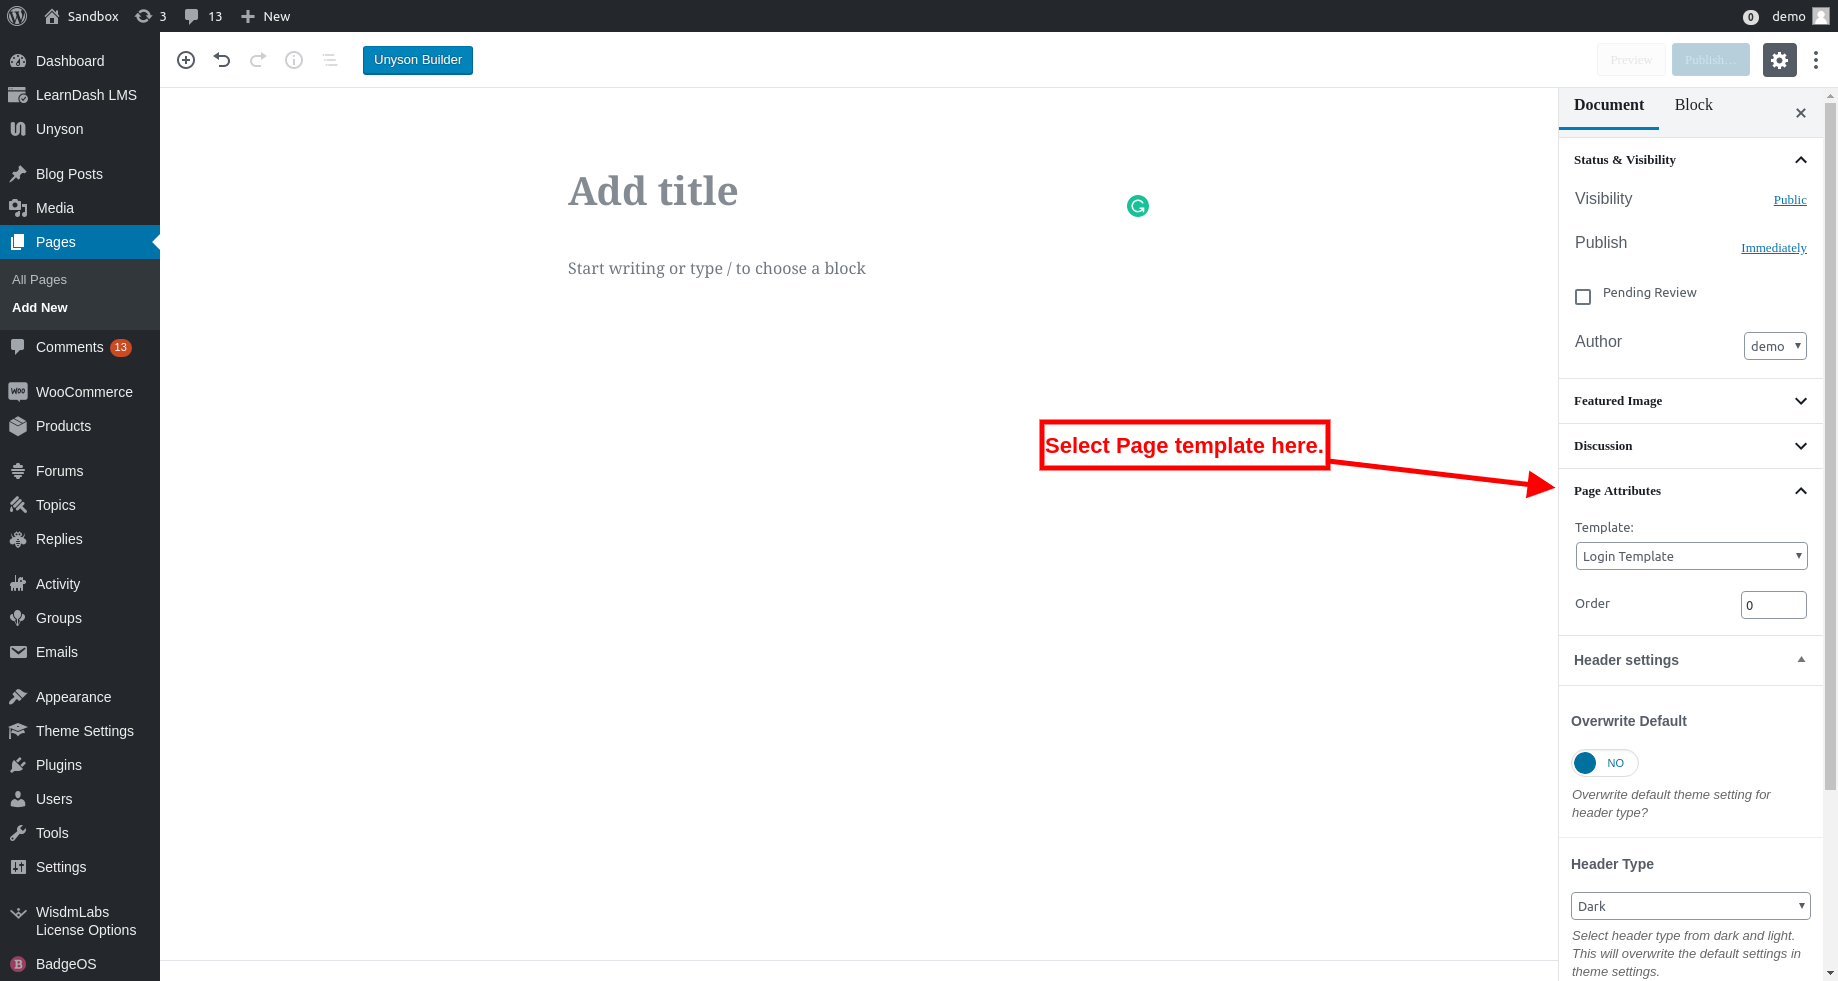
4. Now edit the page that you just created and select Front Page Template under Page Attributes.
5. Now that a static page has been set as the homepage, you can create the content using Gutenberg editor or a page builder of your choice such as Elementor.
6. Now click on the Update button.
7. Your Homepage setup is complete.
WooCommerce Setup
- Follow the standard WooCommerce setup process.
- Setup the shop, cart, checkout, and my account pages. (Refer this)
- Now edit the My Account page and select WC My Account Template in Page Attributes and click on the Update button.
BuddyPress Initial Pages Setup
- If you have installed and activated BuddyPress then the plugin itself will create all the necessary pages.
- You need to confirm this by navigating to Settings > BuddyPress > Pages tab.
- Now confirm that all the pages are selected in their respective dropdowns.
- If the pages are not selected then select them in the dropdown yourself.
- If they aren’t available in the dropdown then you will need to create the pages manually and then set them under the respective entries.

Page Templates
There are a variety of page templates available with the eLumine theme. Some of them can be used to generate a regular page. Others are for more specific cases.
Contact Us Template
This page template is used for eLumine’s Contact page.
If you have installed the demo content, then the contact us page is already setup for you.
For anyone who does not have the Contact page setup, follow the below steps to create it:
- Navigate to Dashboard > Pages.
- Click “Add New” button.
- Add an appropriate title for the page.
- Select Contact Template in Page Attributes > Template.
- Publish the page.
Full Width Template
Use this page template when you want your content to occupy the entire width of the page.
Sidebar Left Template
Use this page template when you want to display a sidebar on the left side of the content.
Sidebar Right Template
Use this page template when you want to display a sidebar on the right side of the content.
WooCommerce My Account Template
This template is used for the WooCommerce My Account page.
Custom Metaboxes
Other than page templates there are two other meta boxes available for configuration.
Header Settings
This meta box is used to override the theme wide header setting for a particular page. For example, if you have set a dark header in the theme settings but you wish to use a light header for a particular page, then you need to edit the page, set Overwrite Default to “Yes” and select the Header type.
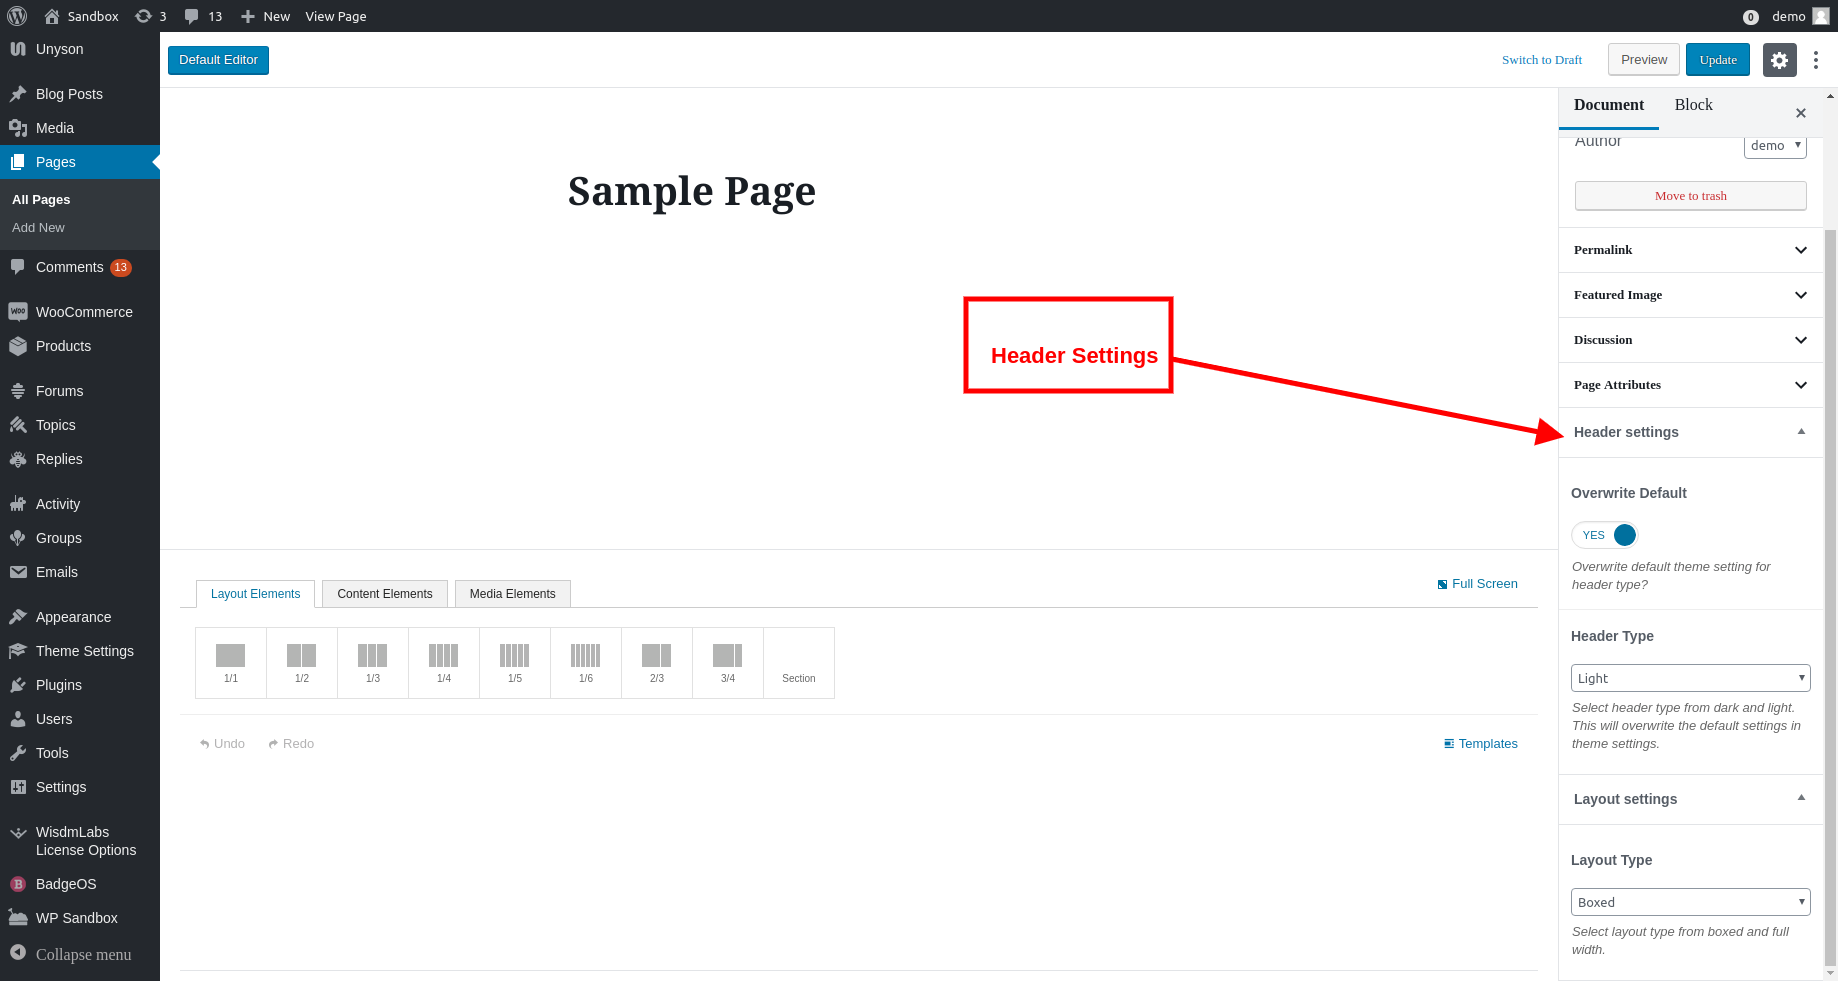
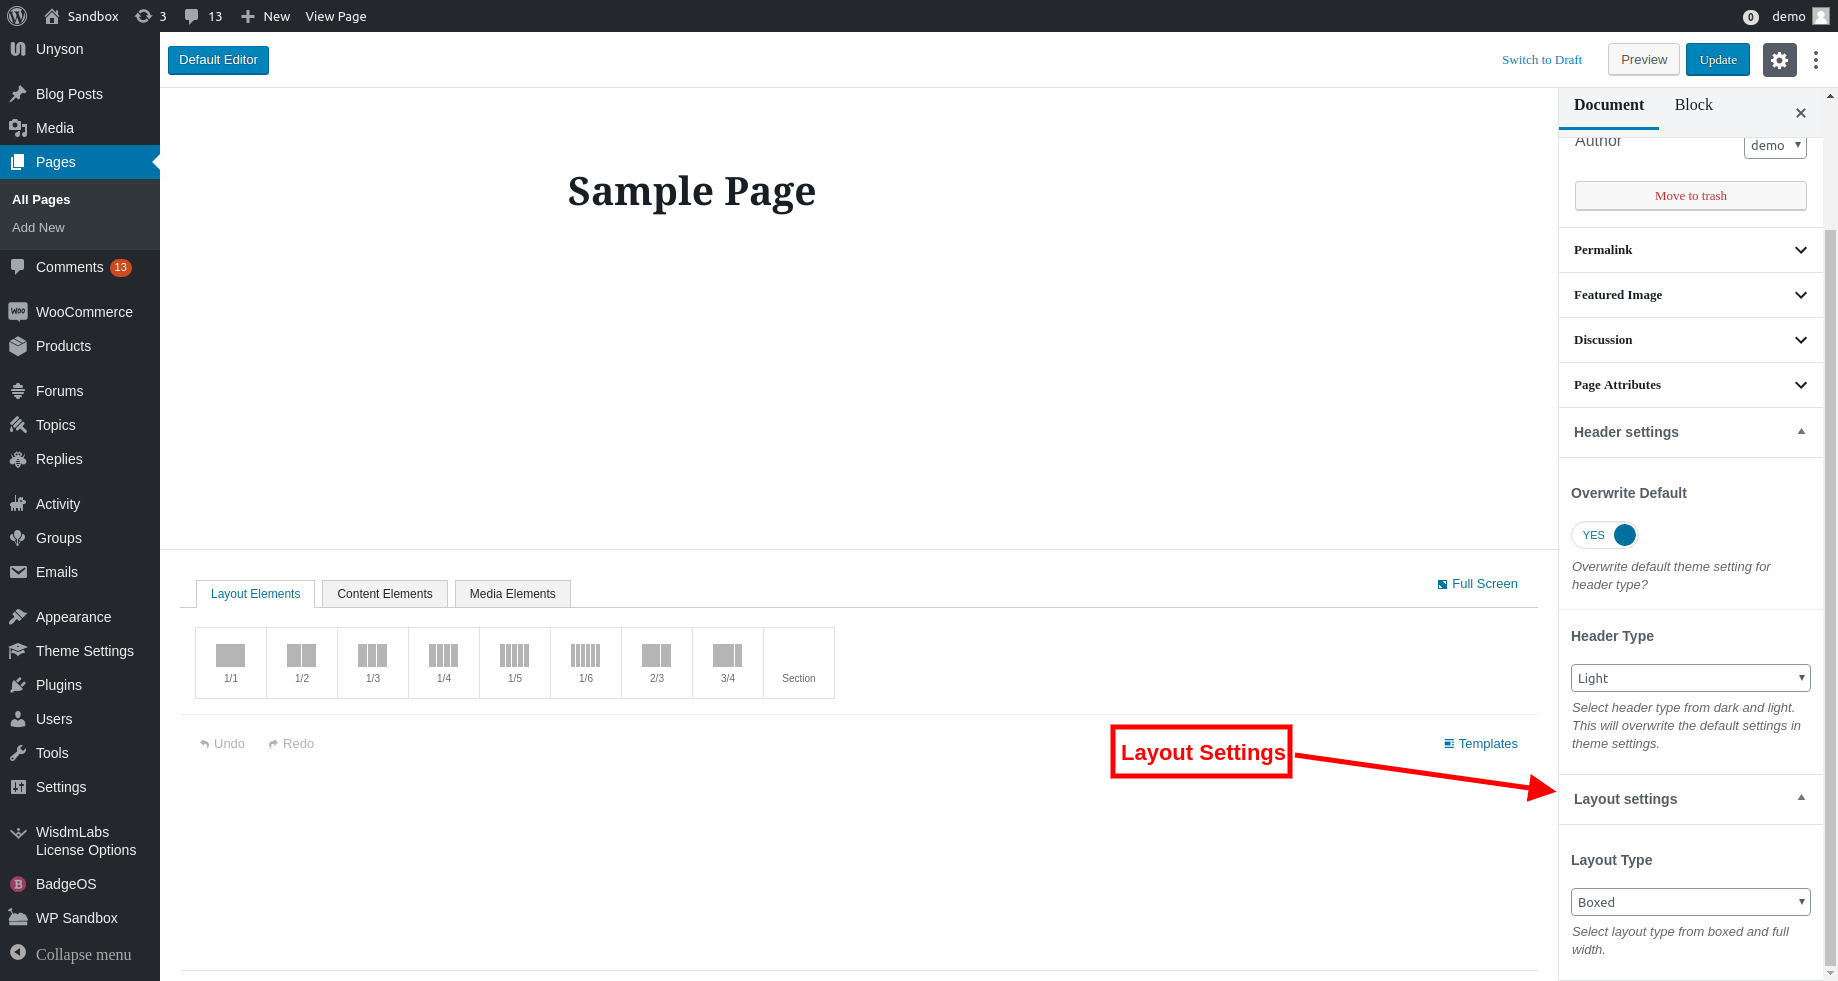
Layout Settings
This meta box is used to override the site-wide layout for a particular page.
For example, if you are using Boxed layout for your website but wish to use Full-Width layout for a particular page then change the layout type using the dropdown and it will override the theme wide setting for that page.