Installation
There are two ways to install any theme.
- Directly from the website dashboard or
- Using an FTP connection
Directly from the website dashboard
- Go to the Admin Dashboard of your website.
- Navigate to Appearance > Themes.

- Click Add New button.
- Now click on the Upload Theme button.
- Upload the zip file and click Install Now.
Please note that this method requires certain conditions to be met, such as the PHP Memory limit should be 256M and Max upload filesize should be 64M. Refer to this link for more details.
Using FTP Connection
- Unzip the theme zip file that you received. It should create an “elumine” directory in your system.
- Establish an FTP/SFTP connection to your website.
- Navigate to wp-content/themes directory on your server.
- Upload the “elumine” directory to the themes directory.
- After the successful completion of the upload process, open your website dashboard.
- Navigate to Appearance > Themes menu.
- Activate “eLumine”.
This is a full-proof method to successfully upload a theme and you shouldn’t face any issues when using this method.
Theme updates
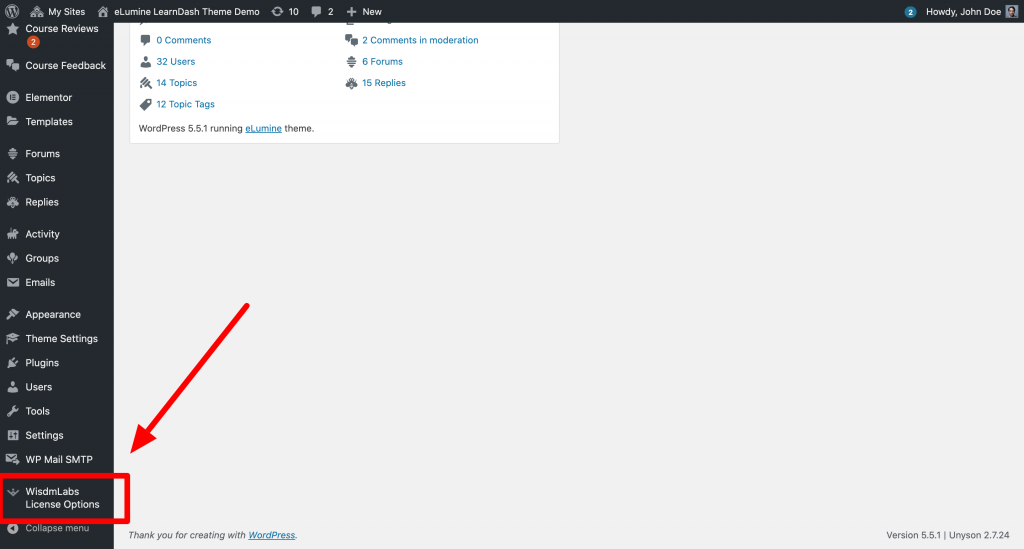
- Trouble activating theme? Contact us here – [email protected]. Once the theme is active, you should see a new menu item called WisdmLabs License Options.
- Open this page and enter the license key against eLumine theme.
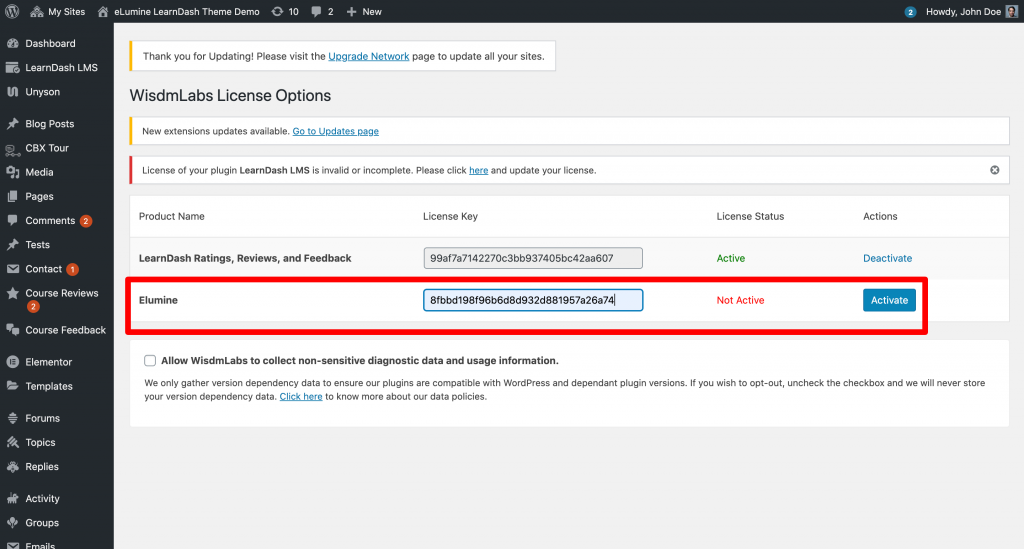
- Now, click Activate.
- You are now ready to use eLumine and will see notifications on the website whenever an update is released.
- Please remember to take a full backup of your website before updating the theme.
- Trouble activating theme? Contact us here.
Unyson Extensions Setup
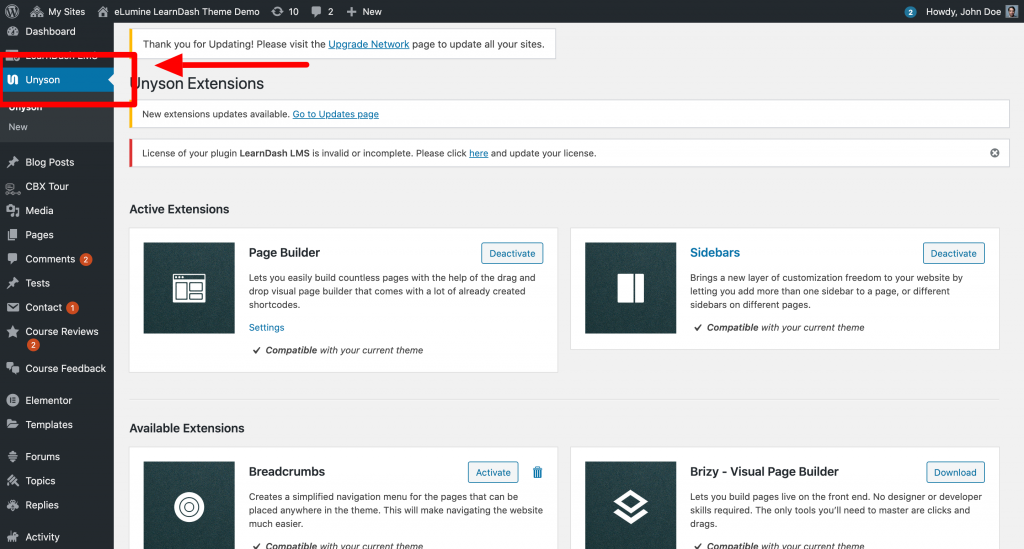
As soon as you activate the theme, you should see an admin notice at the very top of your dashboard which states something like Click here to install the theme compatible extensions.
Clicking on this will take you to the Unyson extensions page with the extensions listed.
Activate 1) Breadcrumbs and 2) Sidebars extensions.
Demo Content Install
Things to remember before installing demo content
- Always take a full website backup before installing the demo content so that you can easily restore the website to the previous stage if something goes wrong.
- LearnDash is a premium plugin and isn’t available with the theme. So, before you install the demo content, make sure that you have installed and activated LearnDash.
- If LearnDash plugin isn’t active when installing demo content then LearnDash related data (such as courses) will not be imported.
- Make sure that your uploads directory has standard WordPress file and folder permissions i.e., the theme should be able to download and save files(images, etc.) in the uploads directory.
- If you want to install content related to the BuddyPress plugin, please make sure that the plugin is active before starting the demo setup.
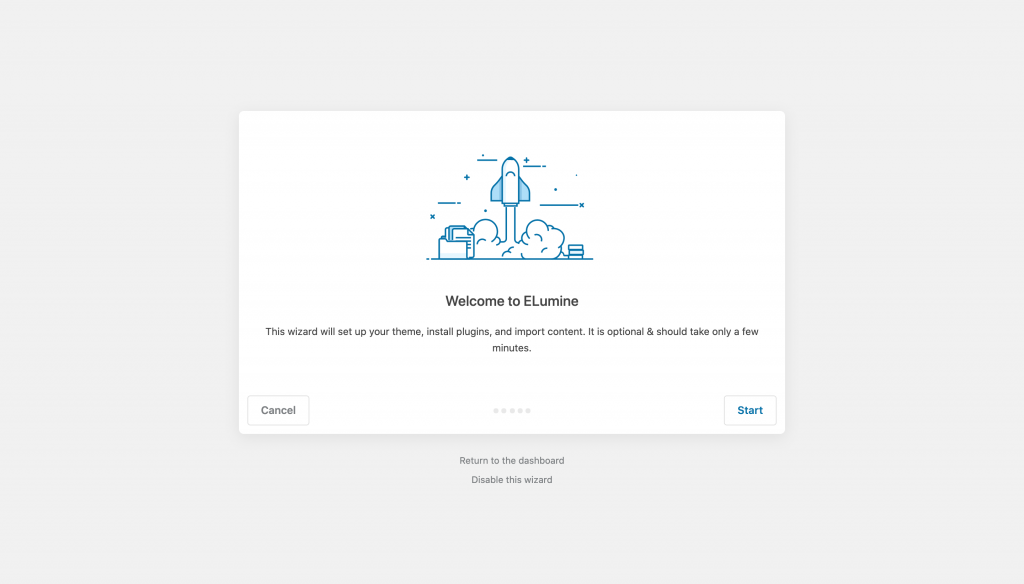
Demo Installation
Please read the following steps for more details on the demo installation process.
You can opt not to use eLumine’s website with reset content and use an external plugin such as WP Reset. If you have already reset the content with such plugin then you can directly use Full Install without Website Reset mode.
You can launch the demo content installer by navigating to Appearance > Theme Setup menu.
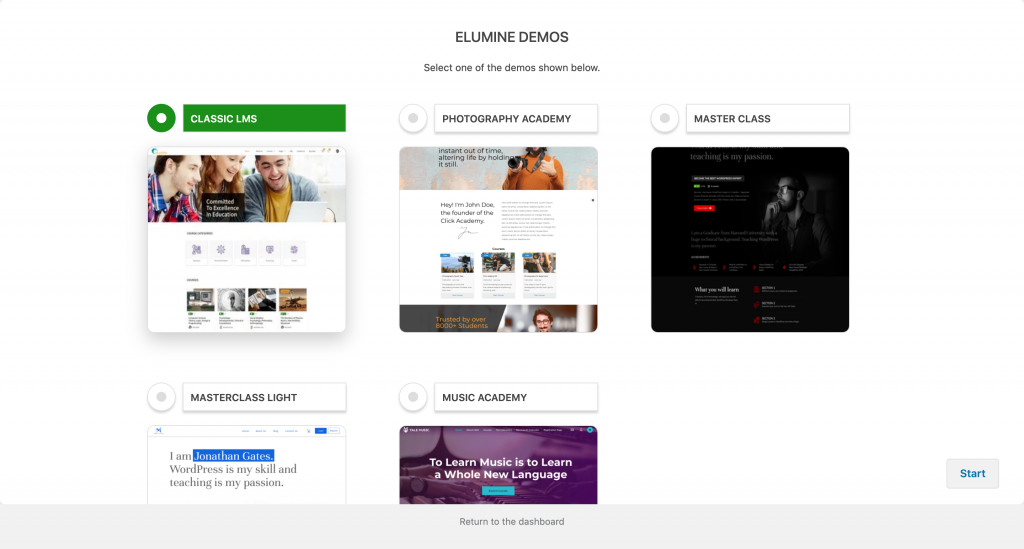
Currently, there are three different demo contents available on the website based on your requirements.
- Classic LMS Demo
- Single Instructor LMS Demo (ex. Photography Academy)
- Master Course LMS Demo (only 1 master course in the entire website)
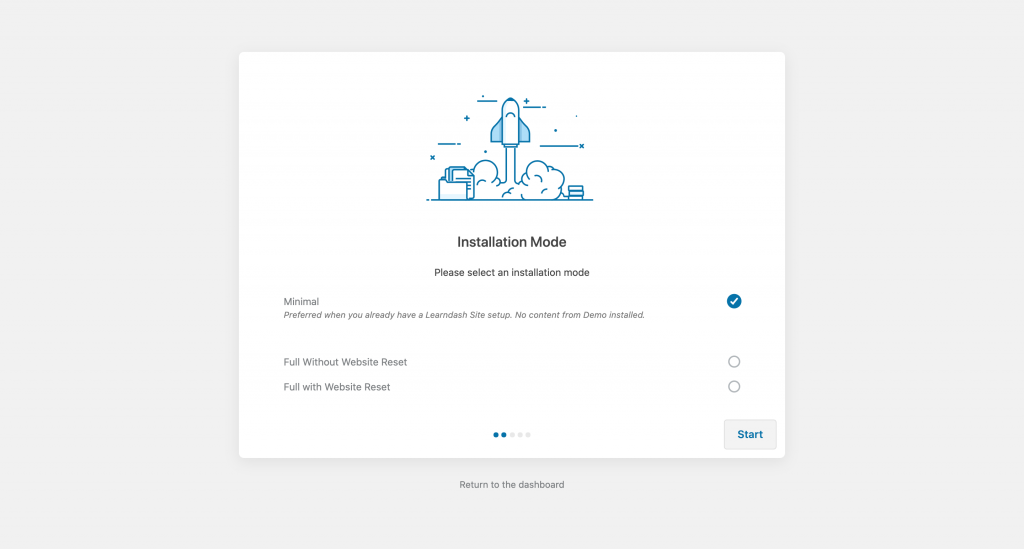
There are three ways in which you could install demo content depending on your requirement.
Minimal: You don’t really need the courses, products, etc. but only want the most basic things such as menus, theme settings, sample pages, widgets, etc.
Full Without Website Reset: This will import the entire demo content to make your website look exactly like eLumine’s demo site. If you have an existing website then it will not erase existing data but create a new one.
Caution: This is not ideally recommended as the demo content has been designed for websites that do not have existing content. As you might face several issues, for example, Course-Lesson association might be lost in the demo courses imported and some similar issues, taking a database backup is strongly recommended.
Full With Website Reset: Erases all the existing content and replaces it with new content.