A pre-configured Reports Dashboard is created on your site once you have installed and activated the WISDM Reports for LearnDash. You can find this pre-configured dashboard on your WordPress admin area under Pages > All Pages > LearnDash Reports.
You can control which user roles can view this page on your site from the WISDM Reports for LearnDash tab > Settings tab on your admin area.
To recollect, this pre-configured reports dashboard launched by the activation of the WISDM Reports for LearnDash on your site can only be viewed by the user roles you have selected in the Settings Tab as mentioned above.
Having mentioned that, you can also create multiple Reports Dashboards for different user roles with WISDM Reports.
Example: If your business case requires you to show different sets of LMS Reports to three user roles, let’s say:
- Admin – needs to check all LMS reports.
- WISDM Instructors – needs to check revenue reports and course completion reports.
- Group Leaders – need to check all Course-related reports and need to export reports.
In this case, you can easily create different Reports Dashboards for these user roles by following the steps mentioned below:
- Create multiple WordPress pages from Pages > Create New Page on your WordPress dashboard.
- In each page click on the block inserter or the ‘+’ icon on the WordPress Edit Page and add the blocks for respective user roles.
- For example, if you are creating the Reports Dashboard for the admin, you can simply add the entire Reports Dashboard Pattern by clicking on the block inserter > Patterns > Select LearnDash Reports.
- Similarly, if you are creating a Reports Dashboard for the Instructor you can click on the block inserter and add the blocks that represent the Revenue Reports such as Total Revenue Earned, Revenue from Courses, etc.
- Once you have added the necessary blocks/reports for the respective user roles, publish the page.
- Now you can share the URLs of these dashboards with the intended user roles. For eg., the link to the Reports Dashboard for Instructors can be shared with them to access and check reports whenever needed and the same can be done for Group Leaders.
Do you wish to restrict these Report Dashboard Pages you have created from other user roles? Here’s what you can do:
- Once published, install the Content Control Free WordPress Plugin and activate it.
- Once activated, navigate to the Settings Tab of your WordPress Dashboard > Content Control.
- Now, on the Restrictions tab, click on Add a Restriction and the Restrictions Editor will popup as shown in the screenshot below:
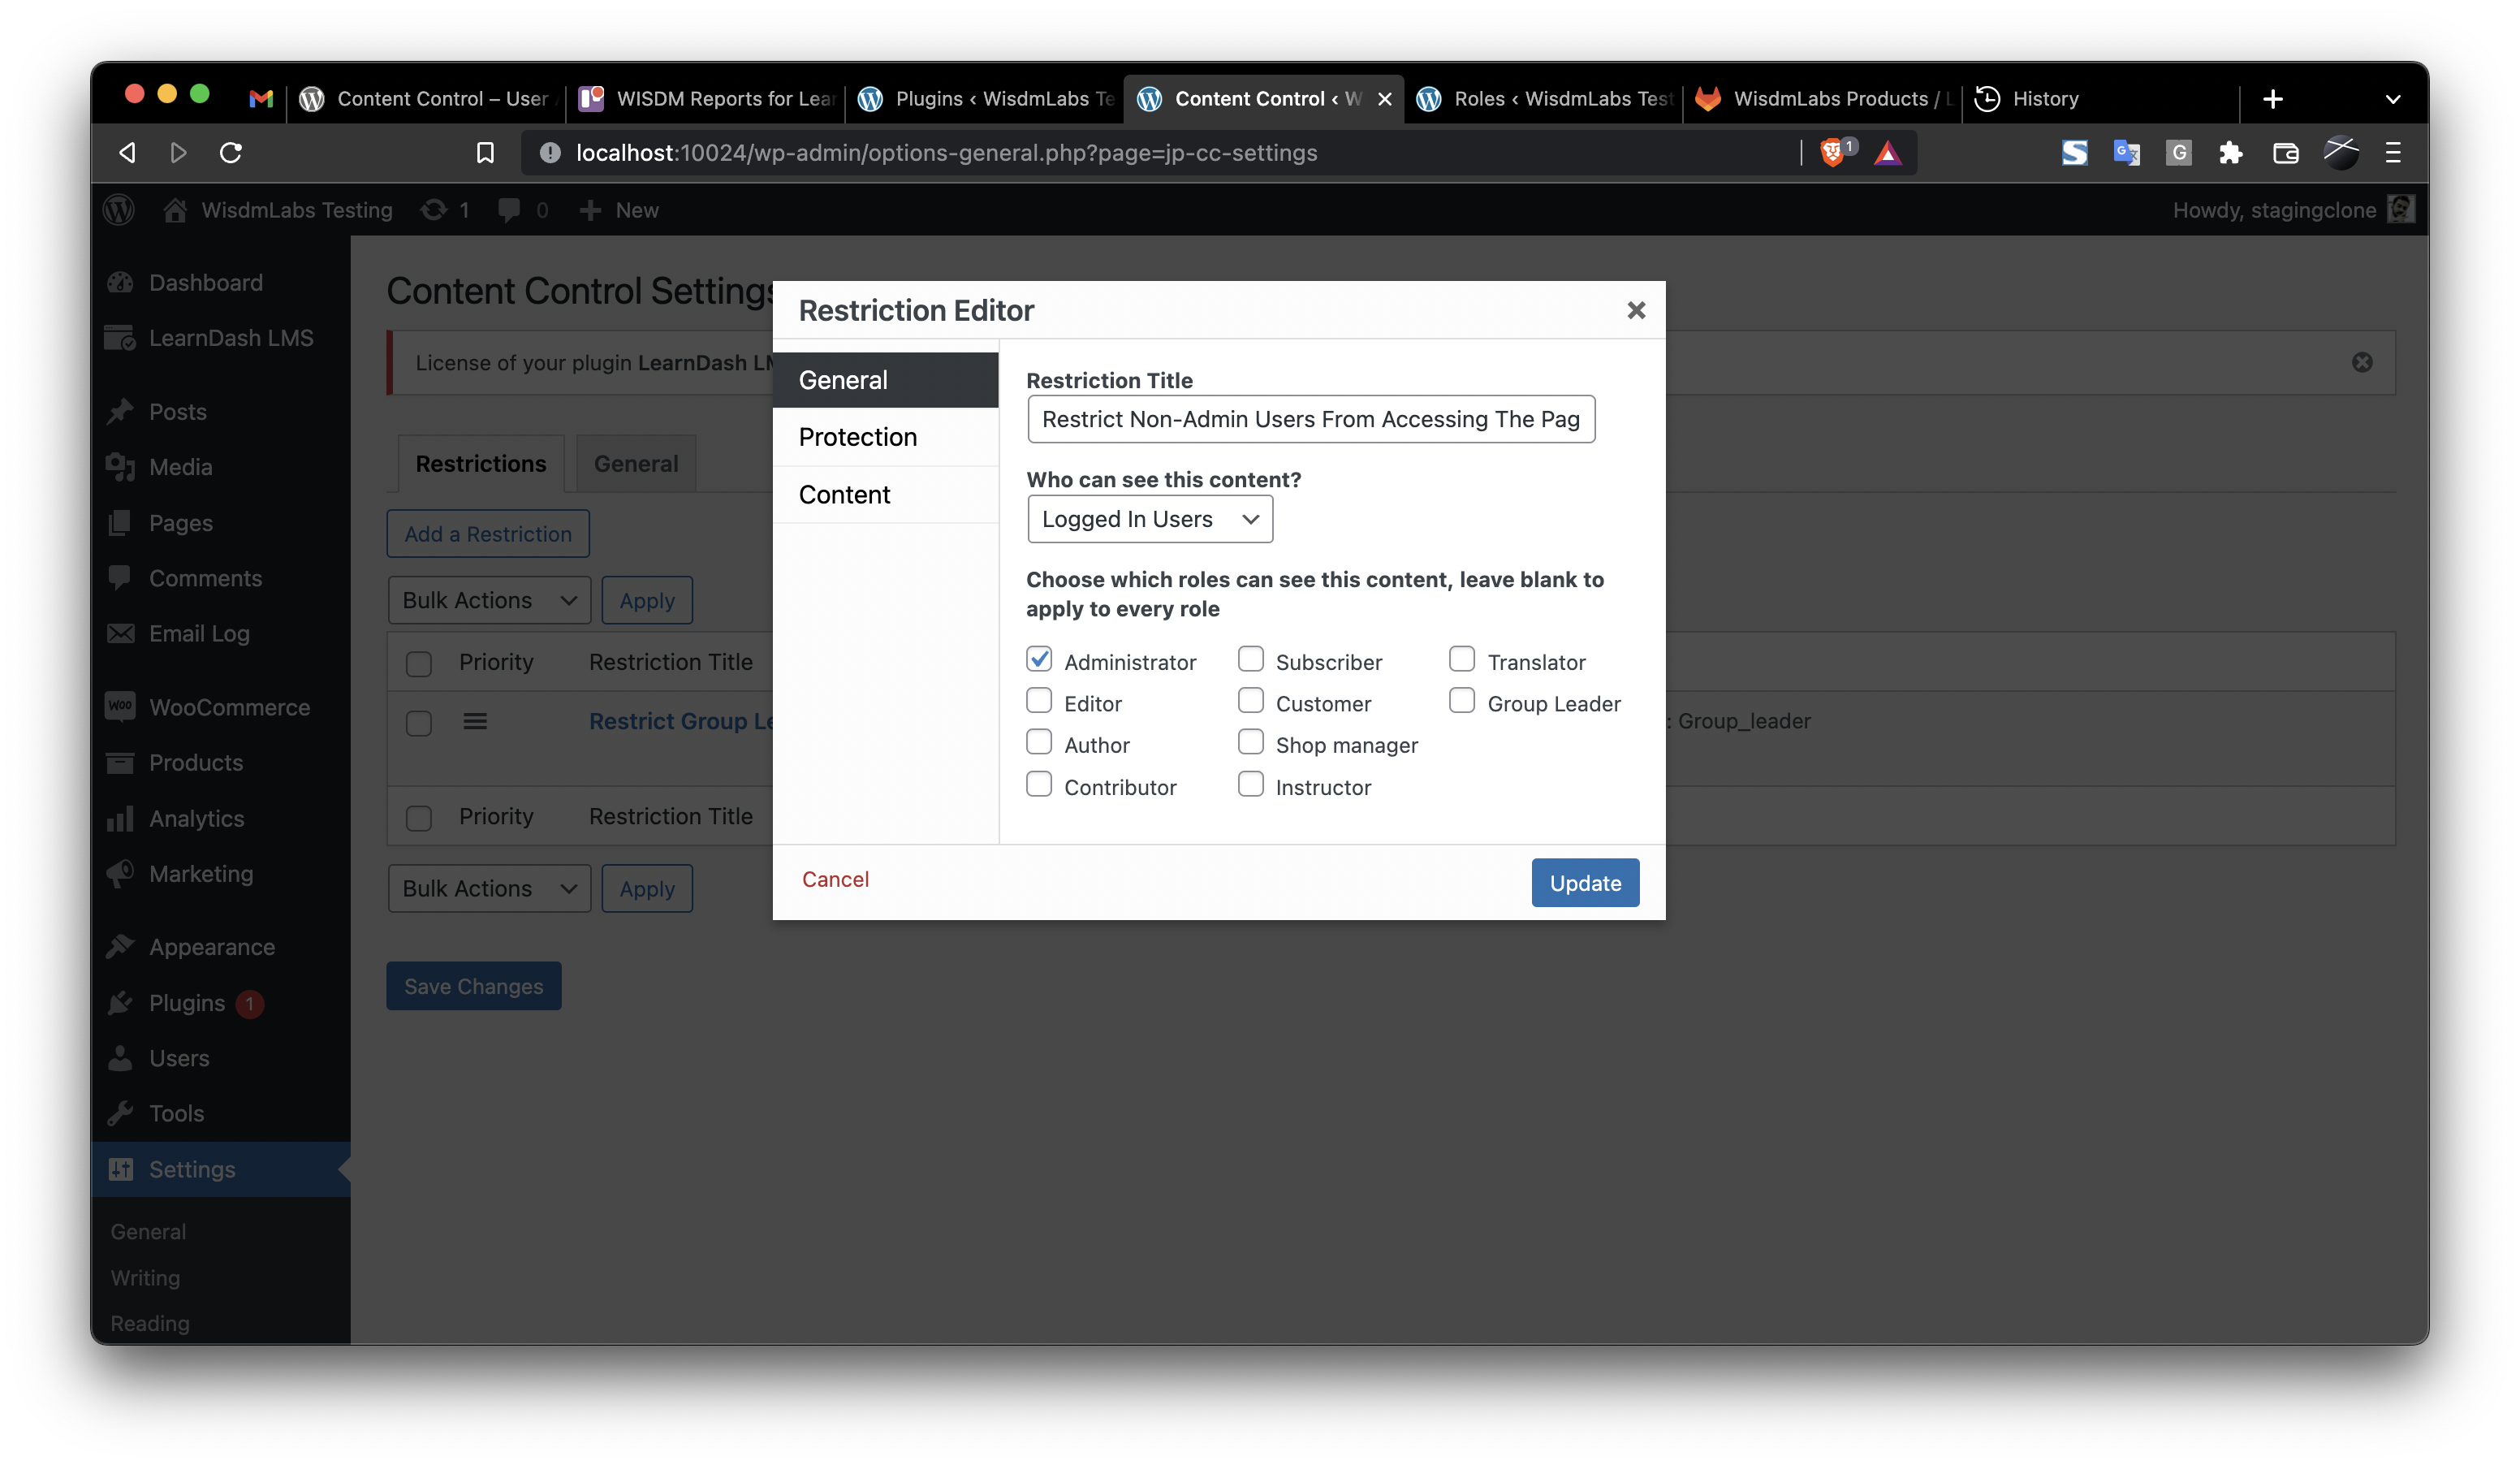
- Here you can add the title of the message you wish to display when an unwanted user visits the Reports Dashboard and also select whether logged in or logged out users can view the page. You can also select which user roles will be able to access the page.
- Once you have selected the user roles who can view this page, click on update and go to the Protection Tab as shown in the screenshot below:
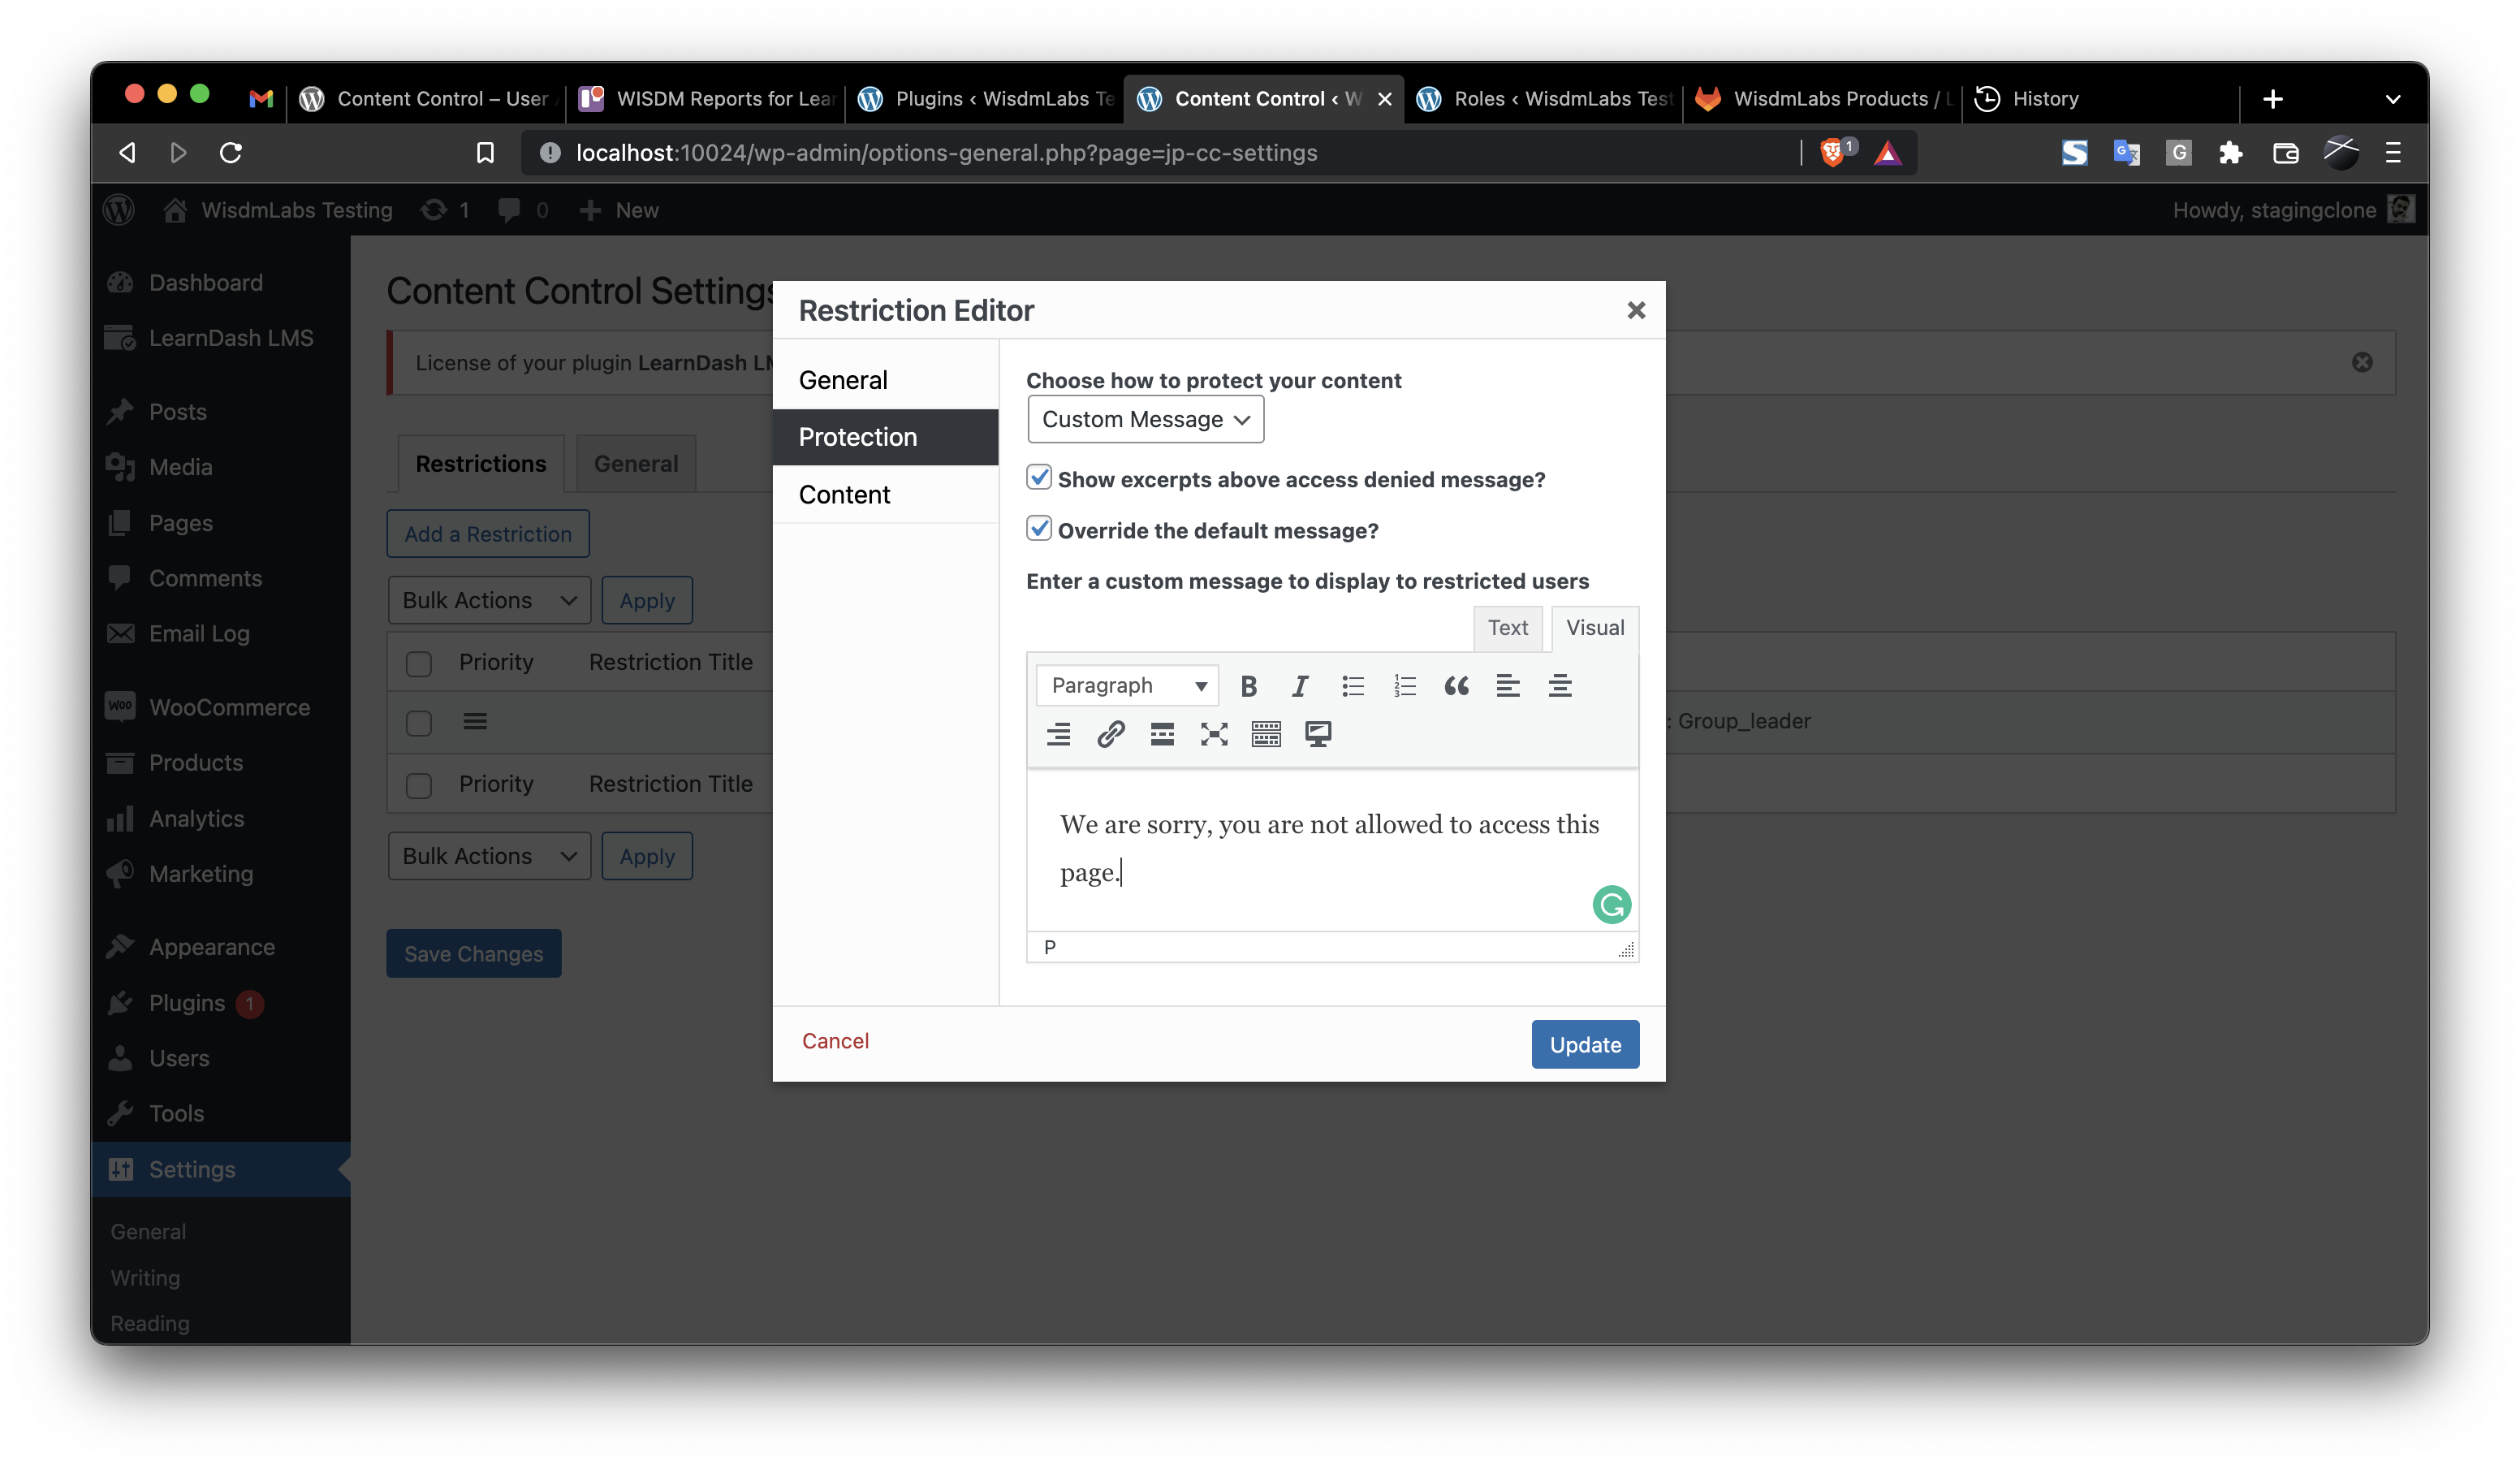
- Here, you can customize the message to be shown to restricted users with a bunch of settings.
- Once this is done navigate to the Content Tab as shown in the screenshot below:
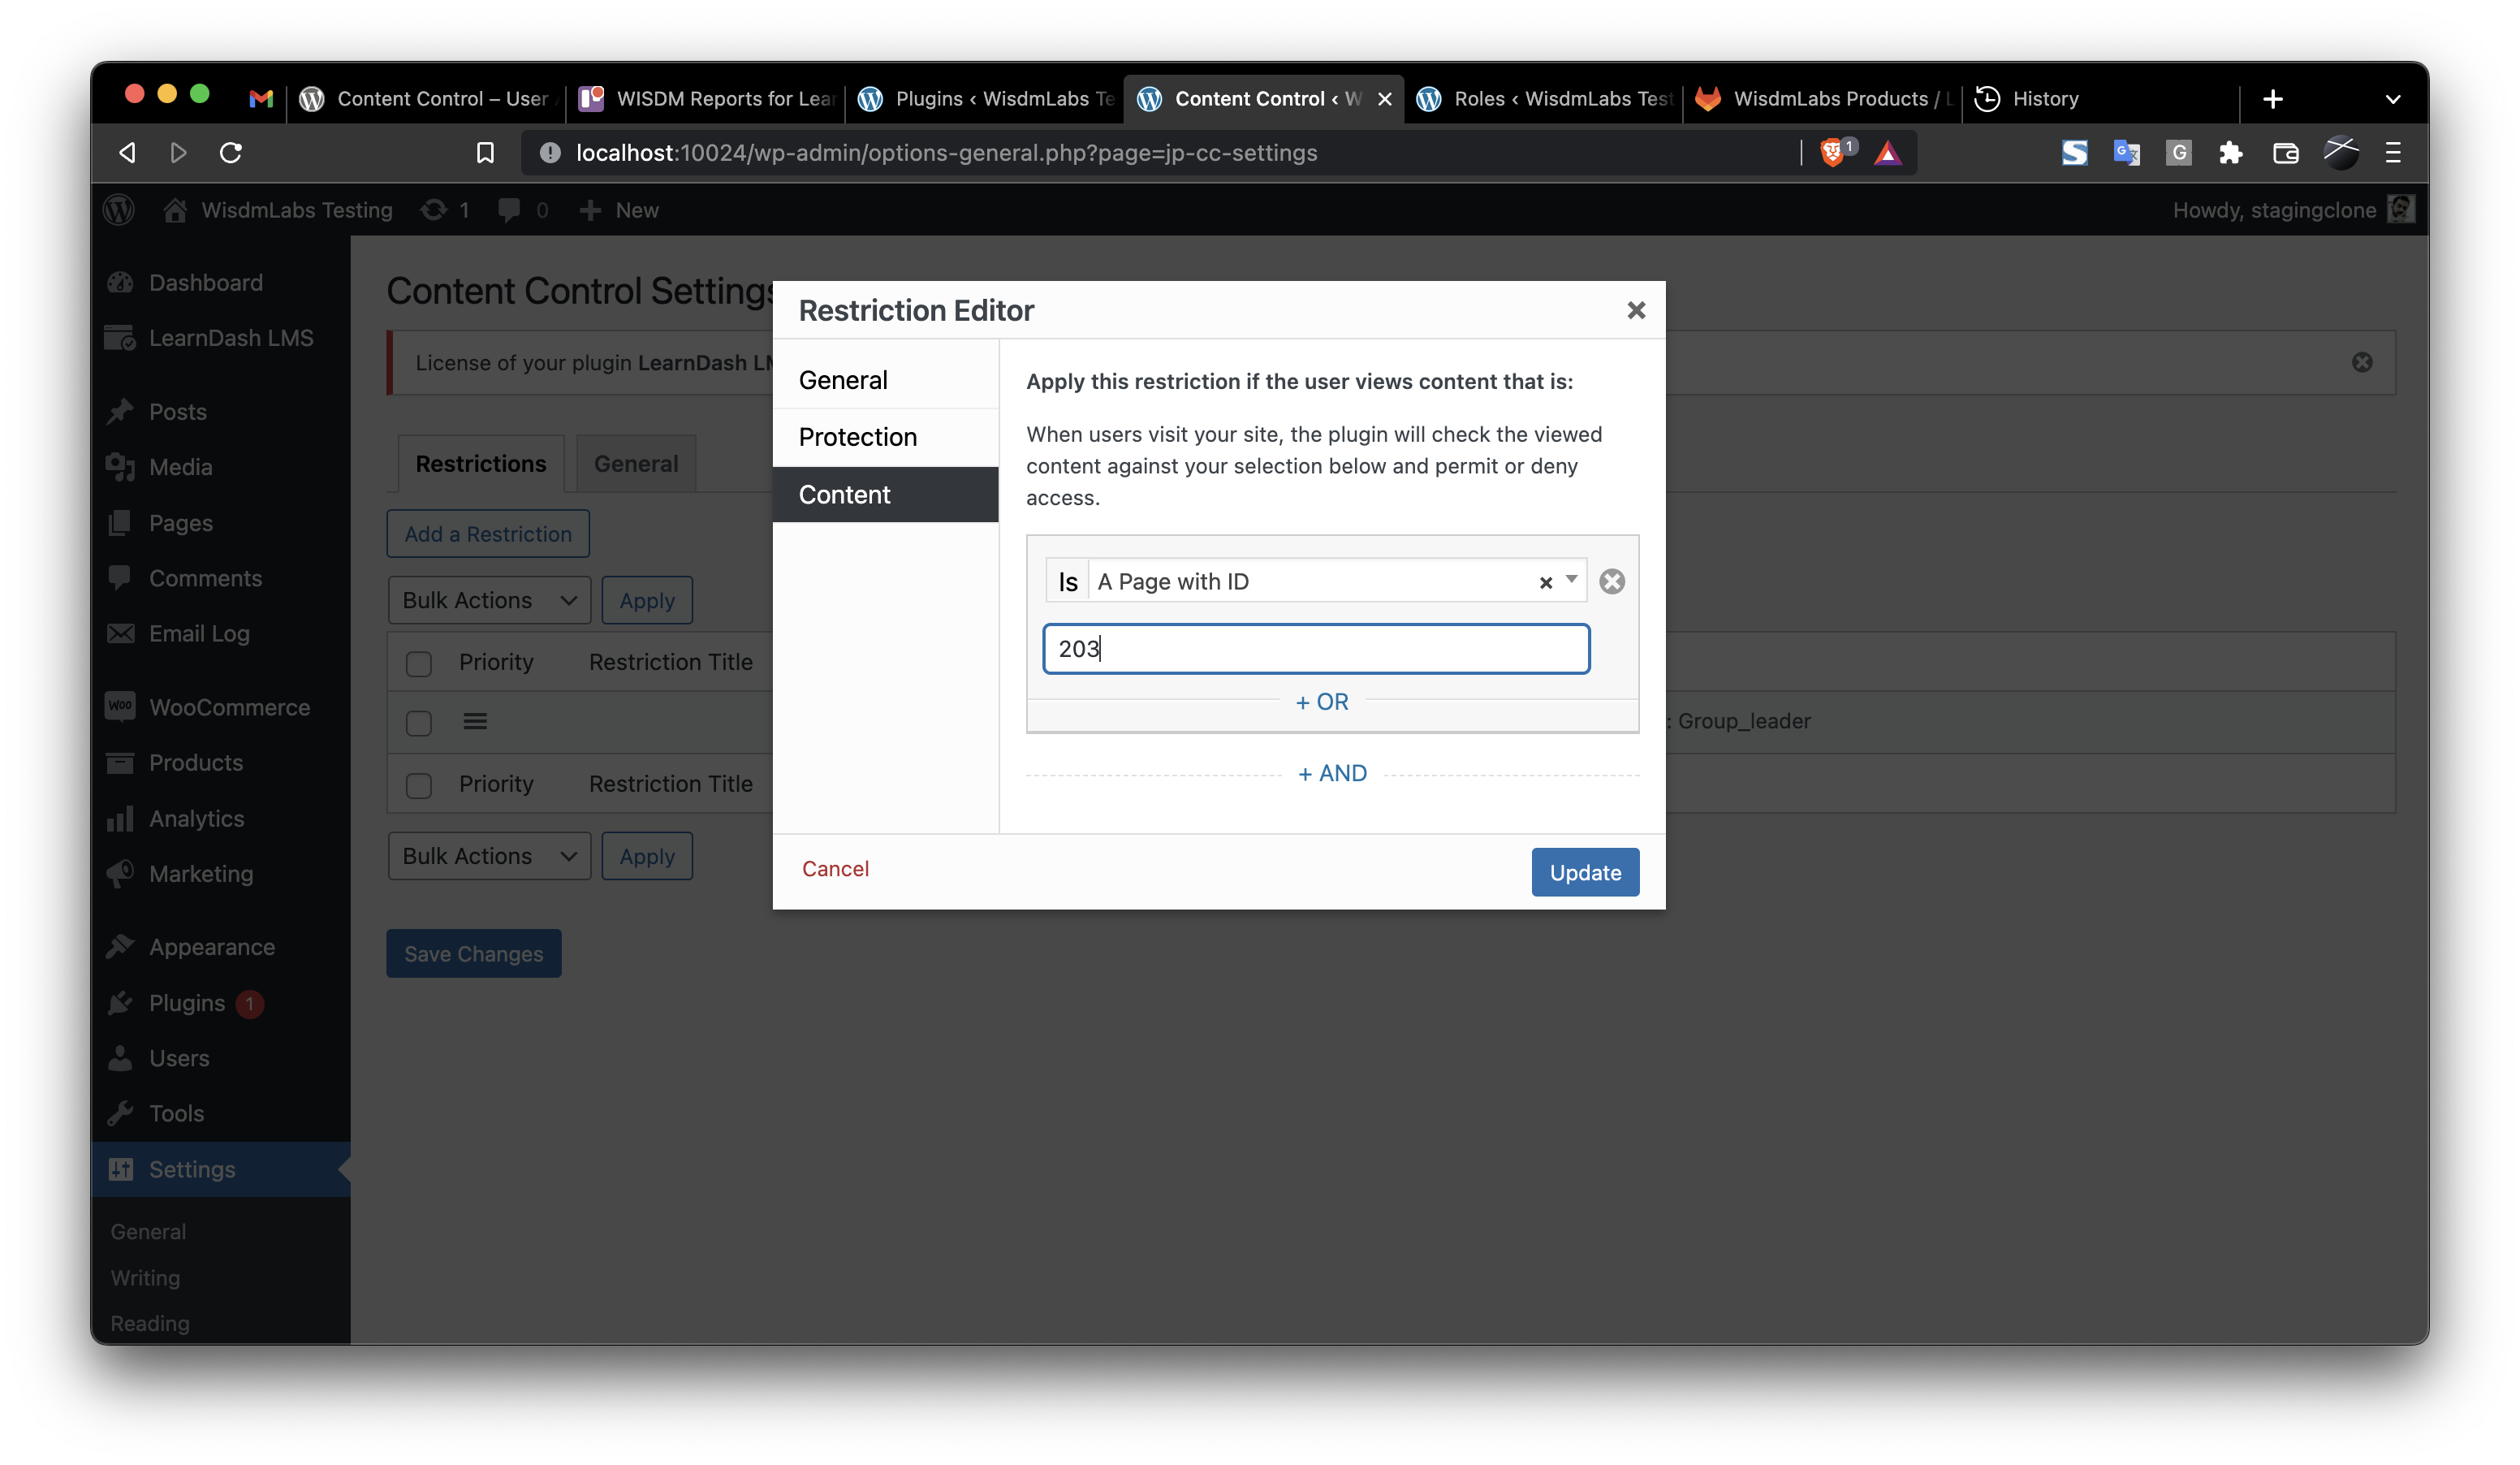
- On the Content Tab, select the condition as “Is a Page ID with” and enter the page ID of the newly created Reports Dashboard (as mentioned in the steps above).
- For example, if you are adding the restriction for the Instructor and the Reports Dashboard you have created for Instructors, you will need to add the ID of this new page you have created with the Reports for the Instructor and select the user role Instructor under the user roles who can access the page.
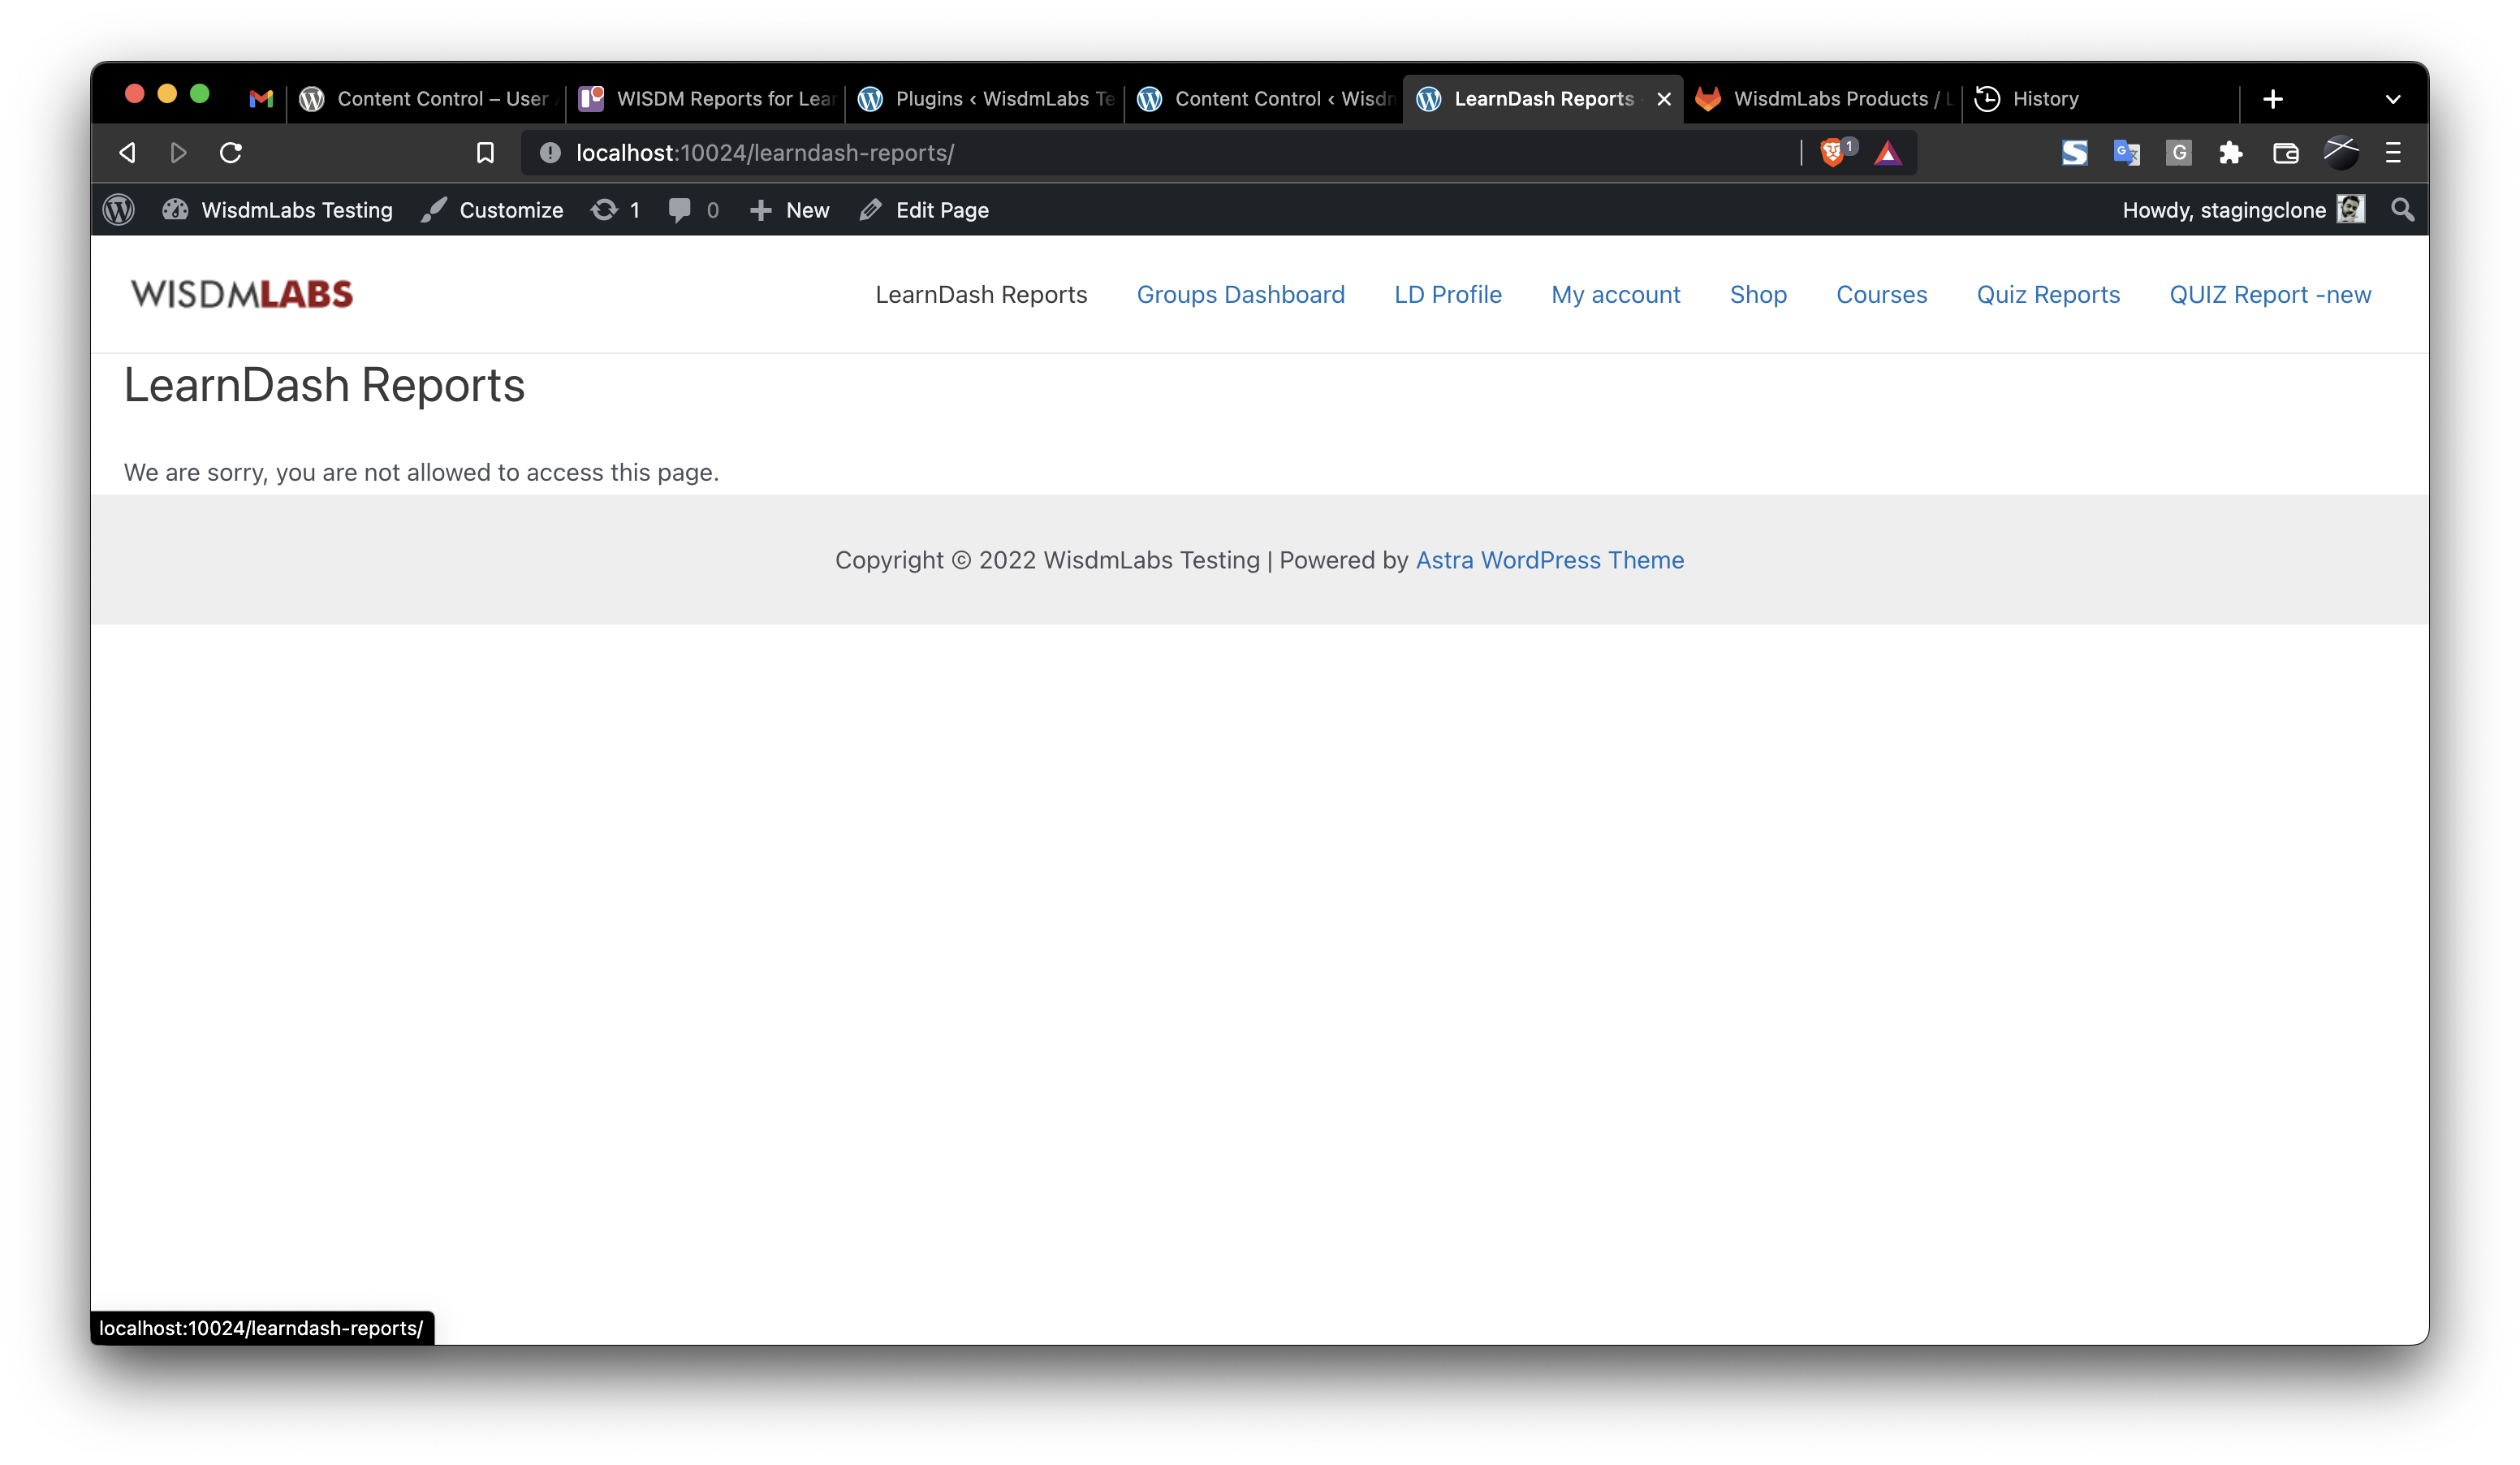
- Once this is done click on Update and as shown below, whenever another user tries to access this page, they will be restricted.
This is how you create different Reports Dashboards for different user roles and make sure only the specified user roles can access their respective Reports Dashboards.