Plan on using WooCommerce for payments? Here’s how to configure Group Registration with it:
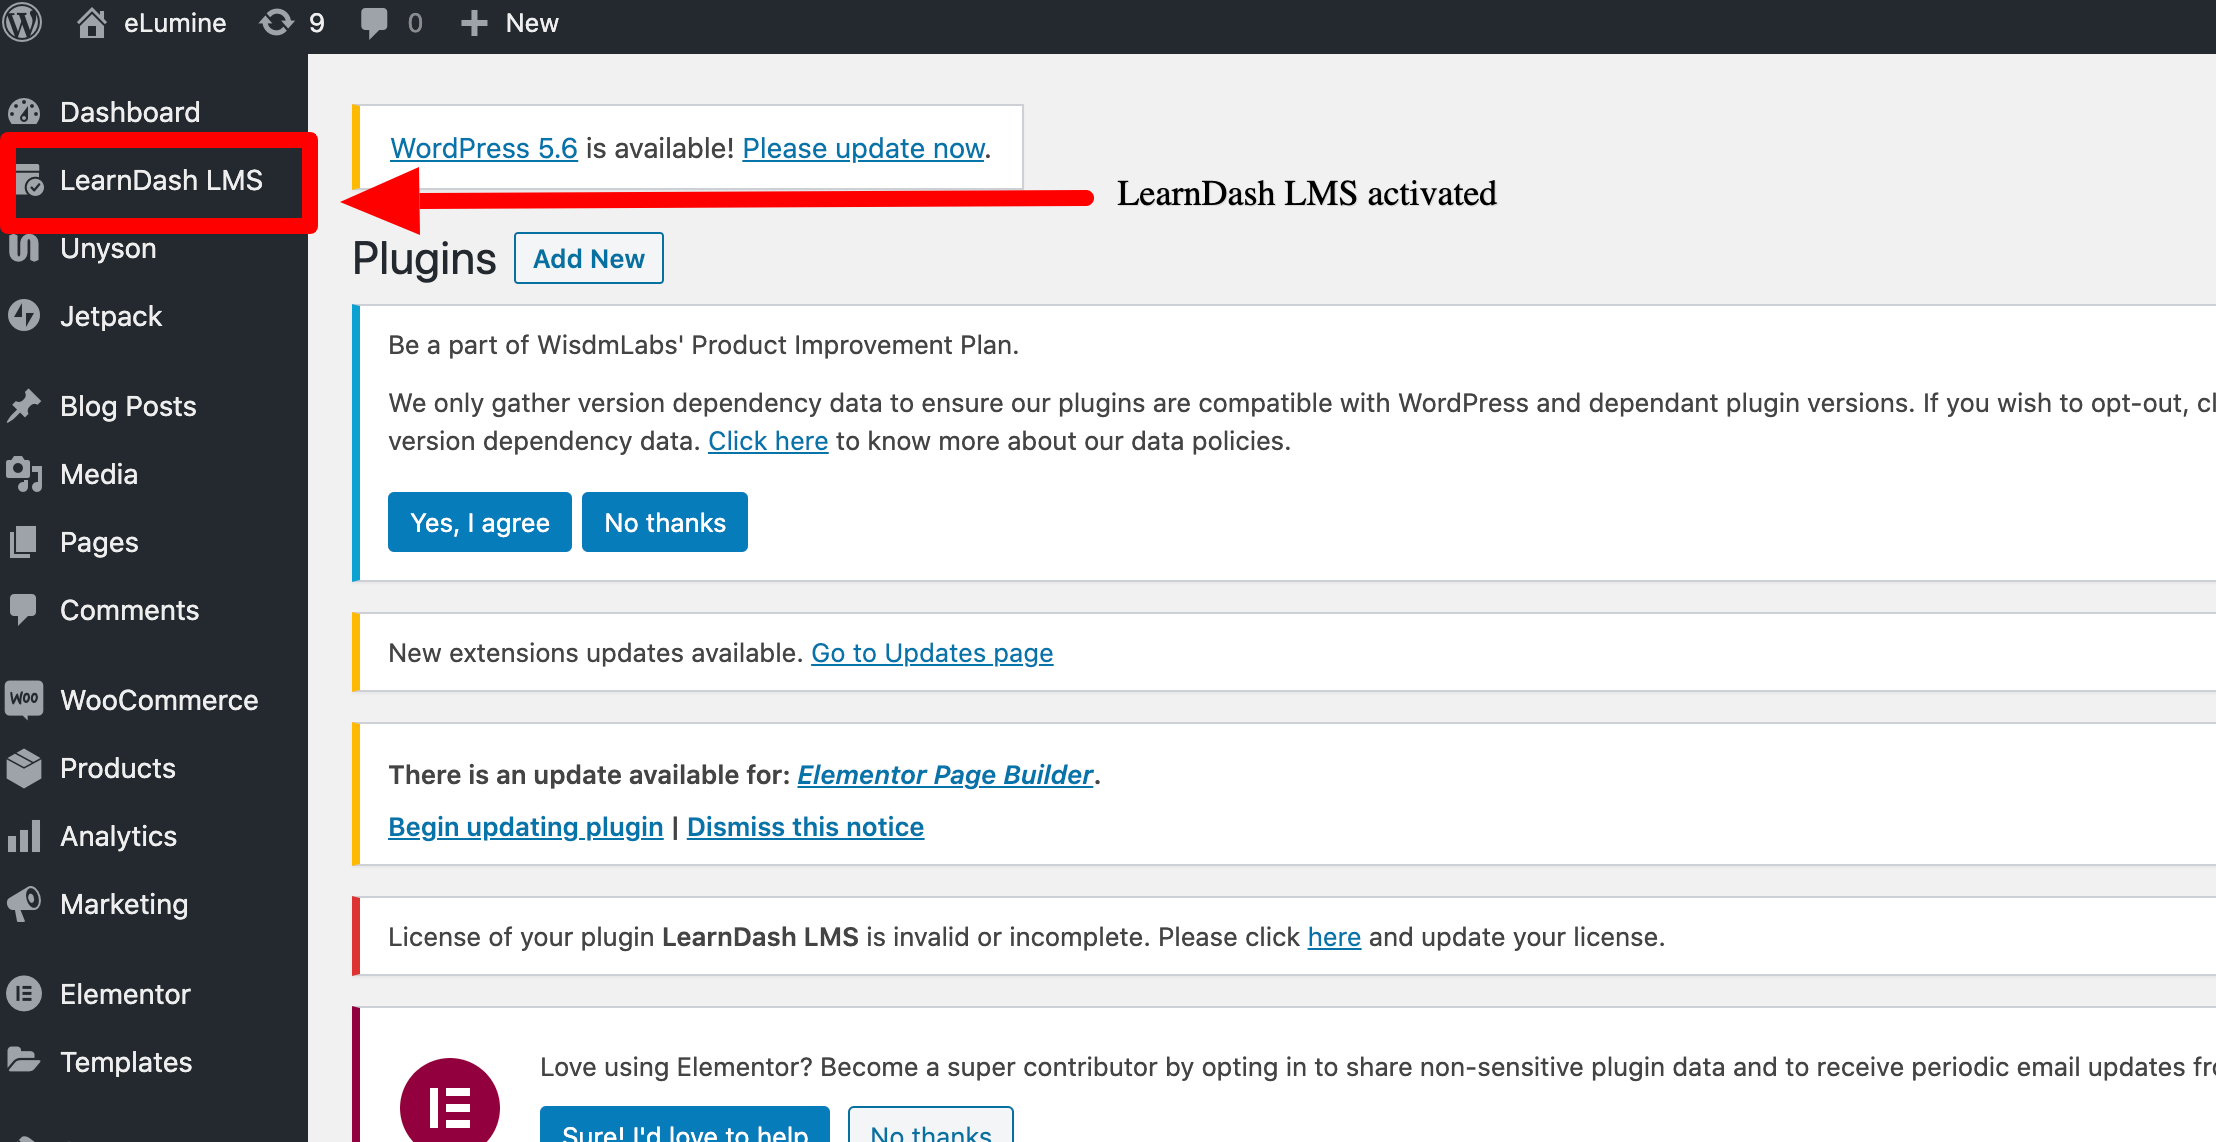
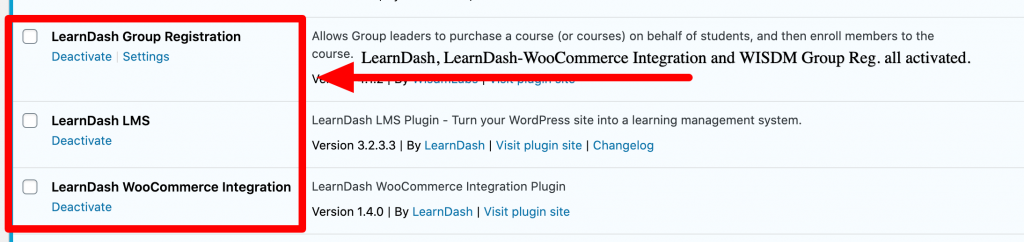
- Make sure your LearnDash LMS plugin is installed and activated.
- Enter and activate the License Key of the LearnDash LMS plugin.
- Go to the Plugins tab > Search for the LearnDash-WooCommerce Integration plugin.
- Install and activate the LearnDash-WooCommerce integration plugin.
- Now install the Group Registration plugin and activate it.
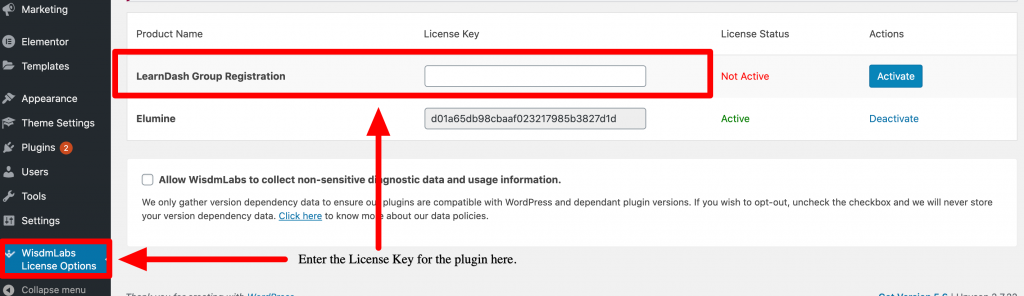
- Navigate to Wisdmlabs License Options Tab > Enter and activate the License Key of the Group Reg. plugin.
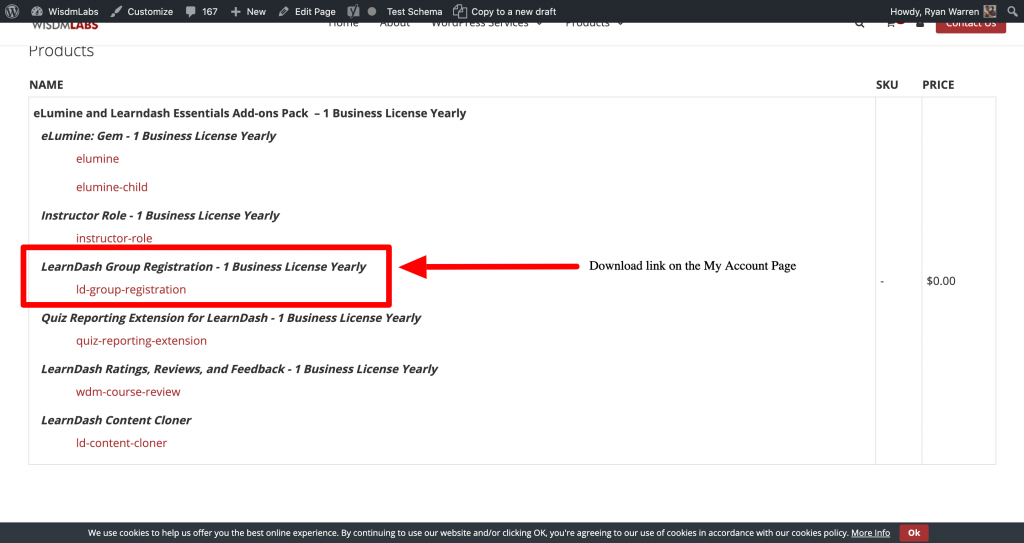
- You will find the License Key and the link to download the plugin .zip in the post-purchase email or on your My Account Page of your wisdmlabs.com account.

Now that you have set up all the required plugins, here’s how to set up your Group Registration:
Create a Product:
- Make sure you have followed all the steps of the WooCommerce set up guide (is activated when WooCommerce is activated)
- Now you are ready to start creating Products.
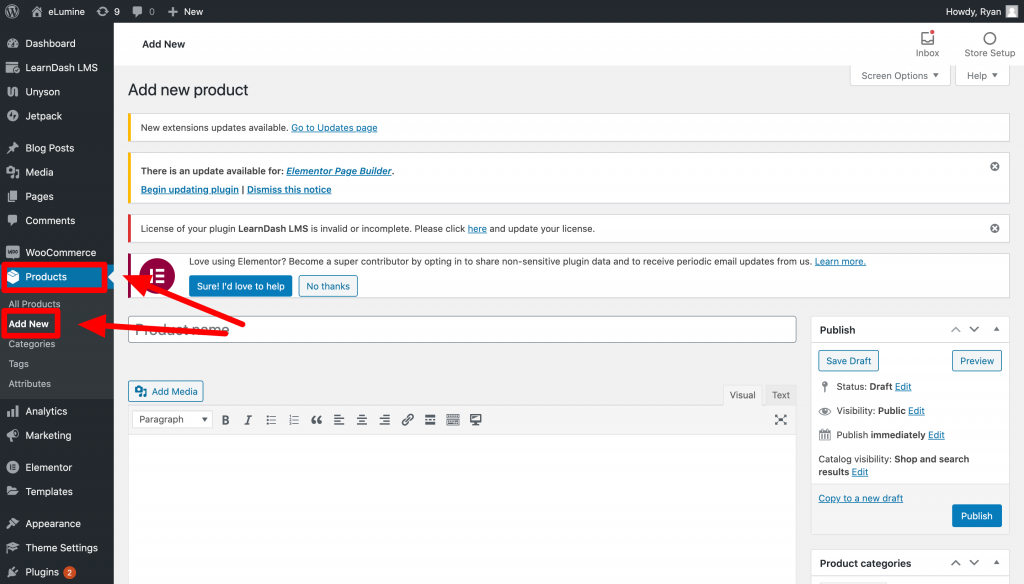
- Navigate to “Products” > “All Products” > “Add New”.
- Add the name of the Product.
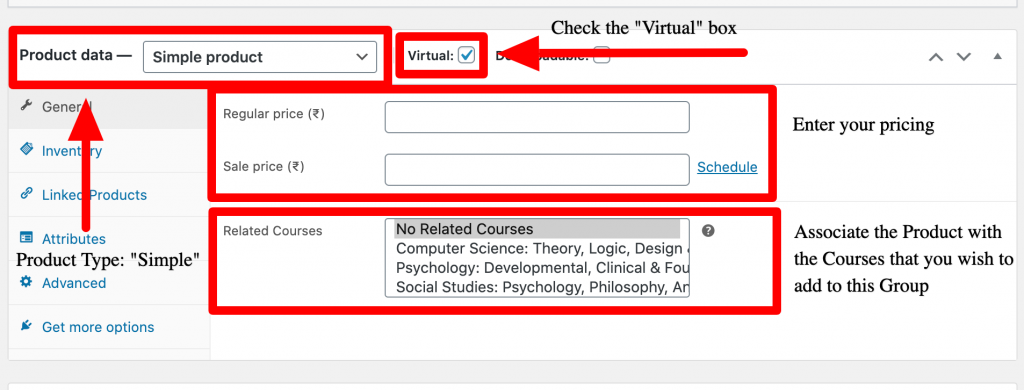
- Select the Product Type as “Simple Product”.
- Select the ‘Virtual’ checkbox next to Product type.
- Fill in the price details.
- From the “Related Courses” Section, associate the Group Product with the Courses you wish to add to this Group.
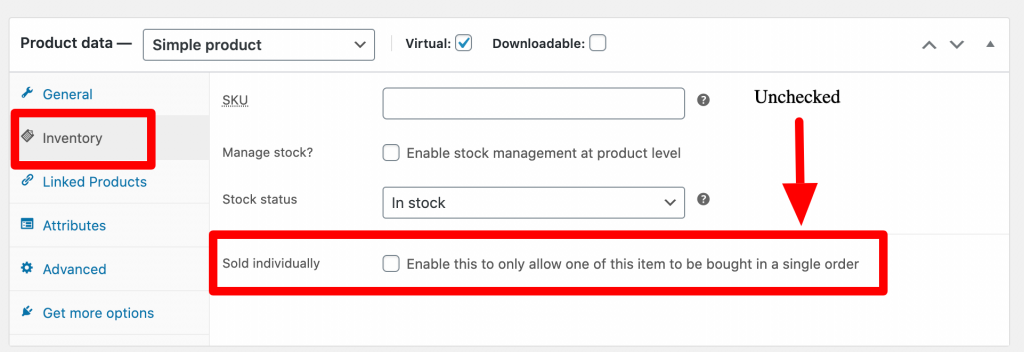
- Go to “Inventory” > Make sure the “Sold Individually” checkbox is unchecked.
Group Registration Settings:
- Once you have completed the steps above, scroll to the bottom of the Edit Product Page.
- There is a checkbox called “Enable Group Registration” checkbox.
- Check that setting and a bunch of other settings will appear.
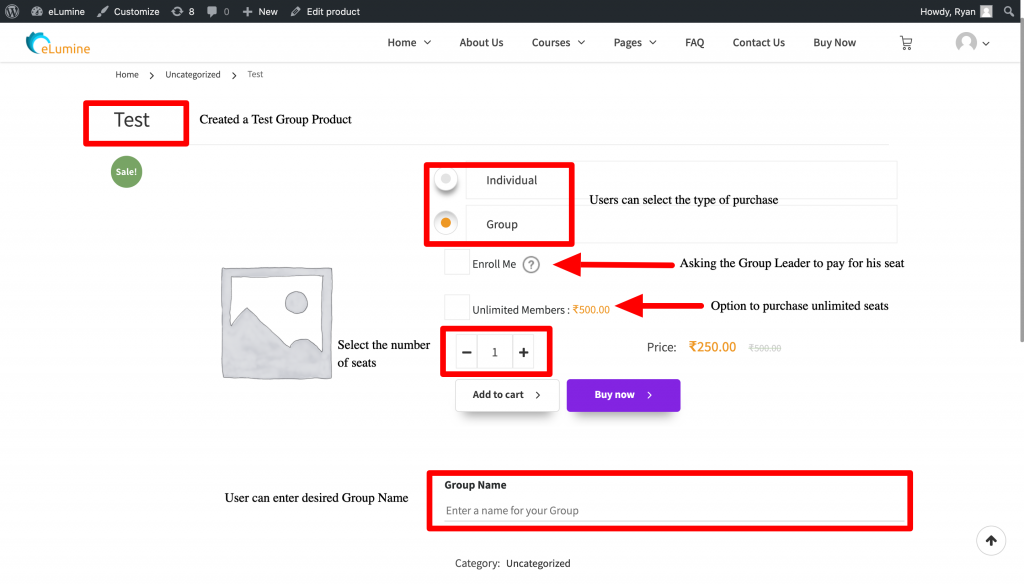
- The “Allow users to check ‘Enable Group Registration’ on the Front End” will allow the users to select whether they want to purchase an Individual or a Group Product when they visit the Product Page. (Note: If the Group Leader wishes to add more seats to his/her Group, he/she will just need to purchase the required number of seats of the same Product.)
- The “Ask Group Leader to pay for course access” setting will force the Group Leader to pay for his/her seat as well.
- The “Unlimited Members” Setting allows the user to purchase unlimited seats, and also allows you to enter a price for the same.
- Once you have configured these settings according to your specifics, you can go ahead and “Publish” the product.
- Your Group Product is now ready.

How to create a LearnDash Group with the WISDM Group Registration Plugin and how to assign a Group Leader?
- Once the product is created and published, you are ready to view the Product on the front-end and so are the users on the site.
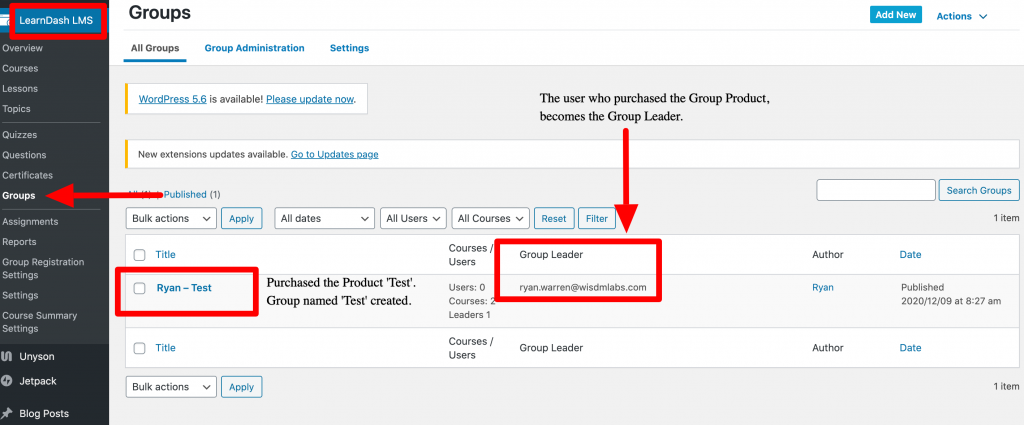
- Once a user purchases the “Group Product” created by you, that specific user becomes the Group Leader.
- Once the purchase is complete, a Group (with the Group Name if the user has entered it) with the default name same as the Product is created. This happens automatically.
- You can check the auto-created Group on the backend of your WordPress under ‘LearnDash LMS’ > ‘Groups’.
How and from where can Group Leaders View and Manage their Groups?
- Once you activate the WISDM Group Registration Plugin, a Page (in your WordPress backend, under Pages > All Pages) is created automatically with the name “Group Dashboard”.
- In case the page was not created, you can simply create this page by navigating to “Pages” > “Add New”, then select a shortcode block and add the shortcode [wdm_group_users]
- Note: Only the administrator and/or Group Leader can view the above-mentioned page.
- The administrator can see all the Groups with all the users enrolled in those groups on the Groups Dashboard Page. This is because administrators are Group Leader of all Groups by default.
- The Group Leader will only be able to select, view and manage the Groups that he/she is group leader of.

How to Use the Groups Dashboard?
- The setup of the Groups Dashboard Page has been explained above. It is extremely simple, just add a new page under “Pages” on your WordPress backend and add a shortcode block with the shortcode [wdm_group_users]
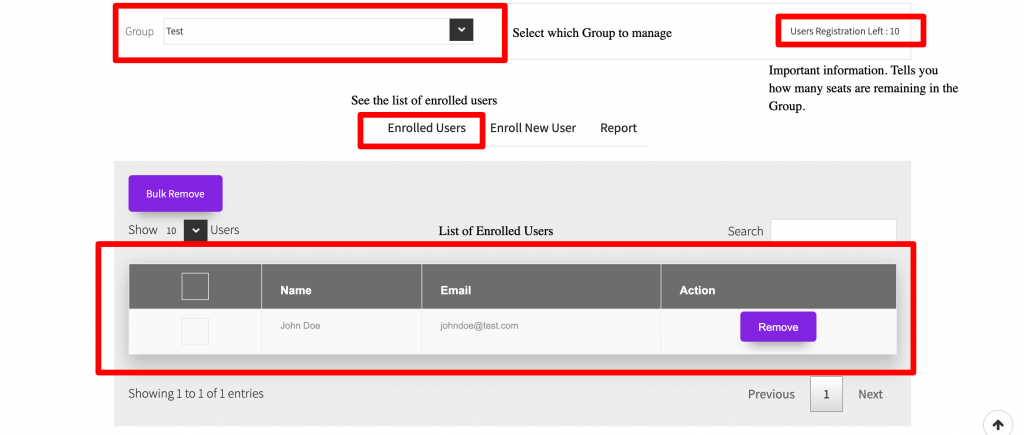
- Once the Group Leader views this page, there is a drop-down menu that will help the Group Leader select which group he/she wants to view/manage (incase the Group Leader is a leader of more than 1 Group)
- Once, the Group Leader selects the Group he/she wants to view, the User Registrations Left for that particular group is shown under the name “User Registrations Left:”
- Now, there are 3-4 tabs the Group Leader can see on the Groups Dashboard Page depending on other settings. (If Group Code is turned on 4 tabs are seen)
- The Enrolled Users Tab: This tab will essentially show the Group Leader all the Users enrolled in the particular Group and will also allow him/her to search for enrolled users and also remove or send invites to the enrolled users.
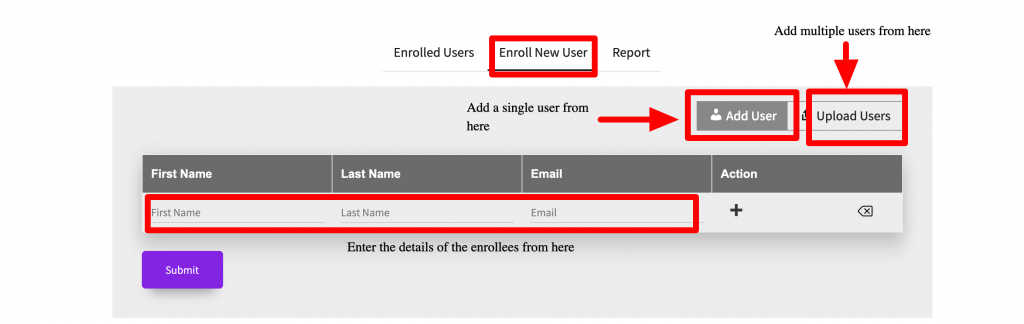
- The Enroll New User Tab: As the name suggests, the Enroll New User tab allows the Group Leader to enrol new users into the group selected wither individually or in a bulk-upload fashion using a CSV file. While enrolling it allows the Group Leader to enter the first name, last name and the email address of the enrollees. CSV upload is toggled from the “Upload Users” tab within the Enroll New User Tab.
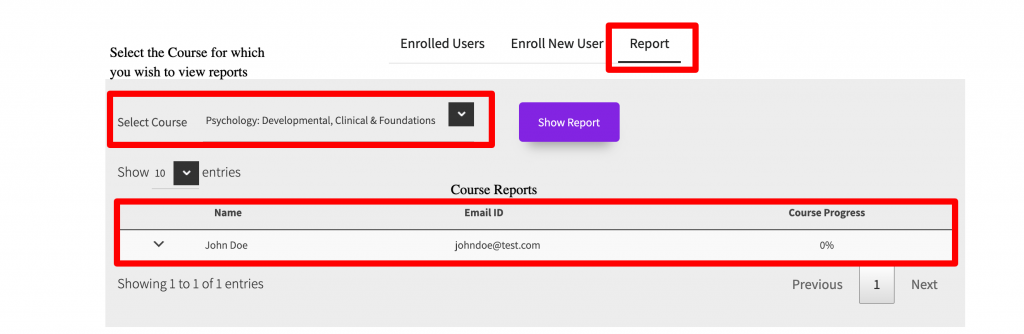
- The Report Tab: This tab allows you to view student reports. All the Group Leaders need to do is select the which Course they want to view the student reports for using the drop-down menu within the Report Tab. A list of students with their reports will appear.
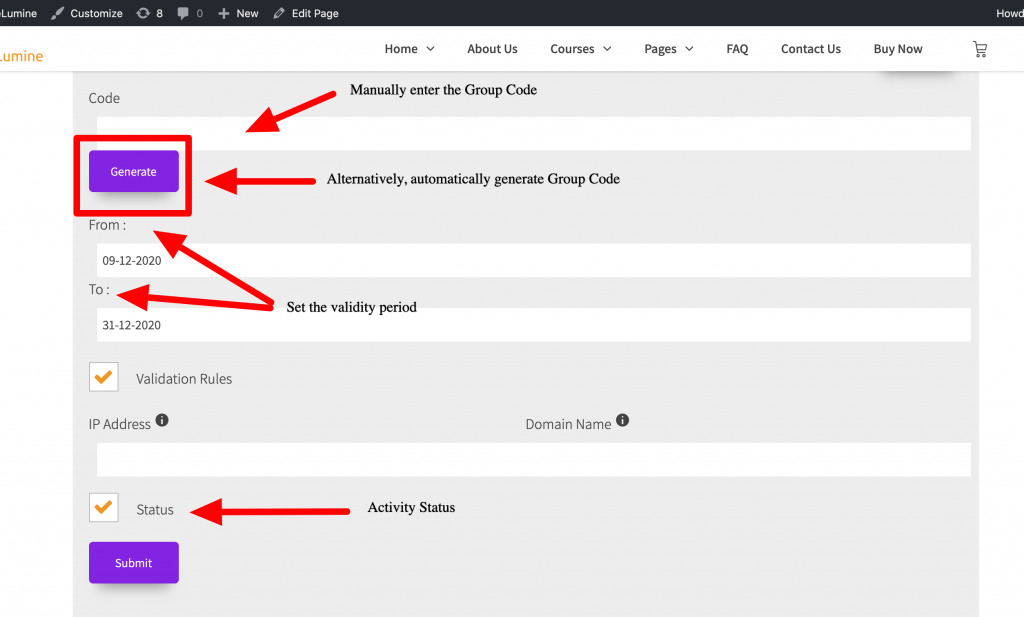
- The Group Code Tab (only appears if the Group Code Setting is activated under ‘LearnDash LMS’ > ‘Group Registration Setting’ > ‘Group Code’): This tab allows Group Leaders to create Group Codes for specific groups. The Group Code can be shared with users who can self-register using the Group Registration form.
Once the Group Leader clicks on the Create Group Code Button, a bunch of settings open.
The first one is the name of the Group Code, where you can manually enter it or “Generate” a new one.
The “From” & “To” is to define how long will the Group Code will be valid for.
The Validation Rules setting is to define which IP Address and Domain name you want to restrict the user registration to.
The Status Setting is just to activate/deactivate the Group Code at any time. - Note: If the “User Registrations Left:” is zero, the Group Leaders will not see the Enroll New User Tab. In this case the Group Leader can just purchase more seats of the same Product and the seats will automatically be added to their Group. Or, the admin can edit the Group and increase the Registrations from the “Group Registrations Left:” field.