Push for the upsell by offering a discount when a higher-quantity bundle is purchased. E.g. ‘Buy 3 for $30’ or ‘Buy 4 for $36’…
Create WooCommerce Pricing Tiers with Custom Product Boxes -Buy X for $Y
The WooCommerce Custom Product Boxes plugin can allow shoppers to create and purchase their own assortment of products or create a flexible product bundle. But did you know, it could also be used to create pricing tiers?
For example, you could create the following deals:
- Buy 3 for $20
- Buy any 4, for $50
- Buy any six for a discount
- Buy 1-4 for $10, 1-8 for $20, and so on
- Interested in knowing more? Here’s how it works!
How to Setup Buy X for Y Pricing Deal
Buy 3 for $20:
Step #1: To set up such a deal (for example, any 3 for $20) in WooCommerce, you need to create a Custom Product Box and set the box items to ‘X’ (e.g. 3)
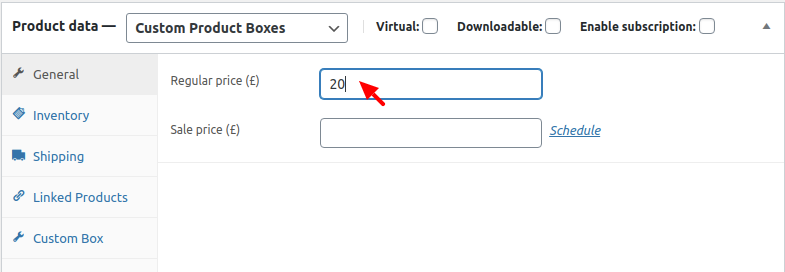
Step #2: Set the pricing type to Fixed Price and set the Regular Price to ‘Y’ (e.g. 20)


Step #3: Now, add the add-on products and publish the Custom Product Box.
Upon selecting this Custom Product Box, shoppers will be able to purchase X products for Y price.
Similarly, you can setup additional boxes, with different box quantities to create pricing tiers.
Upon selecting this Custom Product Box, shoppers will be able to purchase X products for Y price.
Similarly, you can setup additional boxes, with different box quantities to create pricing tiers.
How to Setup Pricing Deals for a Product Range
To setup pricing for a product range (for example, Buy 1-4 for $10 or Buy up to 4 for $10), here’s what you need to do
Buy 1-4 for $10 or Buy up to 4 for $10):
Step #1: Create a Custom Product box and set the quantity to the higher end of a range. For instance, in continuation to our above example to add a pricing deal for the range 1-4, set the box items to 4.
Step #2: Allow the shopper to add partially filled boxes to the cart by checking the ‘Allow Purchase for Partially-Filled Boxes’ option.
Step #3: Set the pricing type to Fixed Price and set the Regular Price to ‘Y’($10)
Step #4: Now, add the add-on products and publish the Custom Product Box.
You can create additional boxes for different product ranges.
